Introduction
Notice: We've released new version of AttorneyPress (v2.0.0). We recommand to take backup and delete all existing plugins before update theme.
Thank you for purchasing AttorneyPress.
In this guide, you'll find information about installing the theme, setting it up properly on your domain, customizing it as per your need, including setting up different pages for the site and everything from scratch. No prior knowledge of design and coding is required.
You can follow different topics listed here and follow this step-by-step guide to set up your site with AttorneyPress. We keep updating tutorial and knowledge base with vital tips and help articles, so recommend you to check online version of this tutorial .
Things worth mentioning: Kindly note, that we cannot provide the support until you specify your envato username which you used to purchase the theme and Item Purchase Code.
We also offer One time theme setup and site installation service for a nominal price of $50. Most theme installation and setup is done within 1 working day.
Theme Installation & Setup
1. Install WordPress
Download and go for Installing latest versions. Otherwise, you may use Softaculous or Quick Install WordPress if your hosting cPanel supports this.
2. Upload Theme
If you have already downloaded the entire theme package, unzip it. There, you will notice the Theme Installation file (called like "attorneypress.zip") along with user manual, dummy content folder, license folder, folder with PSD files, etc.
Alternatively, you can go ahead downloading the installable WordPress file.
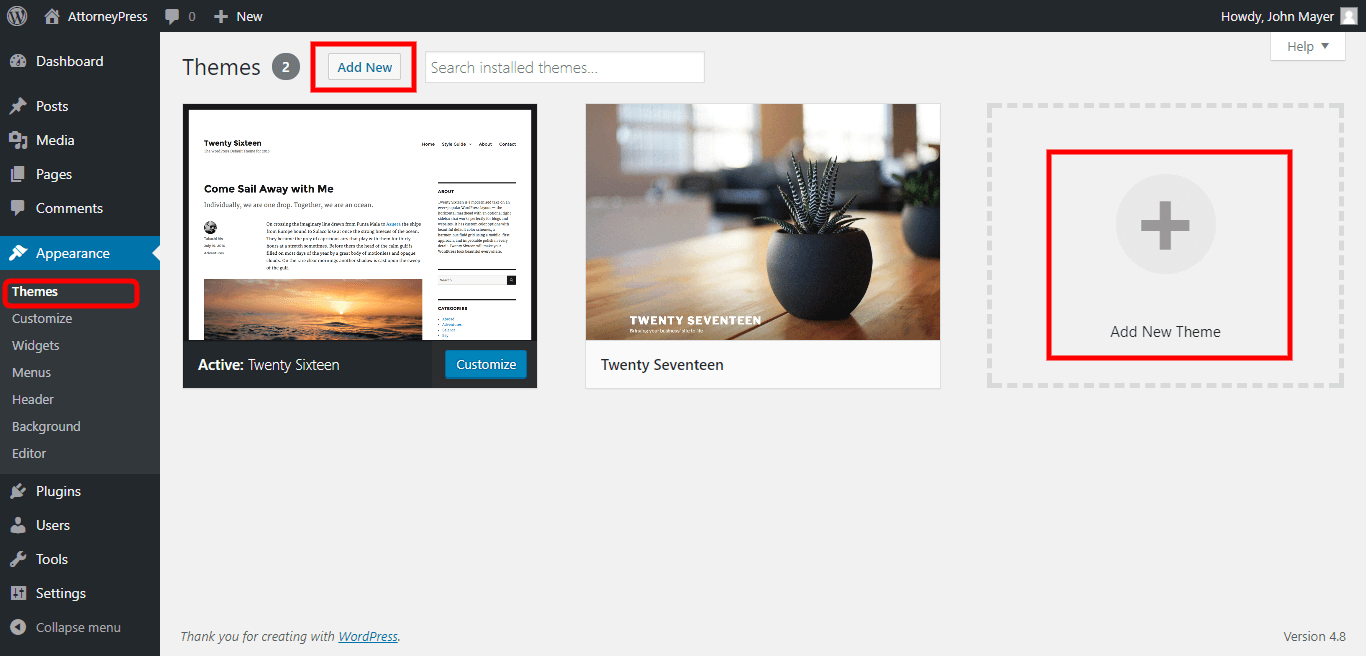
For installing the theme in your WordPress Admin Panel (wp-admin), go to “Appearance > Themes > Add New > Upload Theme > Browse” and select the theme installation file.
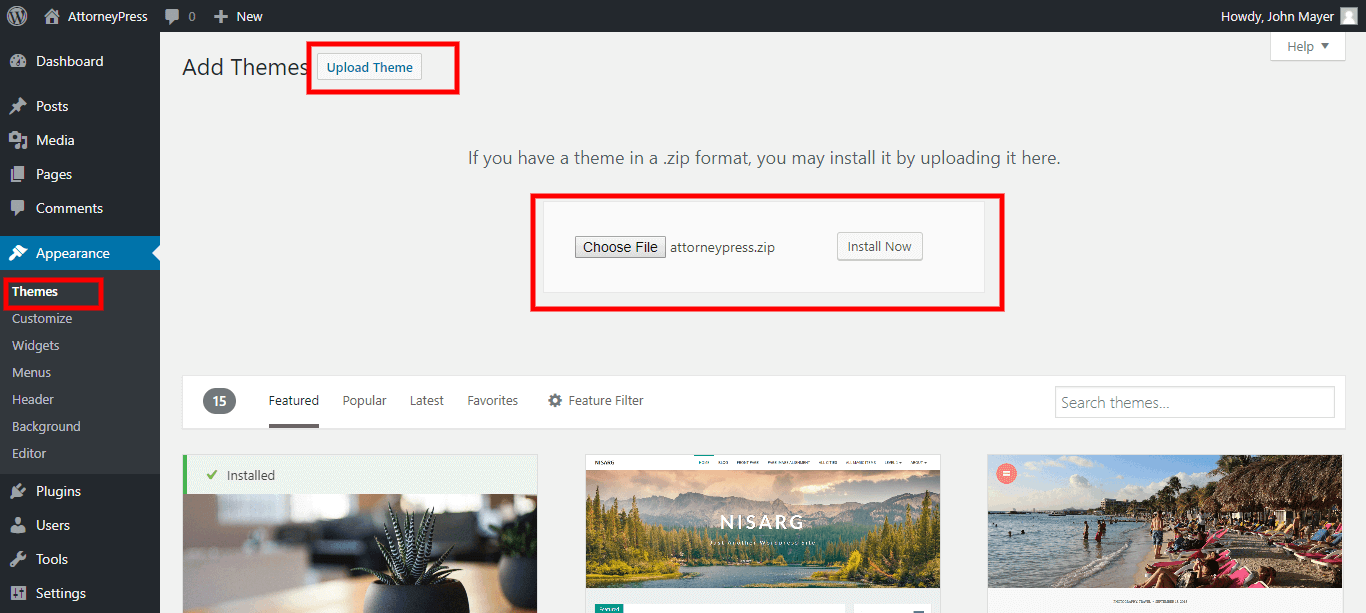
Please keep in mind that quite a few hostings have restrictions on the size of a file that you want to upload. If any warning sign comes up, probably, your hosting has a file size limit and the theme “.zip” file would be too large to upload via WordPress Panel. You can contact your hosting service provider and ask to enhance the restrictions (e.g 32MB will do).
Or else, you can install theme via FTP. Simply, go for unzipping the installable file and upload the theme folder via FTP on to “your_site/wp-content/themes/”.
Attention! Theme will function perfectly on the vast majority of flawlessly installed and configured WordPress sites without any additional settings. However, on few hosting configurations, you can see that images on your site are not uploading/displaying “Theme Returns Notifications” about setting certain CHMOD rules on “uploads” folder. If you are experiencing this issue, please follow these steps to fix it:
- Make sure that the theme installed is strictly to your_site/wp-content/themes/ folder.
- The folder “your_site/wp-content/uploads” must be created. On some hostings you’ll need to set its CHMOD to 755, on others – to 777.
If the above mentioned steps did not yield any results, please don’t hesitate to address this issue directly to your web hosting company. Since this is a server-related problem, we will not be able to help you!
3. Activate Theme
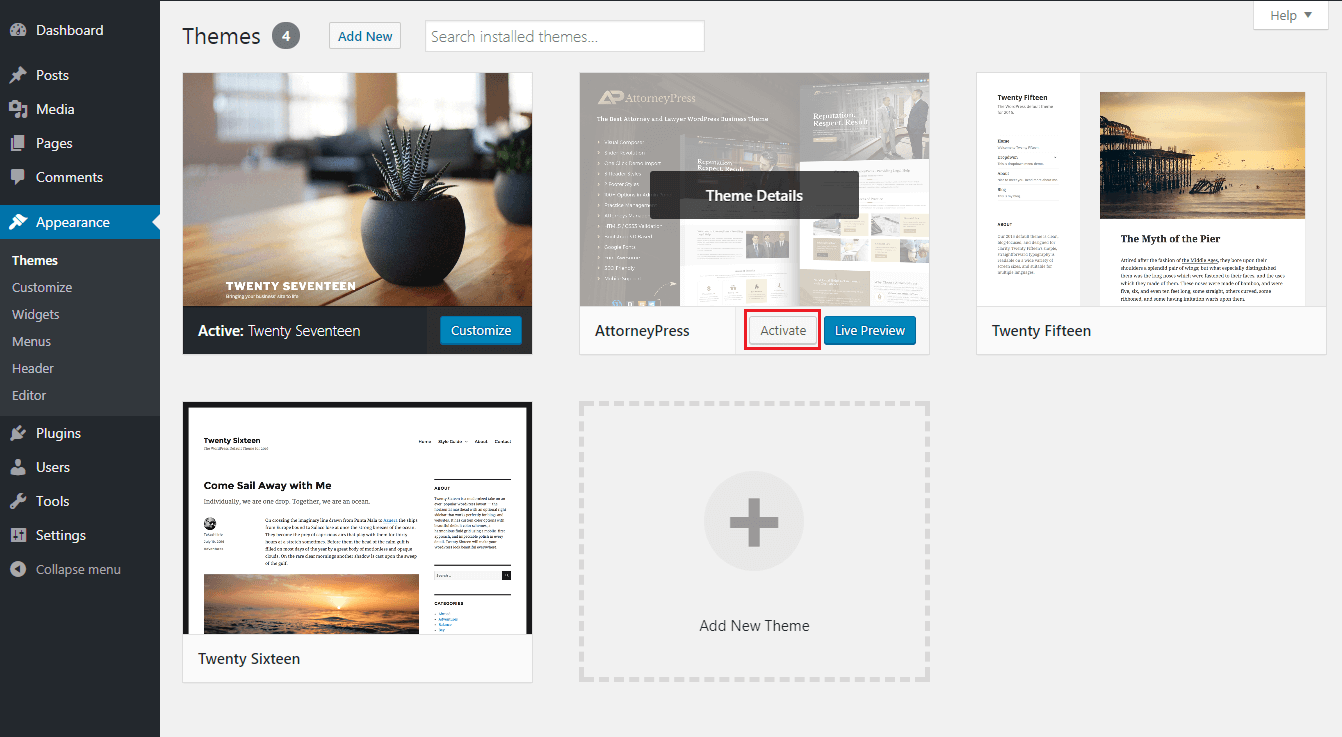
Navigate to “Appearance > Themes “ activate the Theme by clicking the correspondent “Activate” link.
Attention! To confirm that your permalinks are being rendered correctly (the web-site does not return “404 Not Found” error) after activating the theme, follow “Dashboard > Settings > Permalinks” and click “Save Changes”.
After getting your Theme activated, you will see Theme options and Custom Post Types (Attorneys, Video Testimonials, Practice Areas and Testmonials) in your WordPress admin panel.

4. Install Plugins
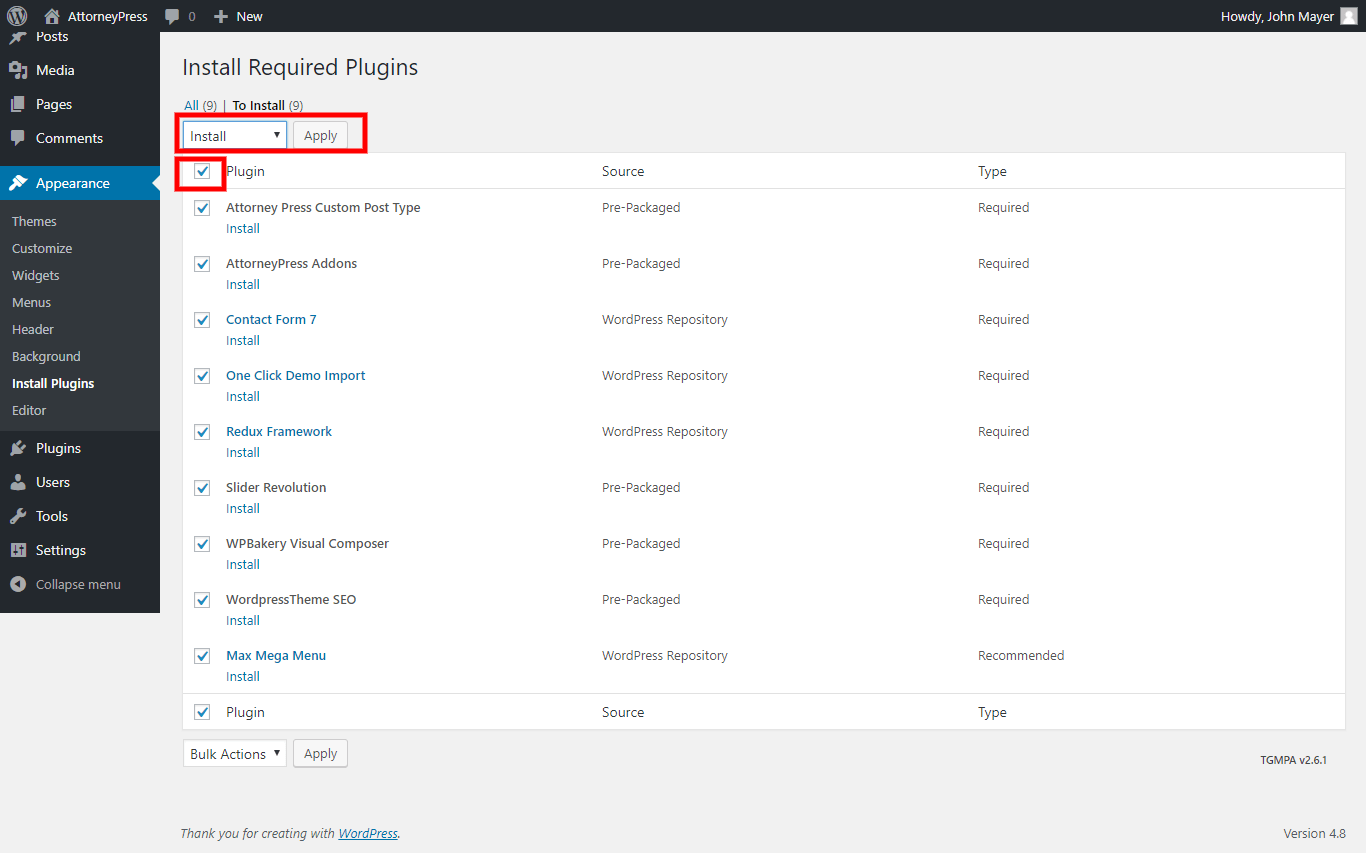
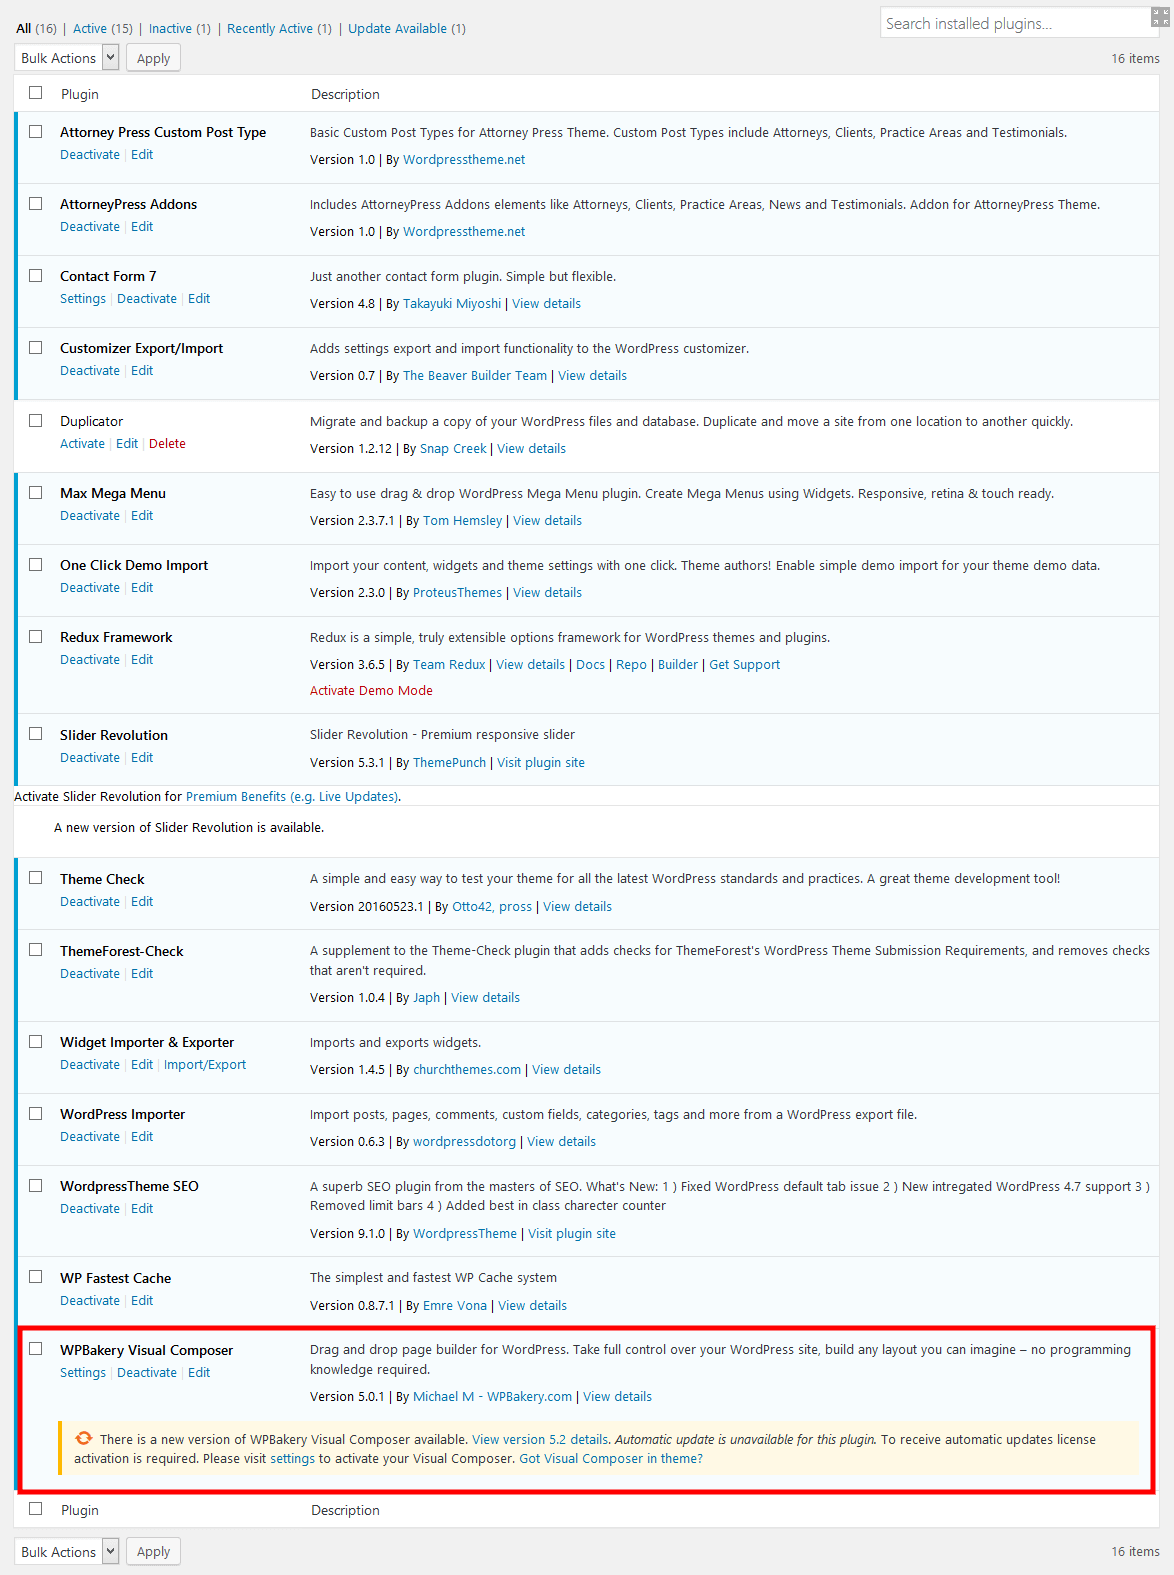
After activating the theme, you will see “recommended plugins” and “required plugins" notifications:
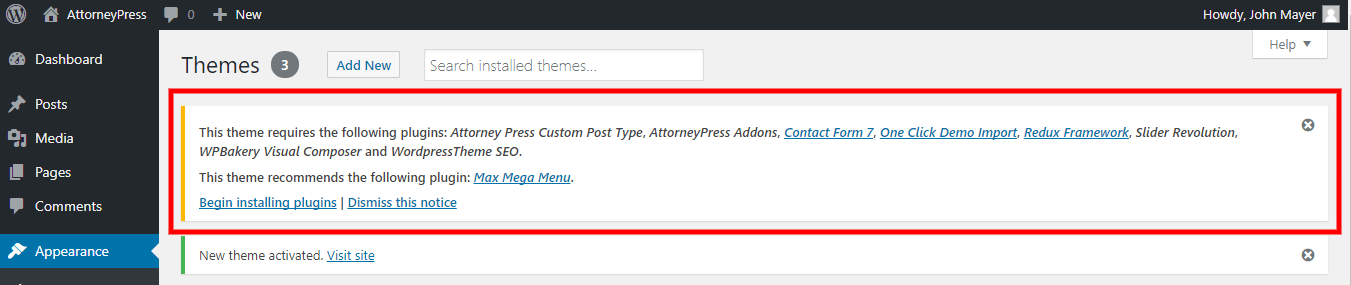
Click on the “Begin installing plugins” link for proceeding to installation. You can also ignore/dismiss the notice and install plugins later via “WP-admin > Appearance > Install Plugins” Interface.
Tick the plugin checkbox. Choose option "Install" from the drop down menu and click on "apply". It will start the process of installing the "required" and "recommended" plugins.
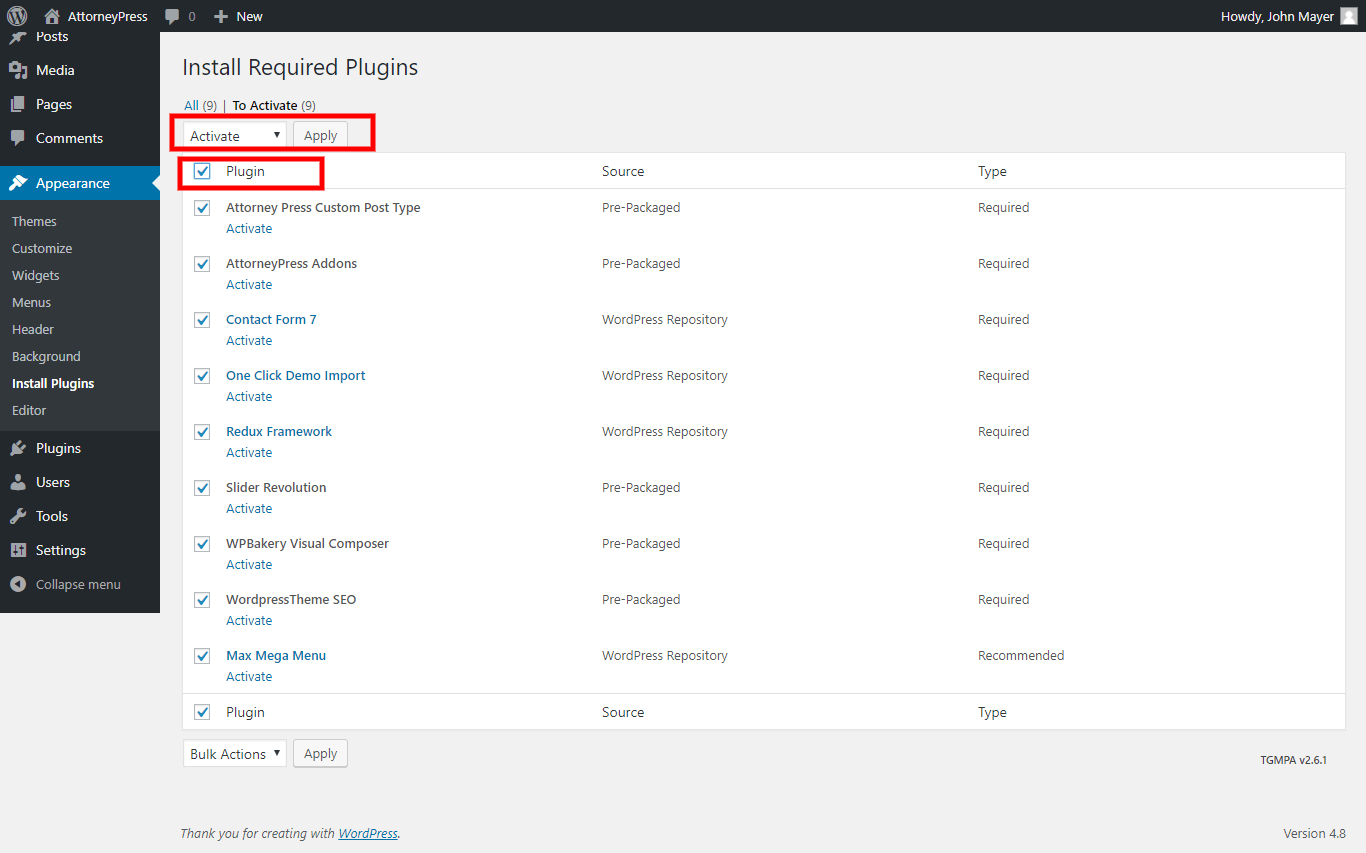
Tick the plugin checkbox. Choose the option "Activate" from the drop down menu and click on "apply". This process would activate all plugins required to run the theme.
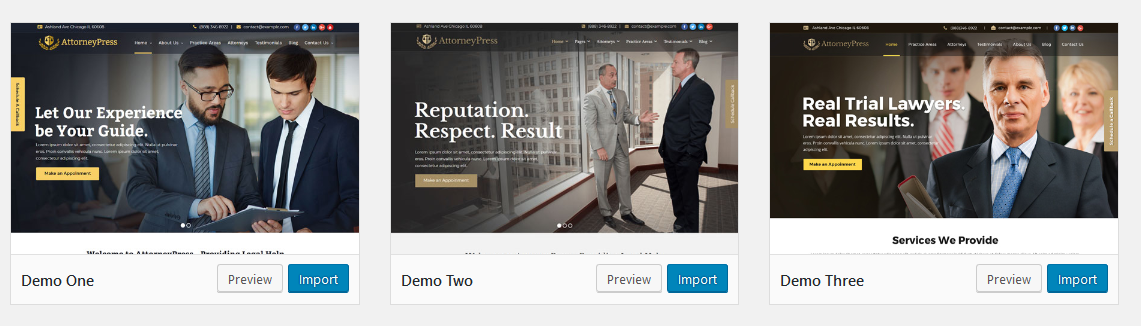
5. Import Dummy Content
For your convenience, our themes come with dummy data files. You will get Demo Content from Admin Panel > Appearance > Import Demo Data. We have created different demos for greater usability. Choose what you want to import and click on the "Import " button to get that specific demo content.
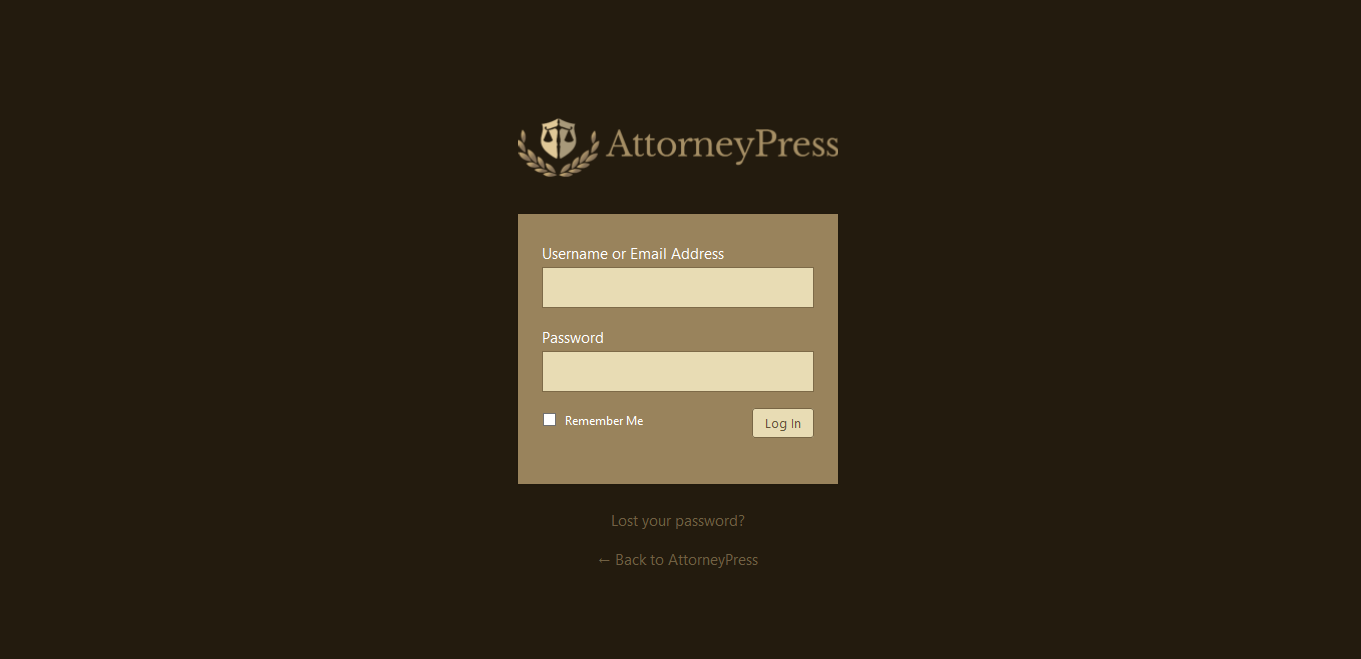
After getting theme activated wordpress login screen would be changed in this manner:
General Guidelines
We wish to thank you for purchasing AttorneyPress! We're incredibly pleased and overwhelmed that you have chosen AttorneyPress for your website. I’m sure you won’t be disappointed! We outline all types of necessary information, and provide you with all the essential details you require for using AttorneyPress. AttorneyPress can only be used with WordPress and we presume that you already have WordPress installed and ready to go.
WordPress Information
To set up this theme you must have a functional version of WordPress already installed. If perhaps you need help setting up WordPress, follow the instructions in WordPress Codex. Listed below are all the useful links for WordPress information.
- WordPress Codex – General information about WordPress and how to install on your server.
- First Steps With WordPress – General information about multiple topics about WordPress.
- FAQ New To WordPress – The most popular FAQ's regarding WordPress.
Requirements For AttorneyPress
To work with AttorneyPress, please ensure you are running WordPress 4.6 or more, PHP 5.6 or more, and MySQL 5.6 or higher (for legacy environments also PHP versions 5.3.x will work but it's recommended to be on at least PHP 5.6 and preferably PHP 7.0. WordPress advises PHP 7). We have tested it with Mac, Windows and Linux.
Recommended PHP Configuration Limits
Various issues that you may run into such as: white screen, your demo import fails, empty page content and other similar issues are all related to low PHP configuration limits. The solution is to increase the PHP limits of hosting account. You can do this on your own, or contact your web host and ask them to increase those limits to a minimum as follows:
- max_execution_time 180
- memory_limit 128M
- post_max_size 32M
- upload_max_filesize 32M
We recommend using Hostgator for any hosting need. Order plain cPanel based hosting. Don't order just Wordpress Hosting from any host. Wordpress hosting has lots of limitation and you might not be able to accomplish everything.
Way to work with Visual Composer
Please click here to watch all videos for better understanding of WP Bakery Visual Composer.
You may notice an error message on your WordPress dashboard regarding activation of Visual Composer. Please do not worry, we have included fully licensed in-stock version of
Visual Composer. You don't need to purchase separate license to use it. You will keep getting updated verison of the plugin when we release new version of our theme.
Important Wordpress Options
Settings Permalinks Screen
Permalinks are the permanent URLs to your individual pages and blog posts, as well as to your category and tag archives. A permalink is the web address used to link to your content. The URL to each post should be permanent, and never change — hence the name permalink. The Settings Permalinks Screen allows you to choose your default permalink structure. You can choose from common settings or create custom URL structures. You must click the Save Changes button at the bottom of the screen for new settings to take effect.
By default, WordPress uses web URLs which have day and name in them; however, WordPress offers you the ability to create a custom URL structure for your permalinks and archives. This can improve the aesthetics, usability, and forward-compatibility of your links.
For a much more in-depth description of the way this structure is specified, see the Using Permalinks article. For an introduction to Permalinks, read the Pretty Permalinks section of Introduction to Blogging.
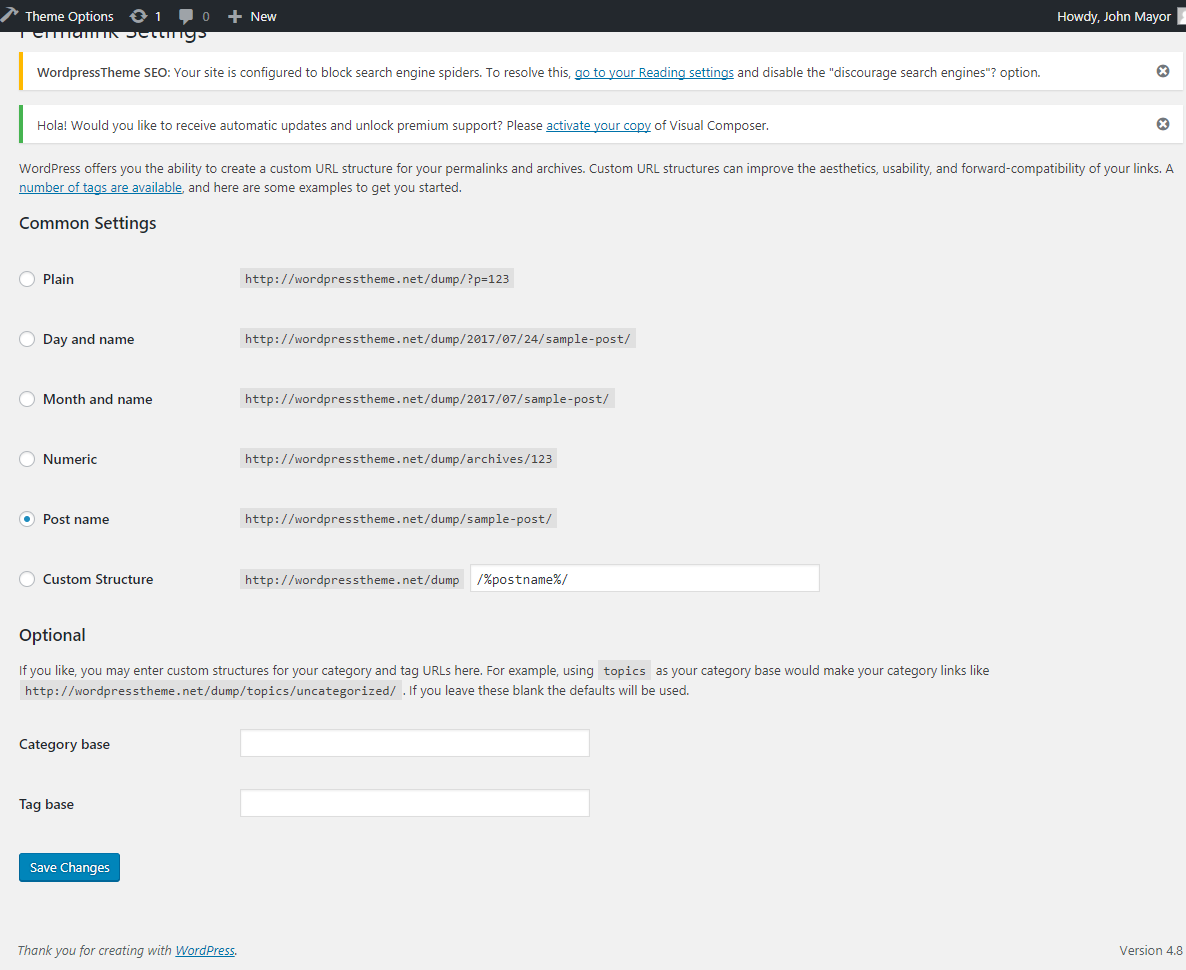
Customize Permalink Structure
Common settings
Check one of the radio buttons corresponding to the correct Permalink Structure for your blog.
- Default - An example of the default structure is
http://www.sample.com/?p=123 - Day and name - An example of the day and name based structure is
http://www.sample.com/2008/03/31/sample-post/ - Month and name - An example of the month and name based structure is
http://www.sample.com/2008/03/sample-post/ - Numeric - An example of the numeric structure is
http://www.sample.com/archives/123 - Post name - An example of the post name structure is
http://www.sample.com/sample-post - Custom structure - In the box specify the custom structure you desire to use. One example is
/archives/%year%/%monthnum%/%day%/%postname%/.
Look at the Using Permalinks article for further discussion of Permalink Structure Tags.
Optional
You may enter custom bases for your category and tag URLs here. For example, using /topics/ as your category base would make your category links like http://example.org/topics/uncategorized/. If you leave these blank then default values would be used. Again, see the Using Permalinks article for further discussion of Permalink Structure Tags.
- Category base - Enter a custom prefix for your category URLs here.
- Tag base - Enter a custom prefix for your tag URLs here.
Save Changes
Click the Save Changes button to ensure any changes you have made to your Settings are saved to your database. Once you click the button, a confirmation text box will appear at the top of the page, telling you your settings have been saved. After you've clicked this button, you should receive one of two messages depending on whether your .htaccess file is writeable. For information on how to make .htaccess writeable, see Changing File Permissions.
- If .htaccess is writeable, you will get a message that says "Permalink structure updated." You're all set; WordPress has been able to do everything for you automatically.
- If .htaccess is not writeable, you will see a message at the top of the screen that says "You should update your .htaccess now.". Near the bottom of the screen you will see "If your .htaccess file were writable, you could do this automatically, but it isn't so these are the mod_rewrite rules you should have in your .htaccess file. Click in the field and press CTRL + a to select all." This means you'll have to do one extra step yourself. In the text box at the bottom of the Screen, WordPress displays several lines of rewrite rules associated with the Permalink Structure you designated above. You need to manually copy everything in this text box into your .htaccess file to make your new Permalinks work.
Note: Visiting the Permalinks screen triggers a flush of rewrite rules. There is no need to save, just flush the rewrite rules.
Note: If you're writing your .htaccess file on your own local computer, remember, some operating systems do not allow the creation of a file named ".htaccess" because of the initial dot ("."). You can always name the file without the initial dot or with a standard extension (e.g. "htaccess.txt"). Once the file is uploaded to your weblog’s directory, rename it with your FTP software. Most FTP Clients should provide you a way to rename files this.
Also Note: Files that begin with a dot (".") like ".htaccess" are hidden on most servers by default. Consult the user guide or FAQ of the FTP software to find out how to display these hidden files, and also how to use the software to change file permissions, rename files, etc. For more information on all of this, see Changing File Permissions.
Import Demo Data
Demo Content
AttorneyPress includes a simple One click dummy data import tool. It allows getting a copy of our demo website in just 1 click.
Before installing demo data, please make sure you have installed all the required plugins, check the Plugins installation section for more information.
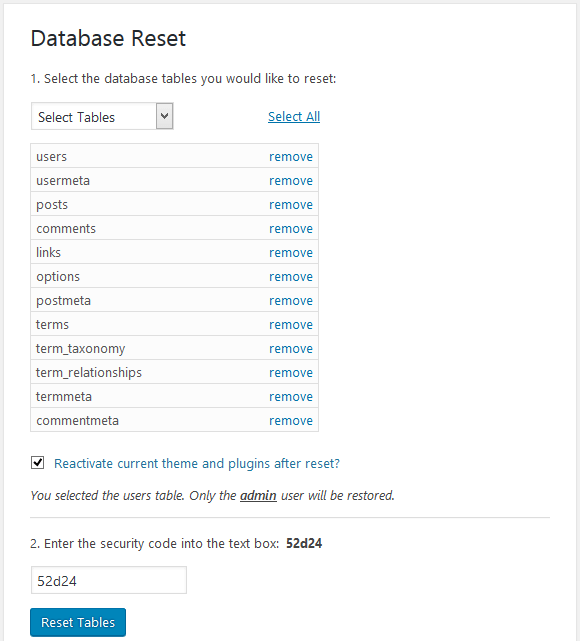
For best results, it's advised to import the content in a fresh WordPress installation. If you already have content present in your site, please use WordPress Database Reset Plugin to reset the database back to its default settings without having to go through the WordPress 5 minute installation.
To reset the database,
- Please navigate to "Tools > Database Reset"
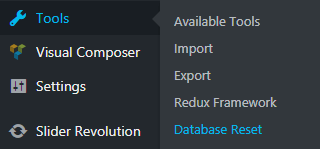
2. Then click on "Select All" link, enter the security code as given and click on "Reset Tables" button.
Now to import demo content into a WordPress site, please follow these steps:
1. Navigate to Appearance > Import Demo Data:
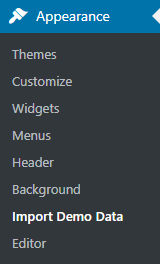
2. Click on "Import Demo Data" button and wait for couple of minutes.

After successful import, you will receive a notice that says that everything has been imported correctly.

(N.B. If you facing any problem while showing ‘Professions’ on ‘Attorneys’ page then you need to update all the attorneys.)
Theme Options
Please read below points to know how you can control entire theme from AttorneyPress Theme Options.
Theme General Options
Within admin, you will get 'Theme Options' menu. From here you can change almost everything in this theme:
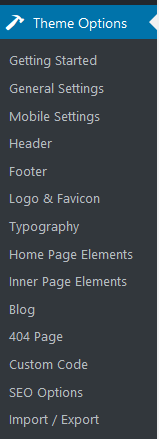
In theme Options, there are 3 buttons namely 'Save Changes','Reset Section' and 'Reset All'. After making all the changes in Theme Options, you can save everything by click on 'Save Changes' button. In theme options, all options are there as tab i.e 'General Settings', 'Mobile settings' etc. you can click on 'General Settings' (or any tab) and make changes therein. Now if want to get back all default data of specific section i.e. 'General Settings' (or any other section) then you should click on 'Reset Section'. Now, if you want to get back to default data/setting for all the Theme Options, then you need to click on 'Reset All'.
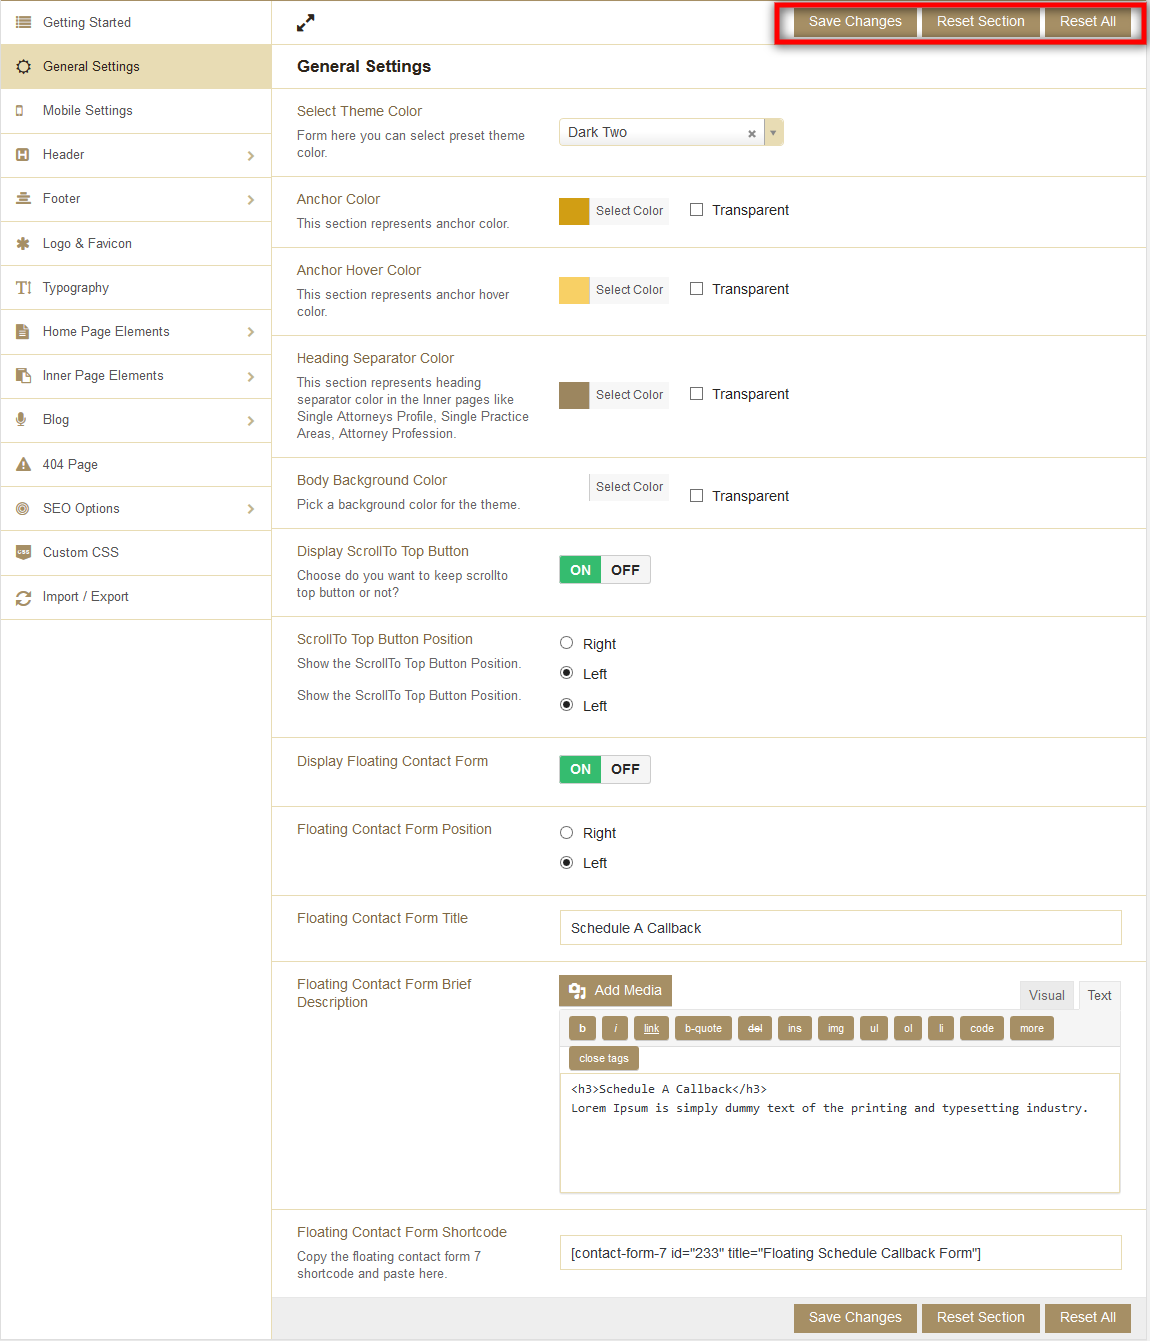
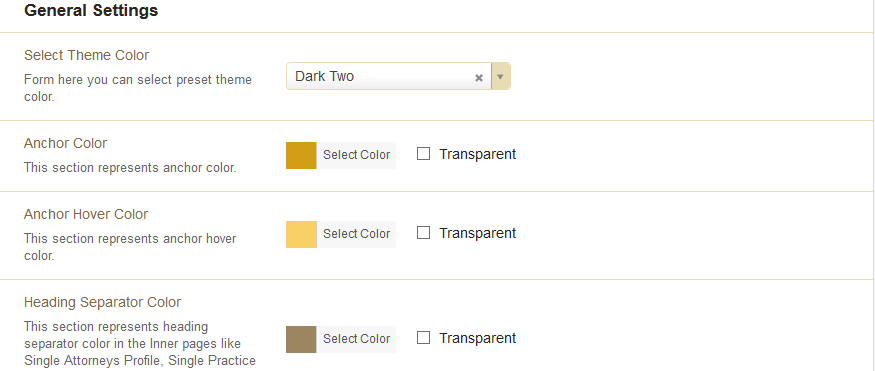
By clicking on 'General Settings', you will get various general settings that are here. Here you can:
- Select Theme Color: From here you can change color for the theme.
- Set Anchor Color: From here you can change colors for all <a> (links) tags.
- Set Anchor Hover Color: From here you can change colors for all anchor (links) hover.
- Heading Separator Color: This field represents heading separator color in the Inner pages like Single Attorneys Profile, Single Practice Areas, Attorney Profession..
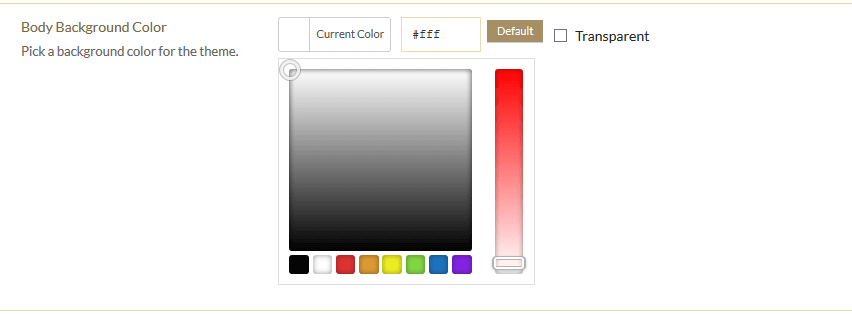
Set Body Background Color. This will change default background color of your website.
Choose to display or not to display ScrollTo Top Button.

ScrollTo Top Button will be displayed on website like this
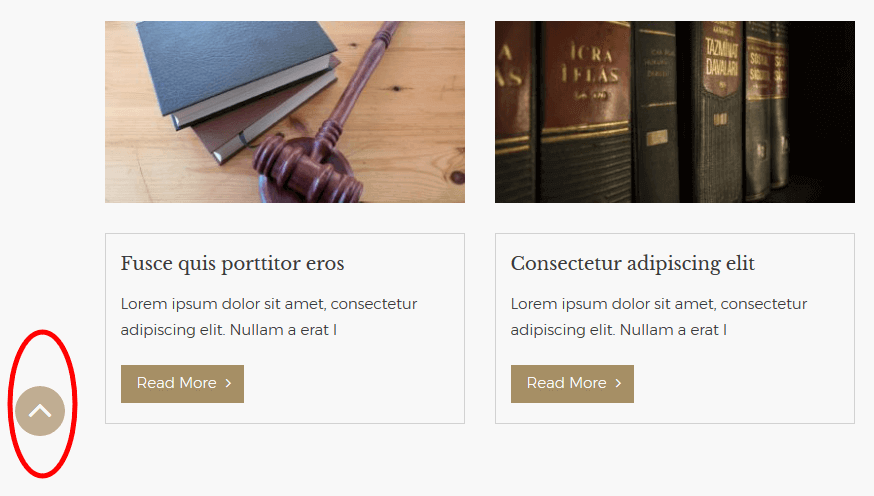
After turning on, you can select on which position (Left or Right) you want to make that visible through this option.

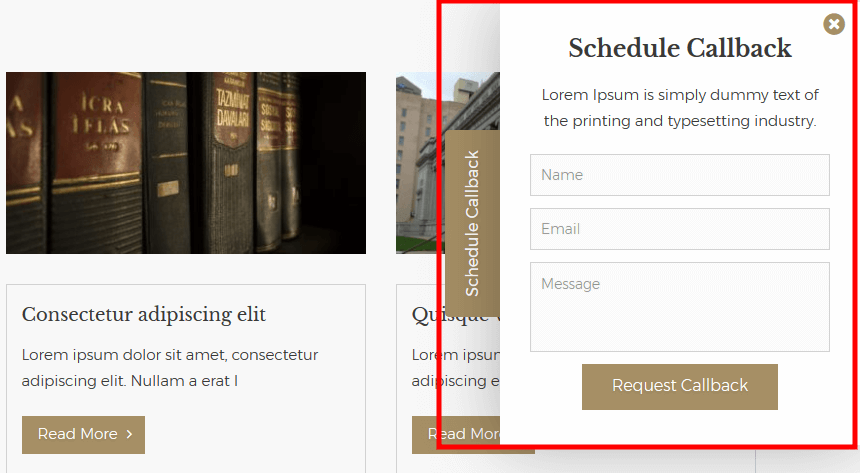
Choose if you want to display Floating Contact Form.

After turning on the Floating Contact Form, you can select the position (Left or Right) of the form.

To put title and content on form, follow this:
A) Put title on "Floating Contact Form Title" and it will be visible on the floating bar of the form.

B) You can put some content on "Floating Contact Form Description" box to show text on form body
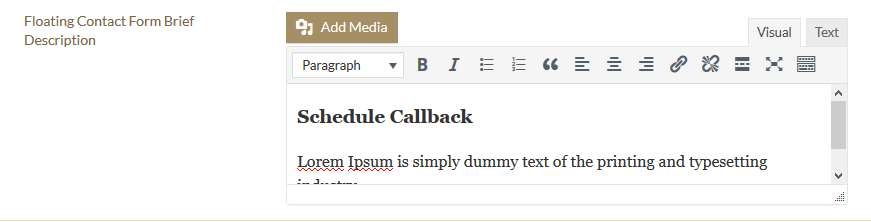
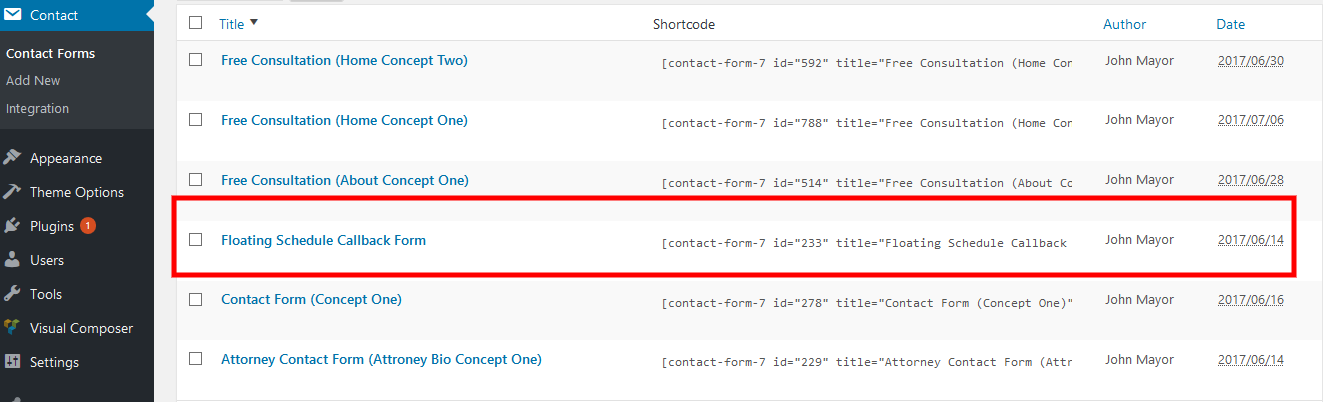
C) On "Floating Contact Form Shortcode" area, you have to put the form shortcode to get the form

You will get the contact form by clicking on 'Contact' menu on admin.
If you are using Gravity Form, then you can use shortcode of gravity form.
Floating Contact Form will be displayed like this
Setting Up Header
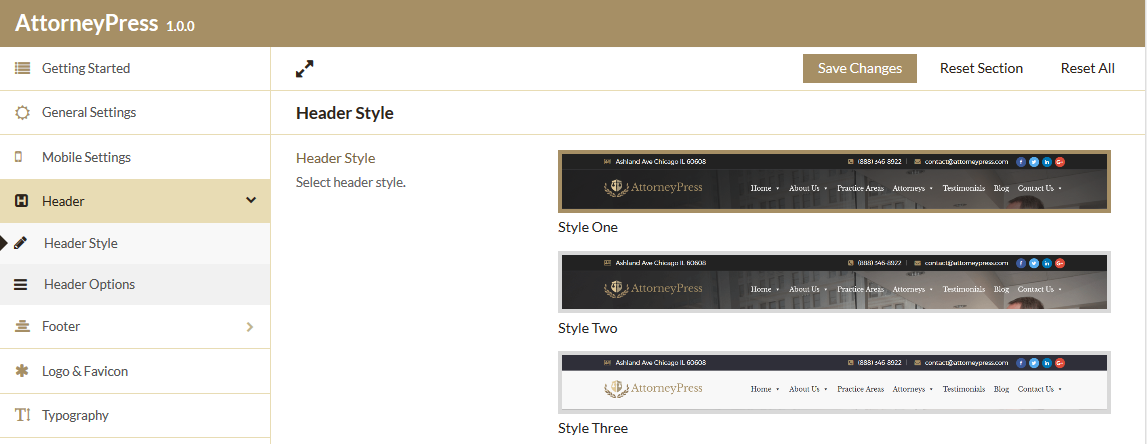
From 'Header' options you can select header layout and edit all the details of header.
You will get 'Header style' Under 'Header' option from where you can select header layouts. There you can find 3 header layouts. Choose one header option and click save changes.
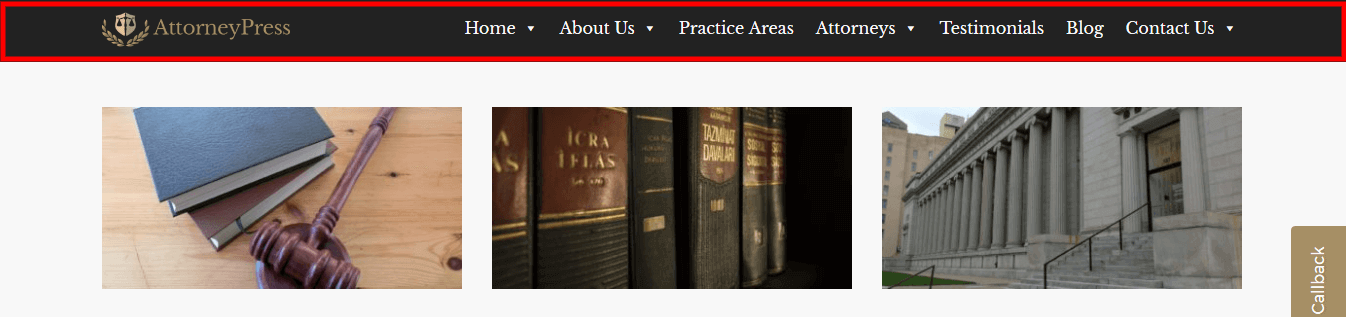
Header layout can be changed on website as per your selection:

From 'Header Option' you can change all the contact details and social links.
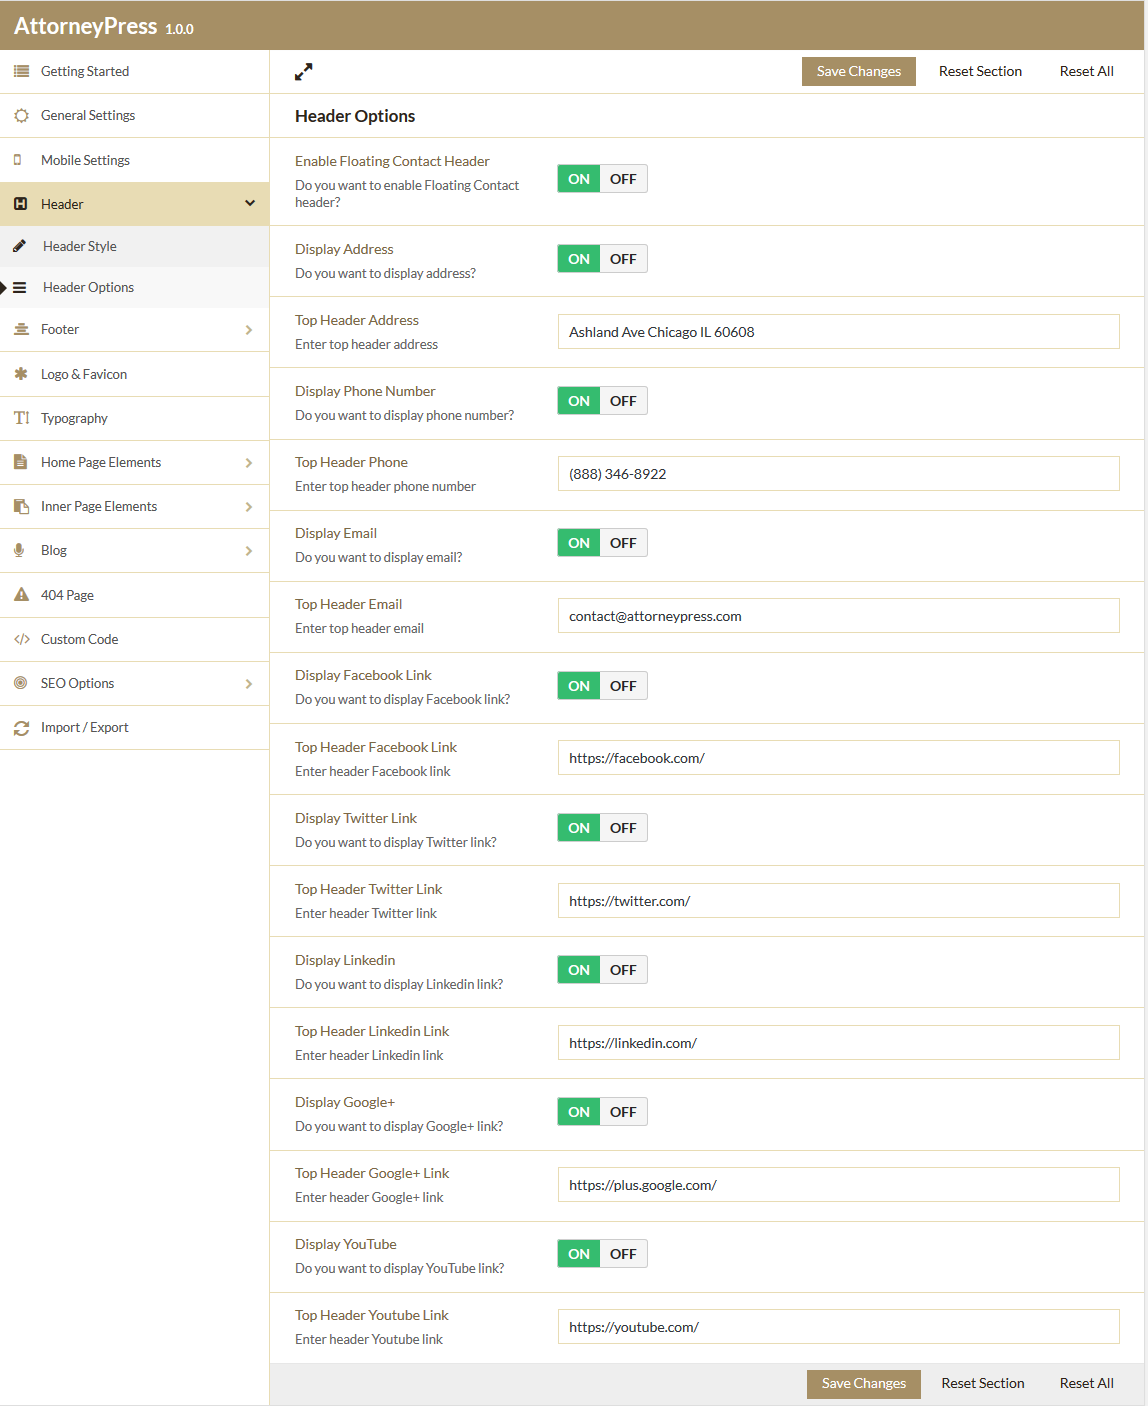
From 'Header Option' you can:
1. Turn On or Off sticky header of your website from 'Enable Sticky Header'. Sticky header will be displayed like this:
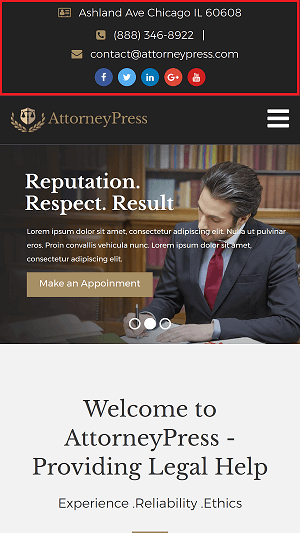
2. Turn On or Off Address at header of website from 'Display Address'. If you turn on 'Display Address', then you can provide your address in 'Top Header Address' field. Address will be displayed like this:

3. Turn On or Off Phone Number at header of website from 'Display Phone Number'. If you turn on 'Display Phone Number', then you can provide your Phone Number in 'Top Header Phone' field. Phone Number will be displayed like this:

4. Turn On or Off Email at header of website from 'Display Email'. If you turn on 'Display Email', then you can provide your Email in 'Top Header Email' field. Email will be displayed like this:

5. Similarly, you will able to turn on or off social links and can put links (Facebook,Twitter, Linkedin,Google+,YouTube). Social links will be displayed like this:

Logo & Favicon
From this section you can upload images for Site Logo and favicon. A favicon is an icon, typically displayed in the address bar of a browser accessing the site or next to the site name in a list of saved bookmarks ((Changes from customization preference first).
![]()
Font Style
From 'Typography' option, you can change font, font style, font size, line height and font color of the entire website.
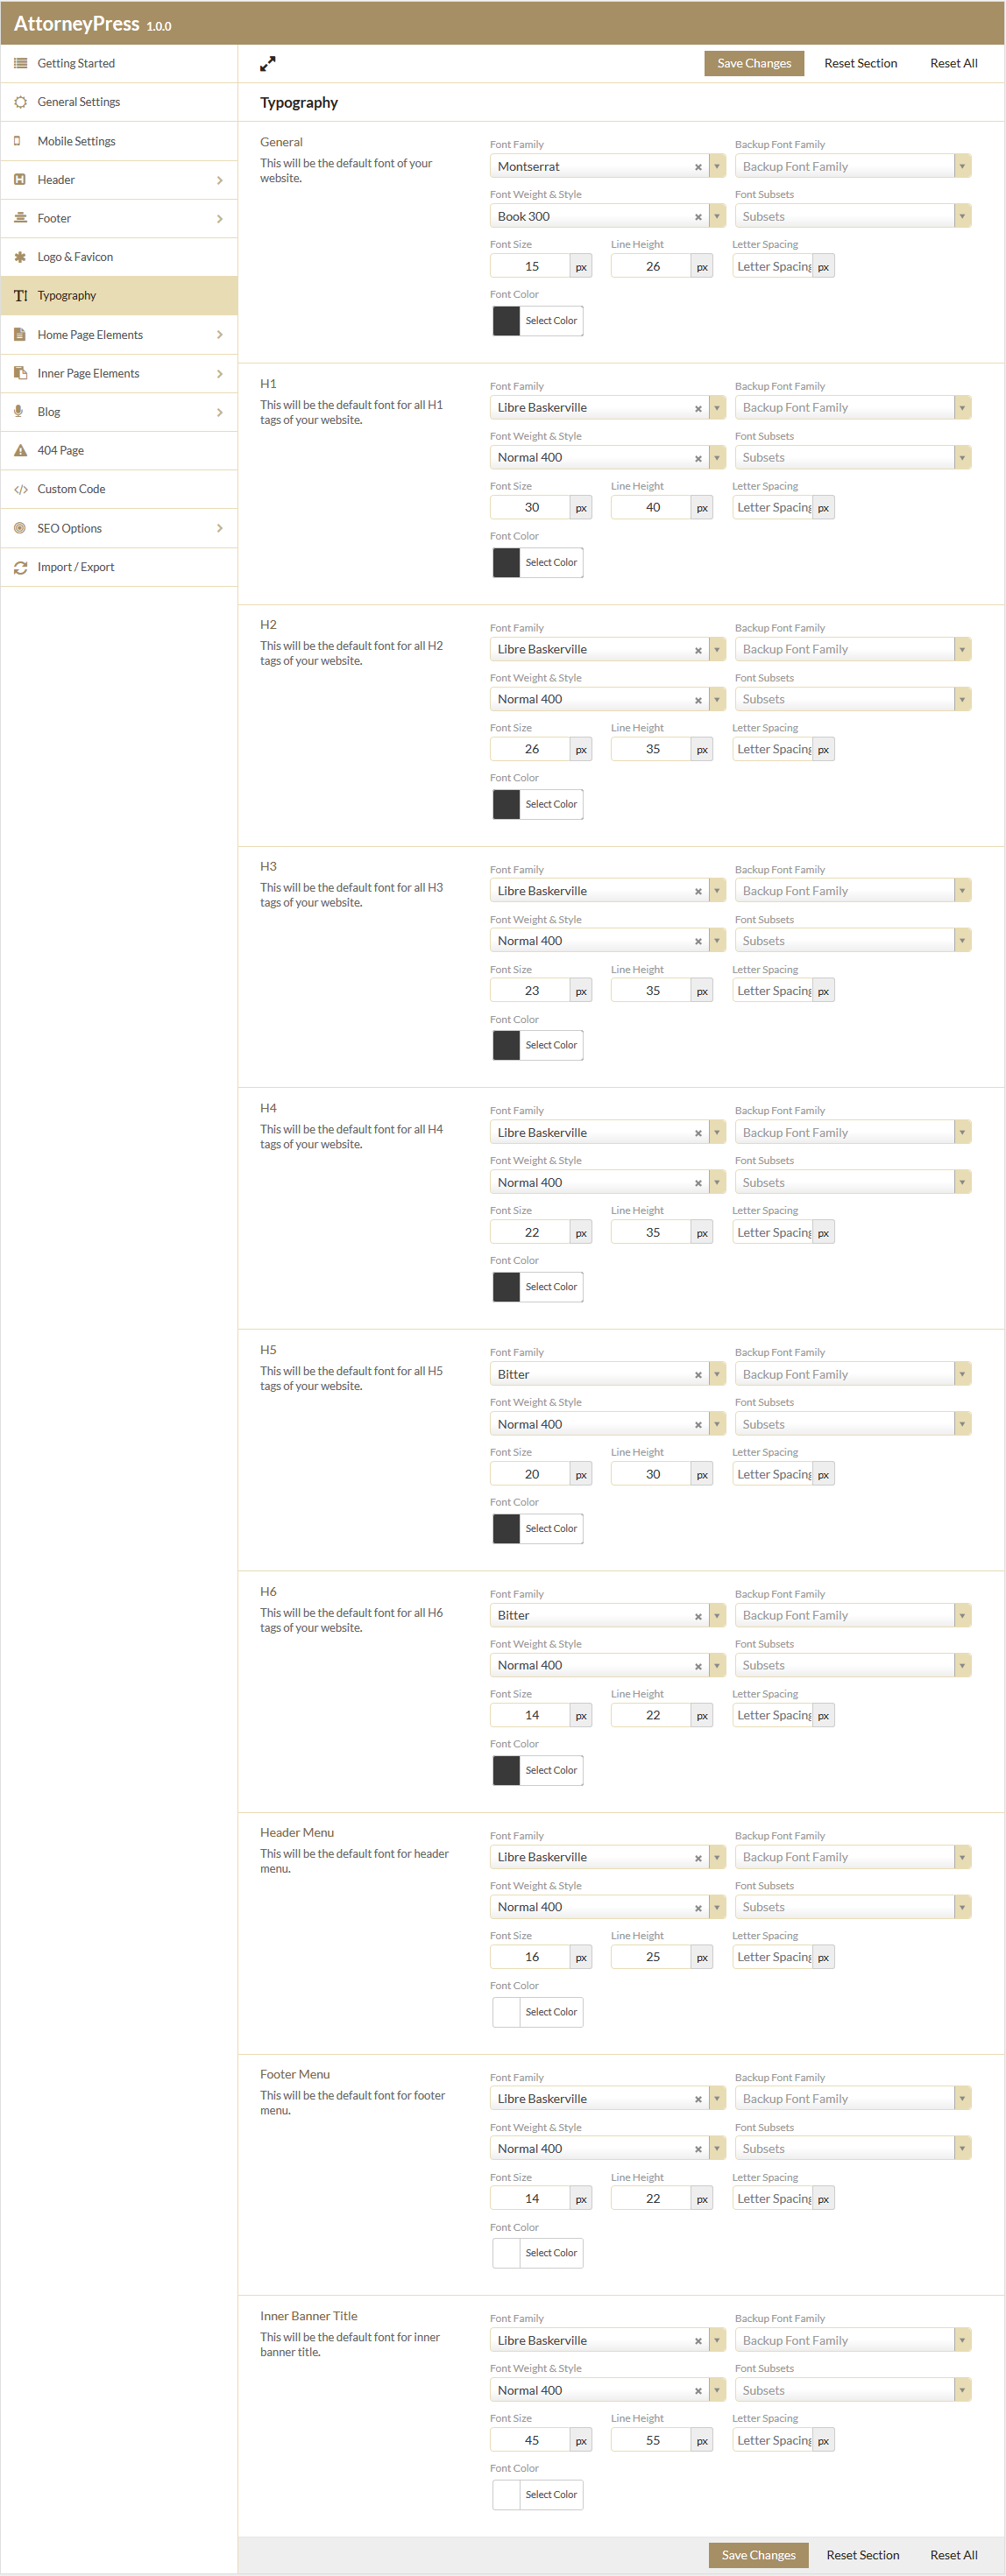
Here you can:
1. Change 'General Typography' option. By changing details from here, default body text will be changed.

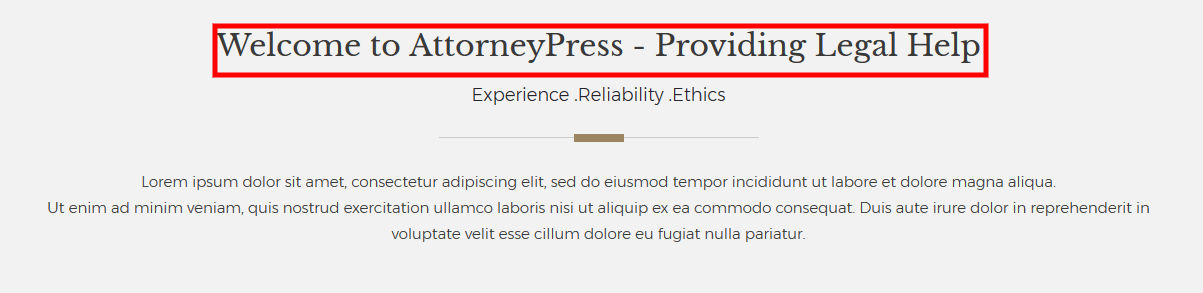
2. Change H1, H2, H3, H4, H5, H6 styles. By changing details from there, heading tags will be changed throughout the site. For example, if you change style of H1, then H1 attributes will be changed throughout the site. Below screenshot displays a sample H1 tag and its appearance.
3. Change 'Header Menu' style. By changing details from here, the style of header menu will be changed. After changing this, menu style will also be changed:

4. Change 'Footer Menu' style. By changing details from here, style of footer menu will be changed (Footer menu will be appeared only if you select 'Style one' on 'Footer Style' of 'Footer' option--See 'Footer Options' tutorial).

5. Change 'Inner Banner Title' style. By changing details from here, style of banner title on all inner pages (Inner pages means all pages in your website except home page) will be changed. So, after changing this, menu style will be changed:

Home Page Elements
You will get 'Home Page Element' from Theme Options > Home Page Elements. From this option, you can manage few of your main elements i.e Attorneys, Practice Areas and Testimonial on Home Page.
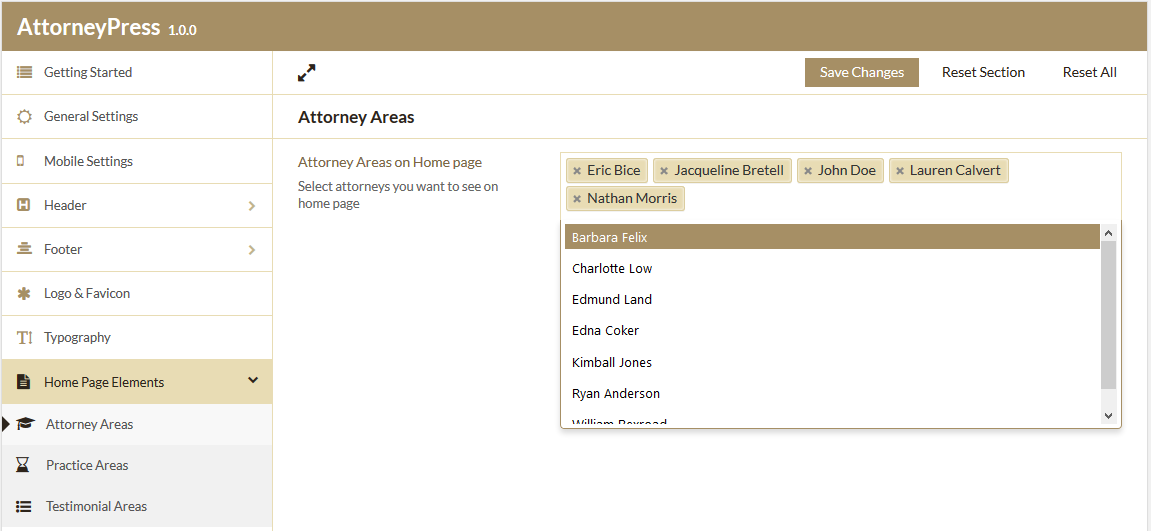
Attorney Areas
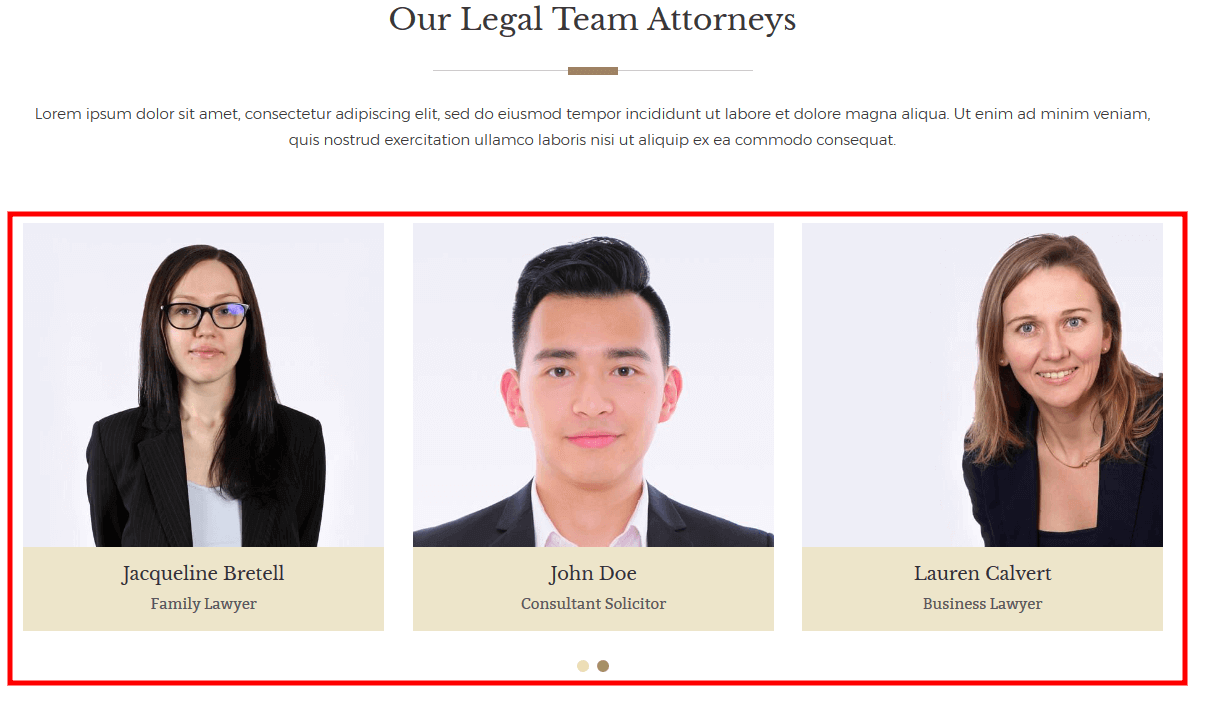
You will get 'Attorney Areas' under 'Home Page Elements' option. From here, you can select specific attorneys whom you want to show as featured on homepage. You will get all attorneys list by clicking on the box of 'Attorney Areas on Home page' and from there you can add specific attorneys. You can also remove specific attorneys by clicking on cross icon within the selection box.
Within a boxed area, Attorneys will be shown like below screenshot:
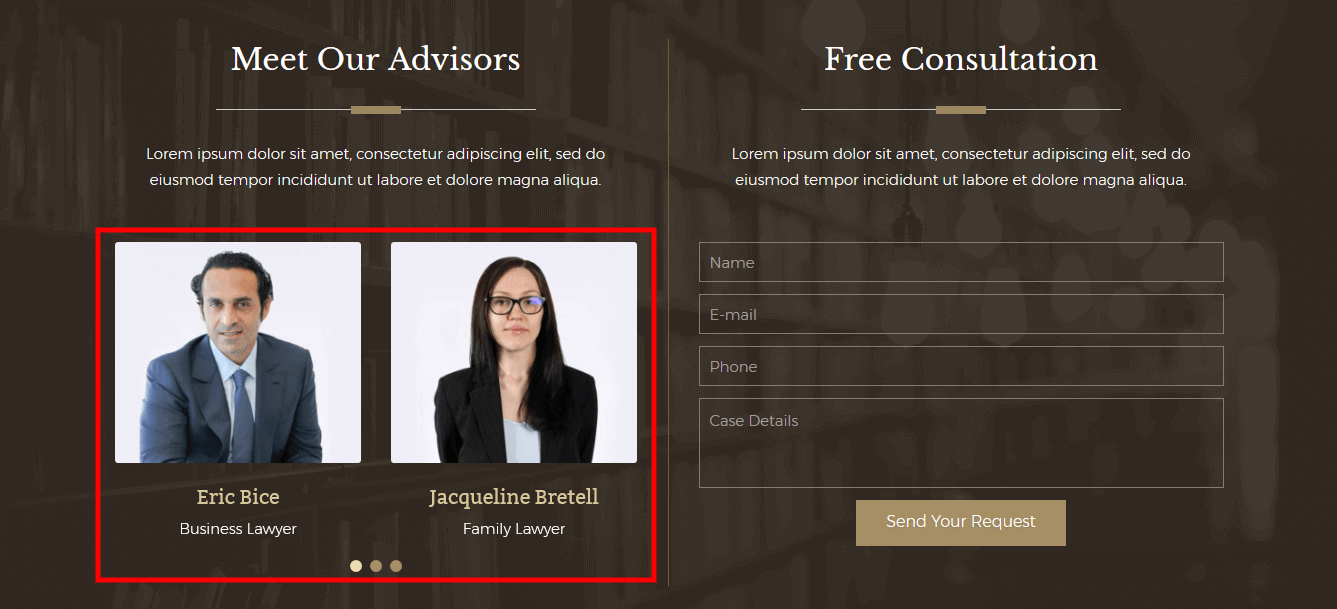
On a full-width page, Attorneys will be shown like below screenshot:
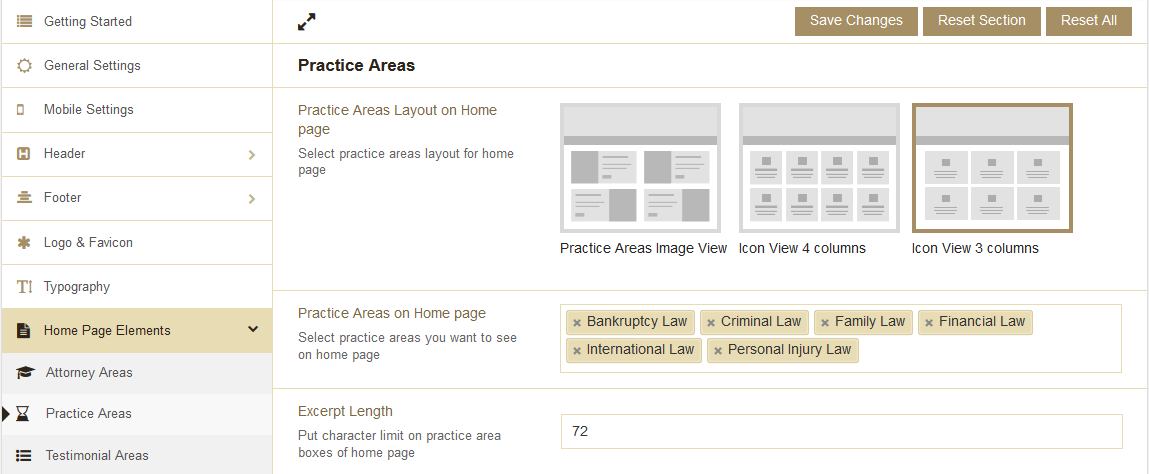
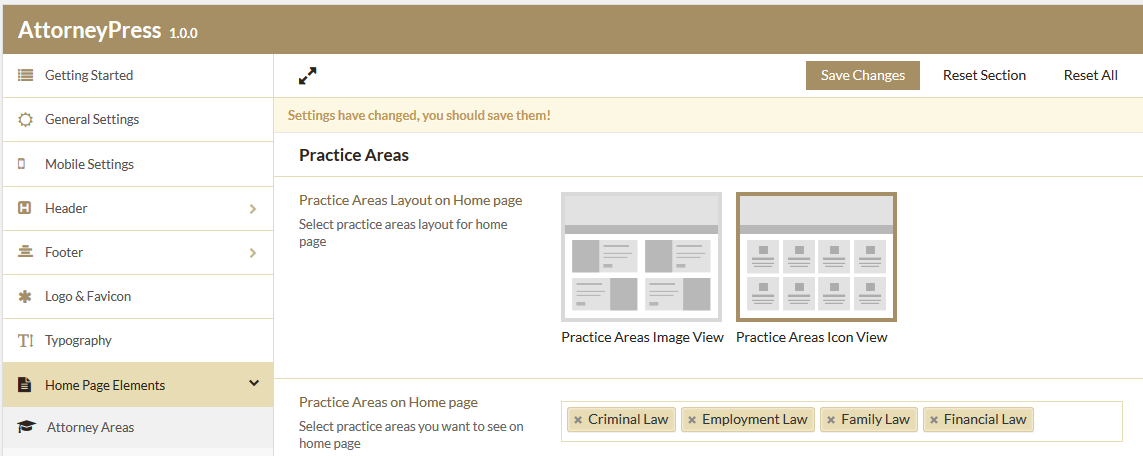
Practice Areas
Under 'Practice Areas' within 'Home Page Elements' option, you'll find there are three layouts for practice areas. Try these options to see changes.
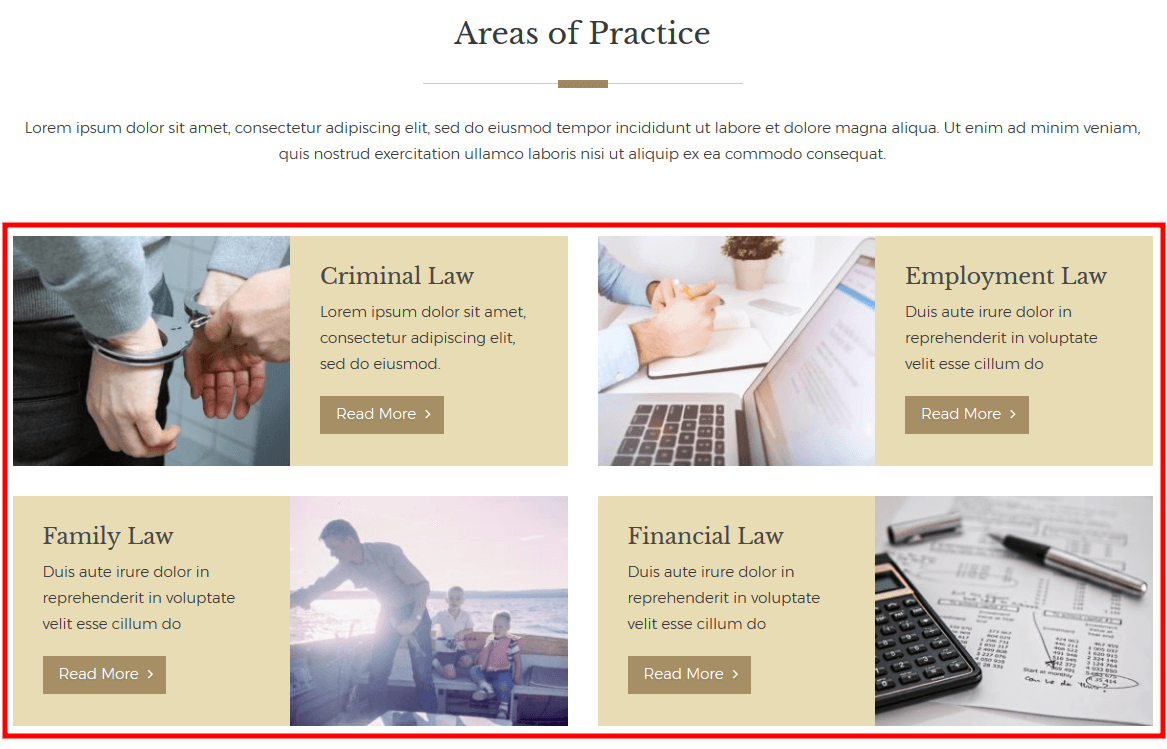
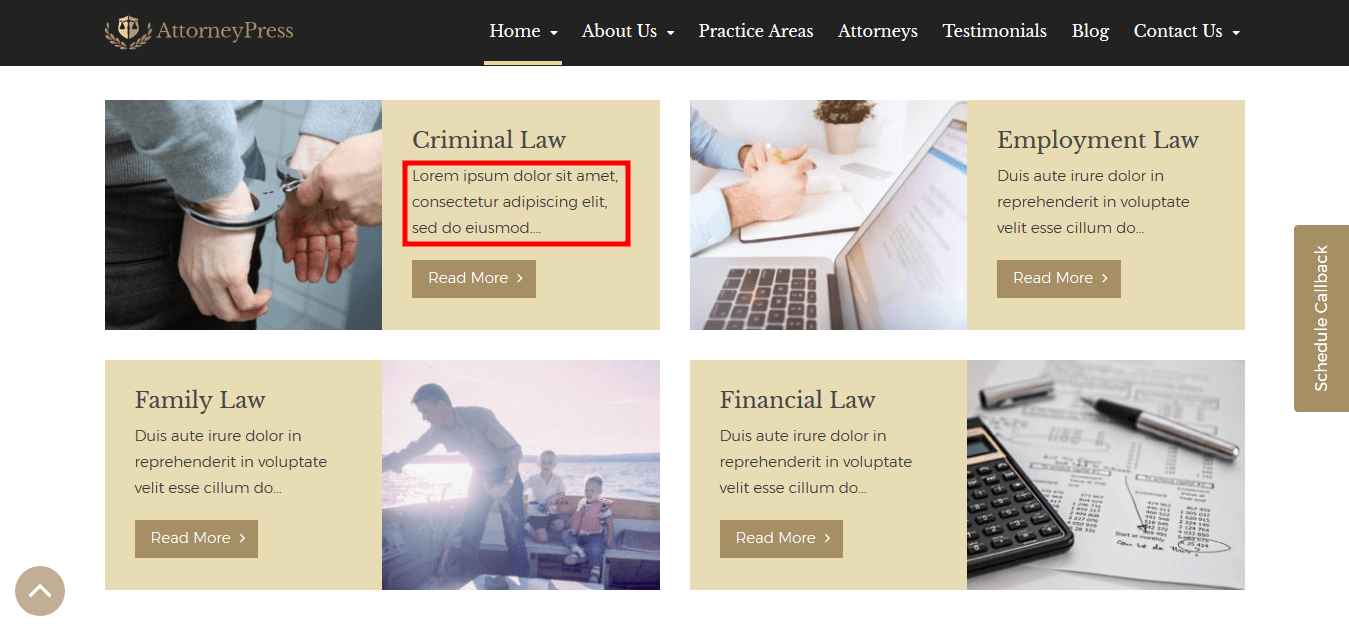
For 'Practice Areas Image View' layout, Practice Areas will be displayed like this:
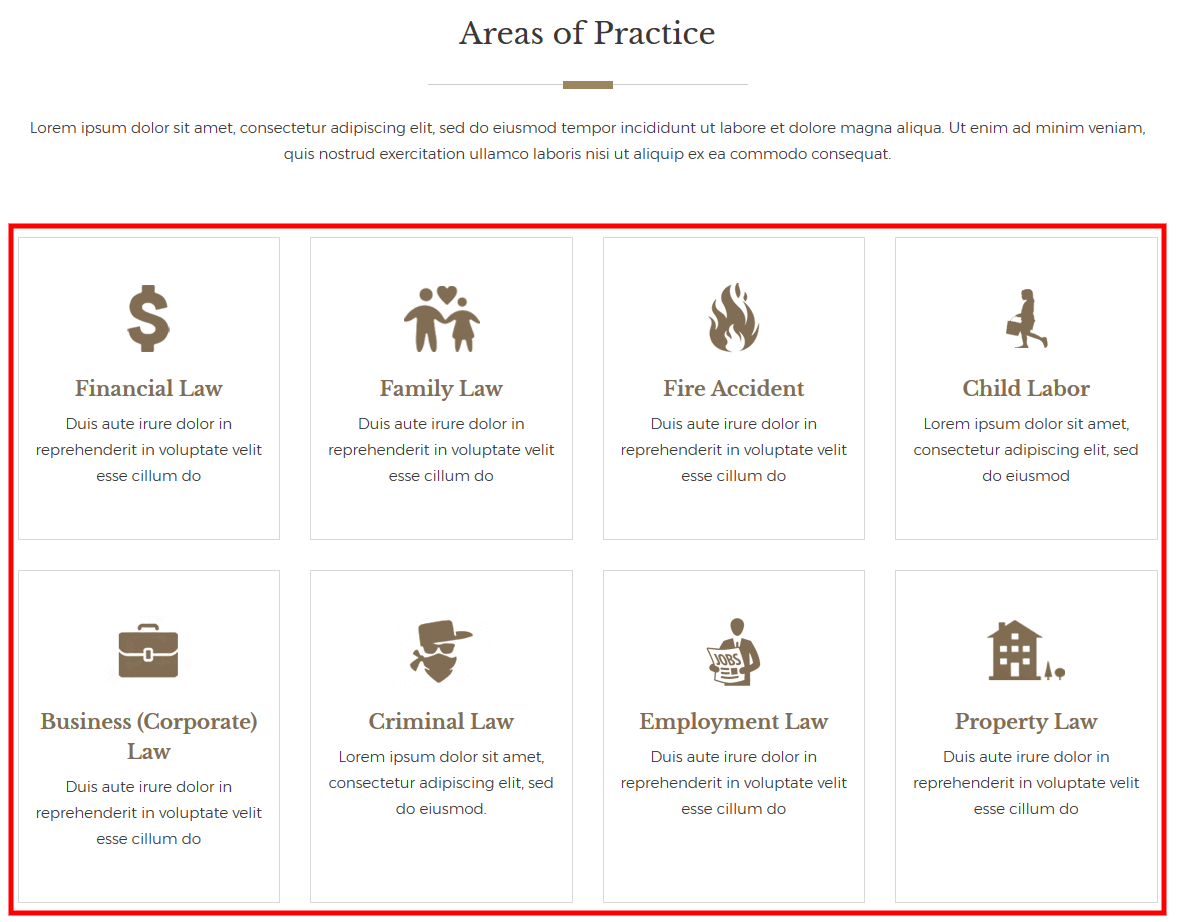
For 'Icon View 4 columns' layout, Practice Areas will be displayed like this:
For 'Icon View 3 columns' layout, Practice Areas will be displayed like this:
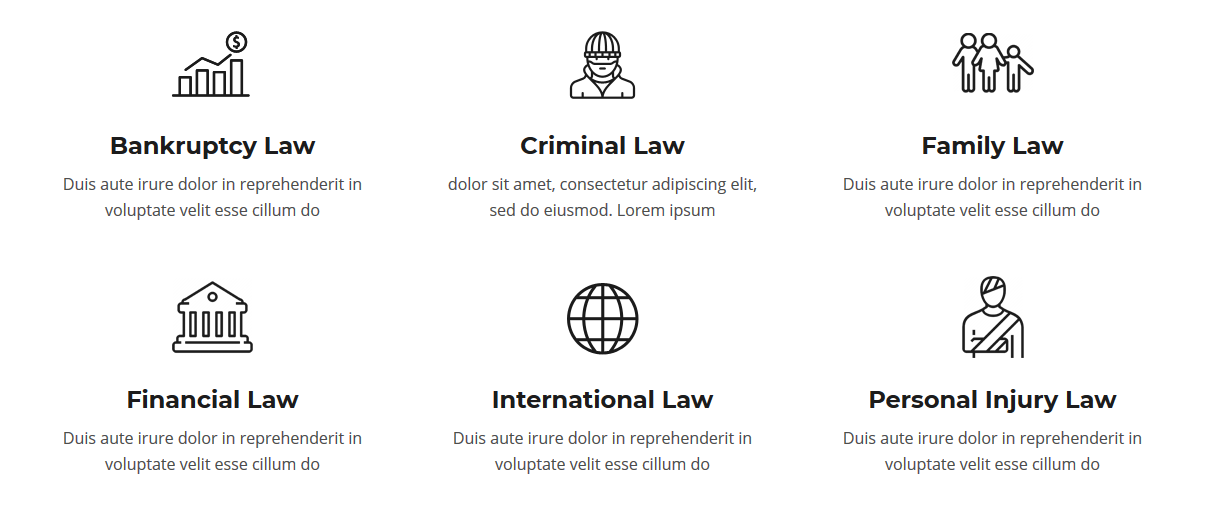
Also there is a option called 'Excerpt Length'. You can write as much content you want but this section will display upto 72 character after that it will add .... Please refer below image for better understanding:
Testimonial Areas
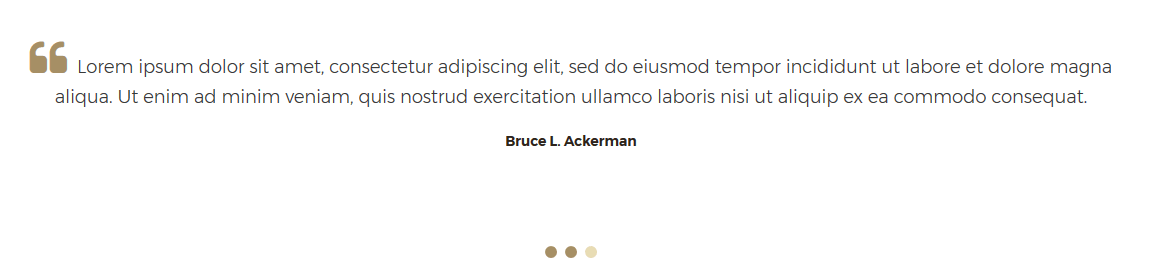
Under Home Page Elements -> Testimonial Areas you’ll get two options to display testimonials on home page.
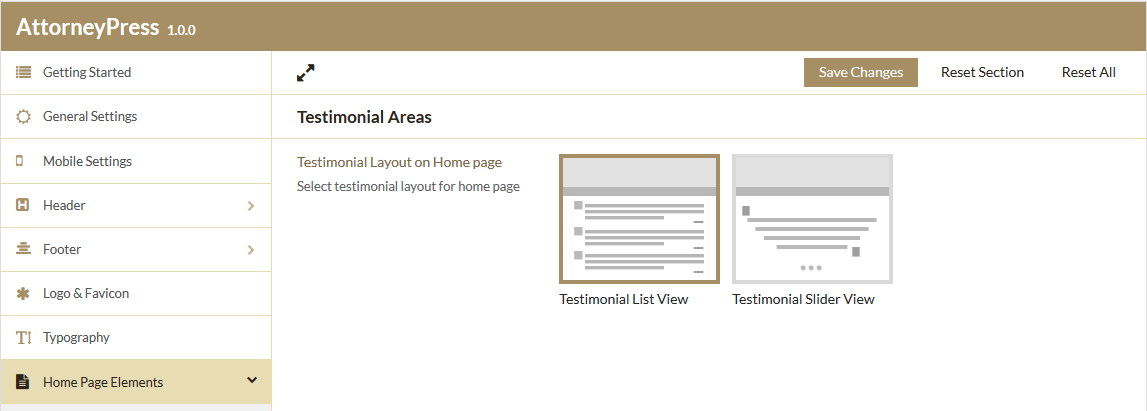
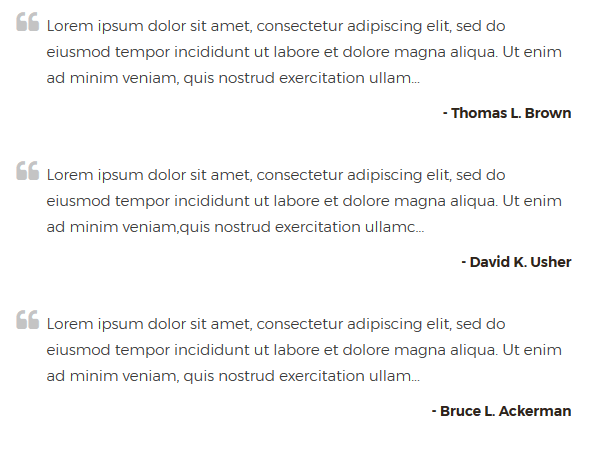
For 'Testimonial List View' layout, Home page testimonials would look like this:
For 'Testimonial Slider View' layout, Home page testimonials would look like this:
Inner Page Elements
You will get 'Inner Page Elements' from Theme Options > Inner Page Elements. This is the most important part as you can change layout of most vital pages. You can change:
- Layout of practice areas listing in ‘Practice Areas’ page.
- Layout of attorneys listing in ‘Attorneys’ page.
- Layout of testimonial listing in ‘Testimonials’ page.
- Layout of attorneys profile page i.e details page of attorneys.
- Layout of details page of practice areas.
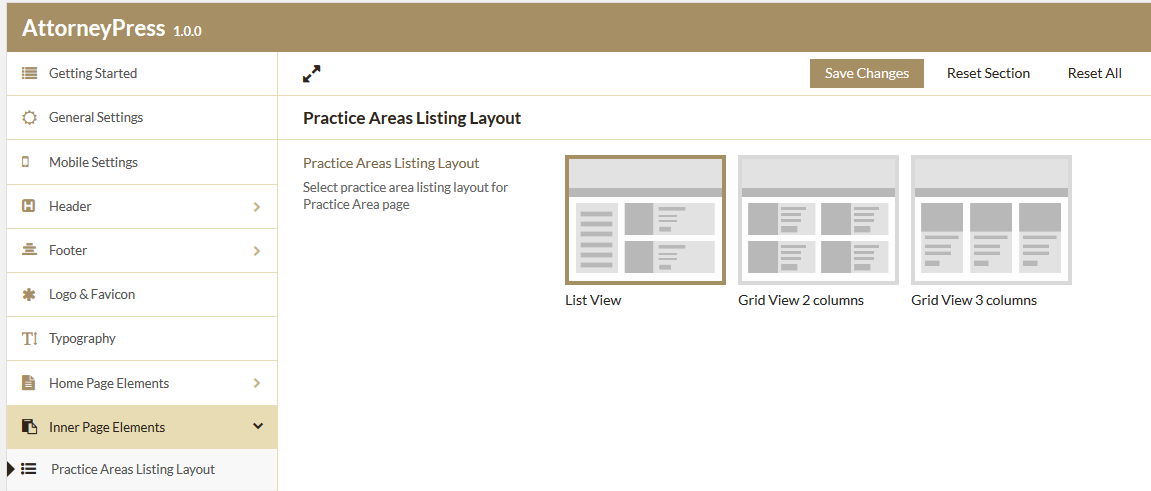
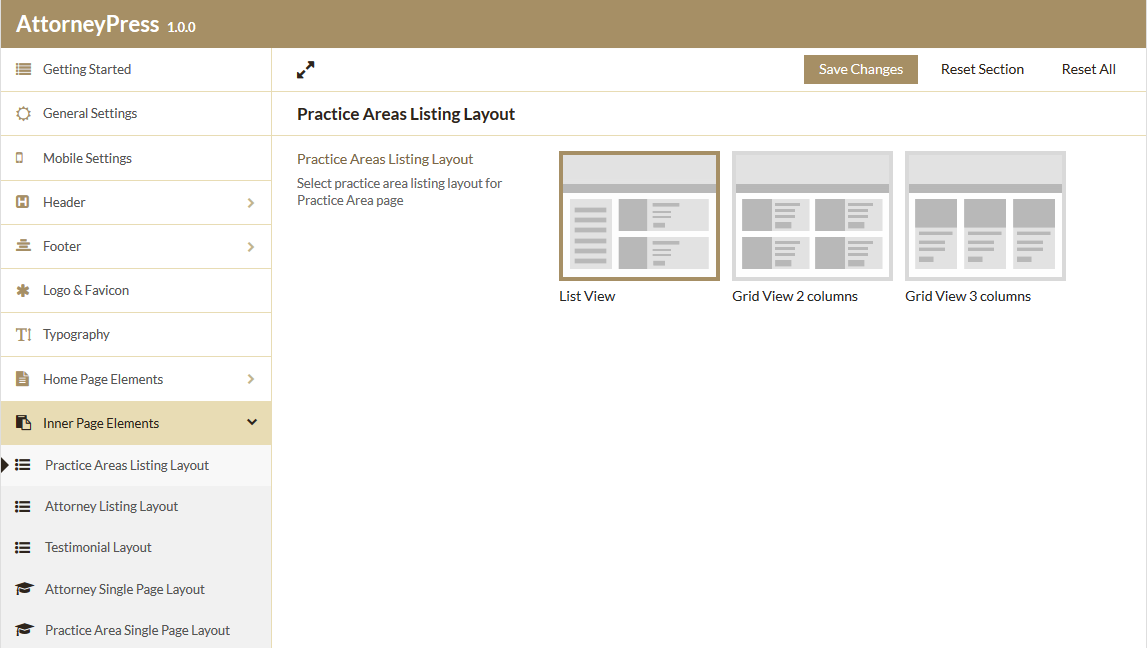
Practice Areas Listing Layout
You will get ‘Practice areas Listing Layout’ under ‘Inner Page Element’. You'll find there are 3 different layouts.
So, if you choose ‘List View’ layout then it will be displayed like this:
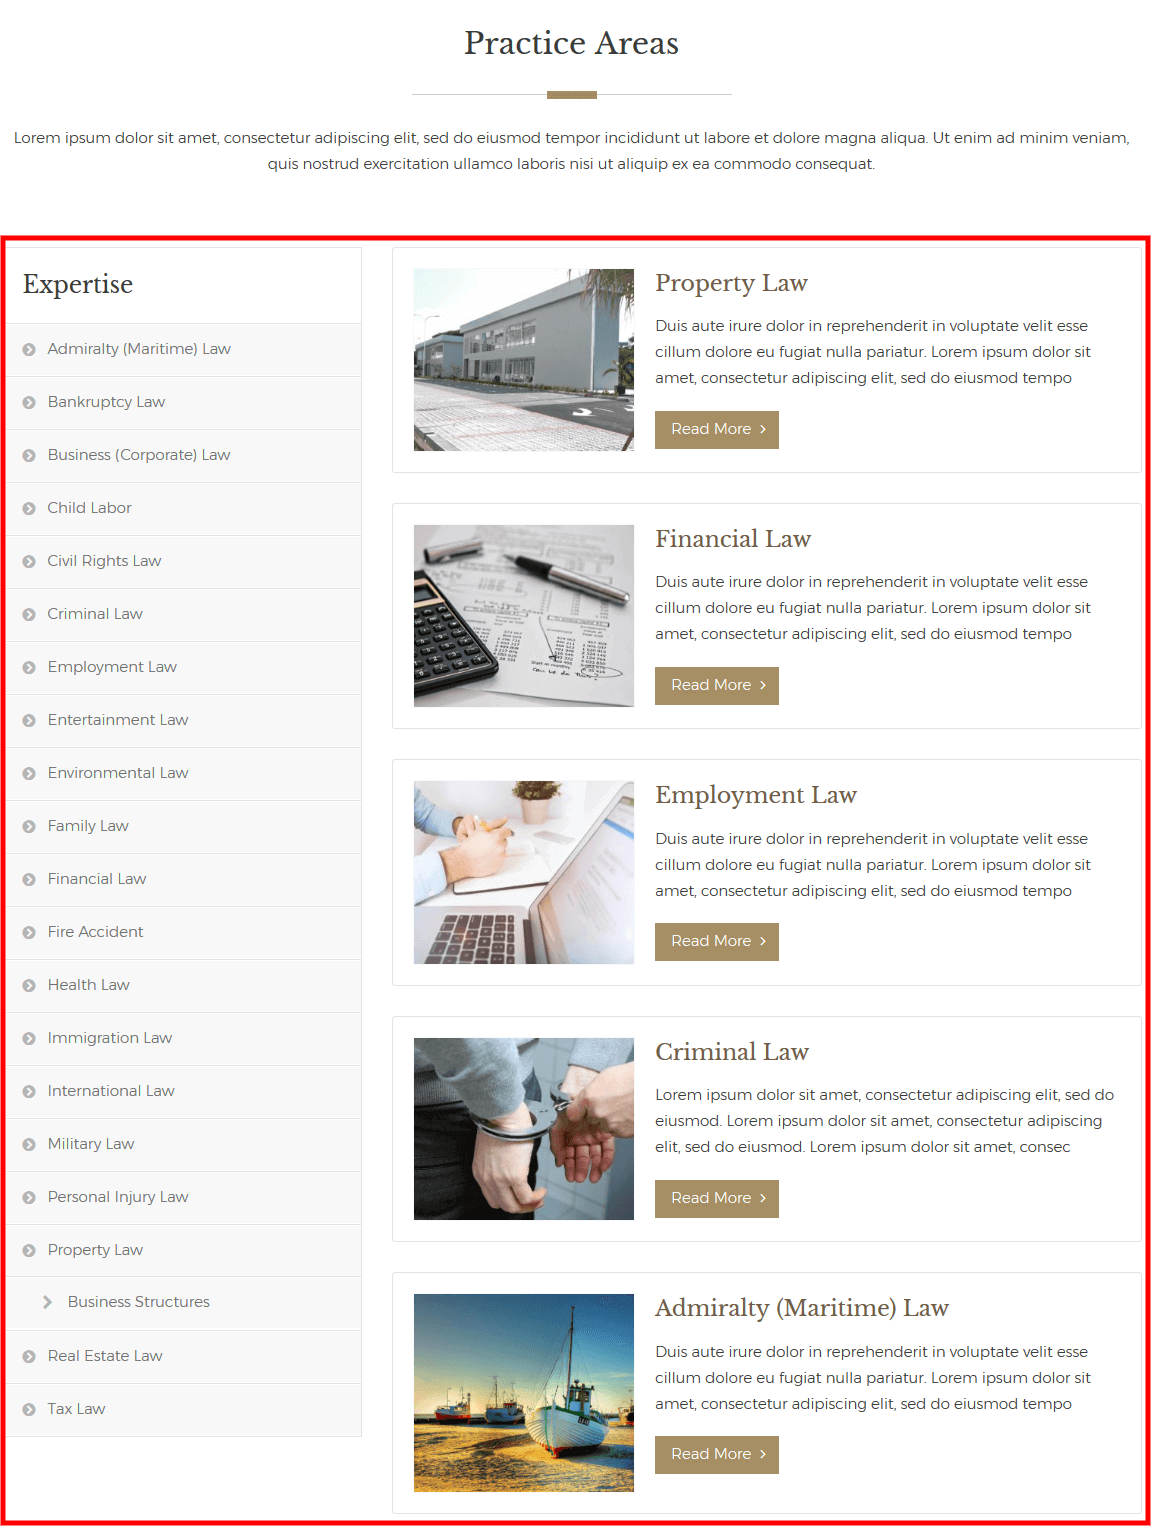
Display view will be changed as per layout selected.
Attorney Listing Layout
You will get ‘Attorney Listing Layout’ under ‘Inner Page Element’. There are 4 layouts.
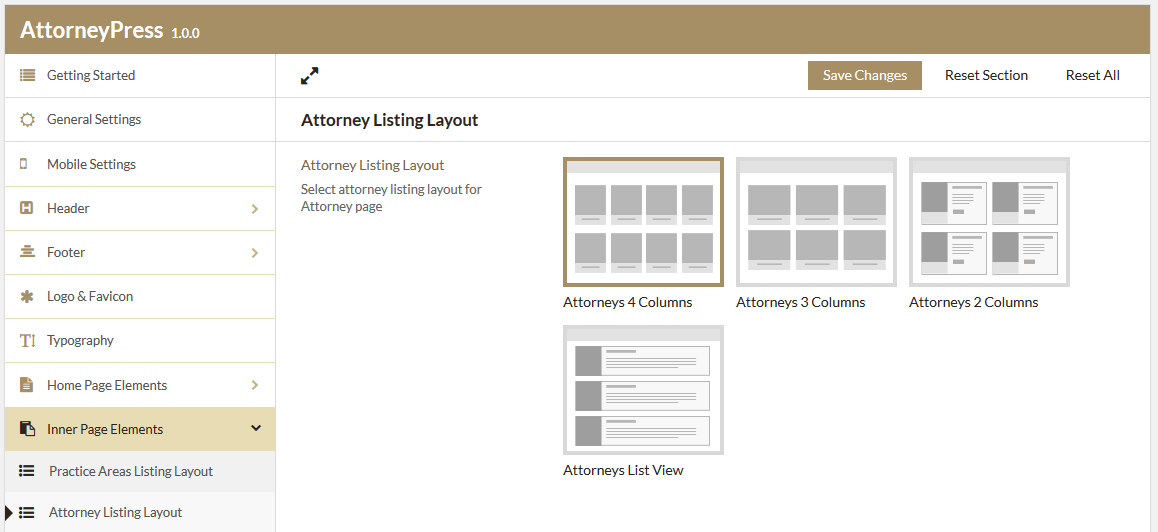
So, if you choose ‘Attorneys 4 Column’ layout then it will be displayed like this:
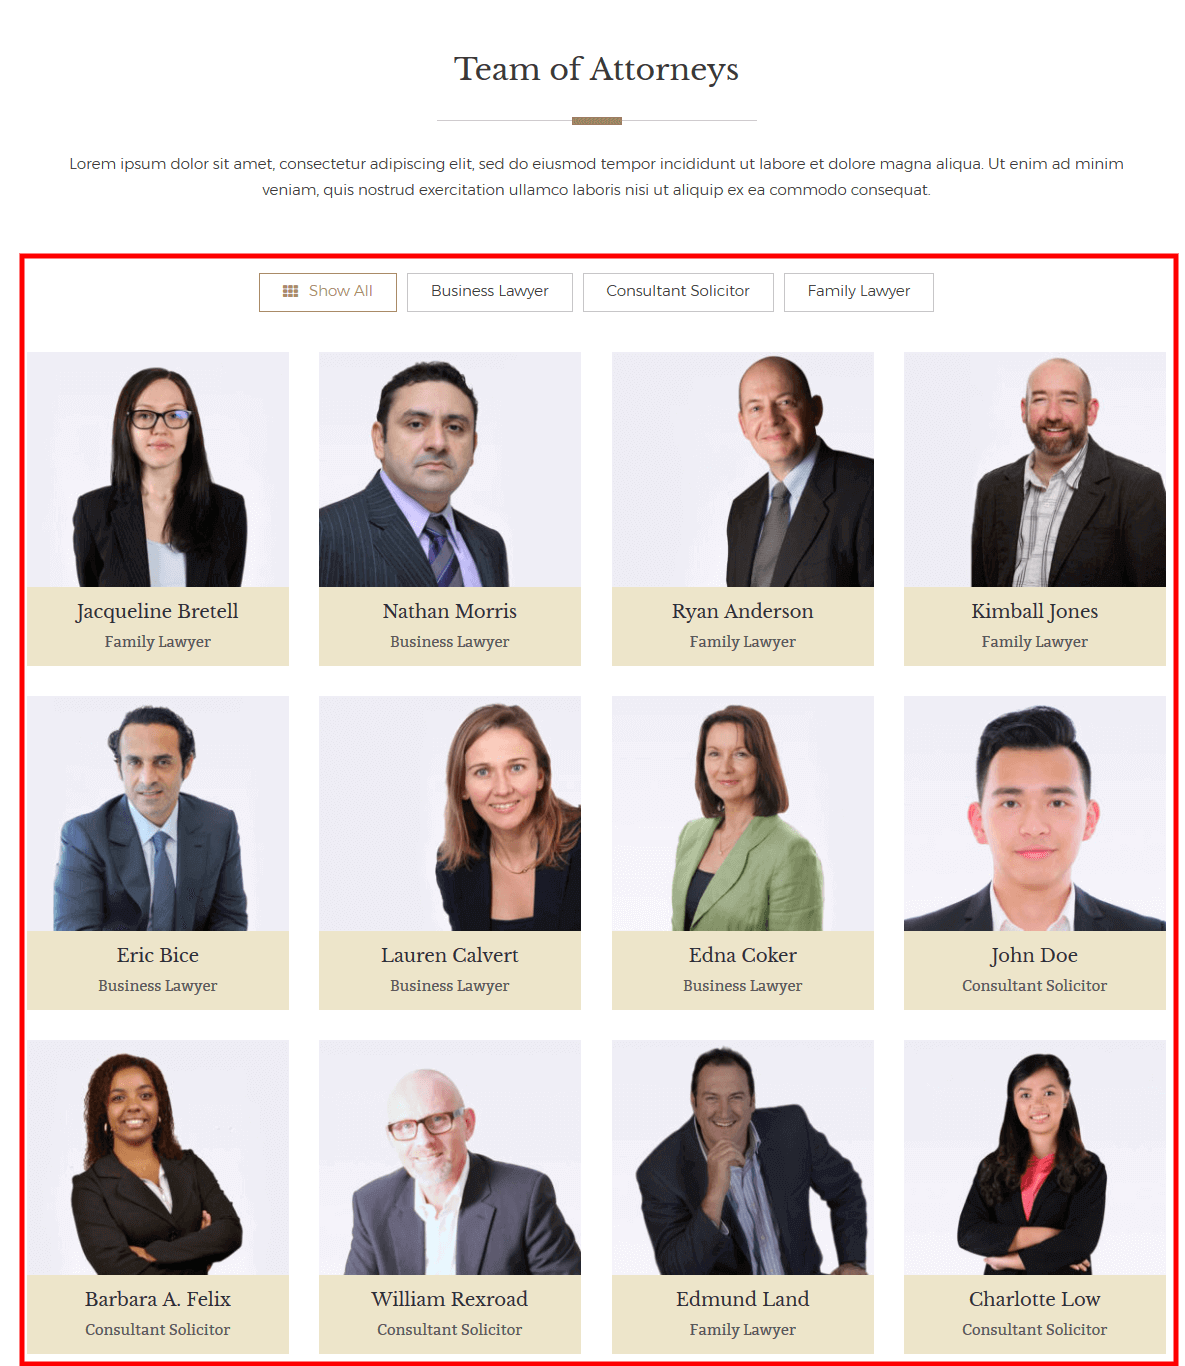
Display view will be changed as per layout selected.
Testimonial Layout
You will get ‘Testimonial Layout’ under ‘Inner Page Elements’. You'll see 3 different layouts.
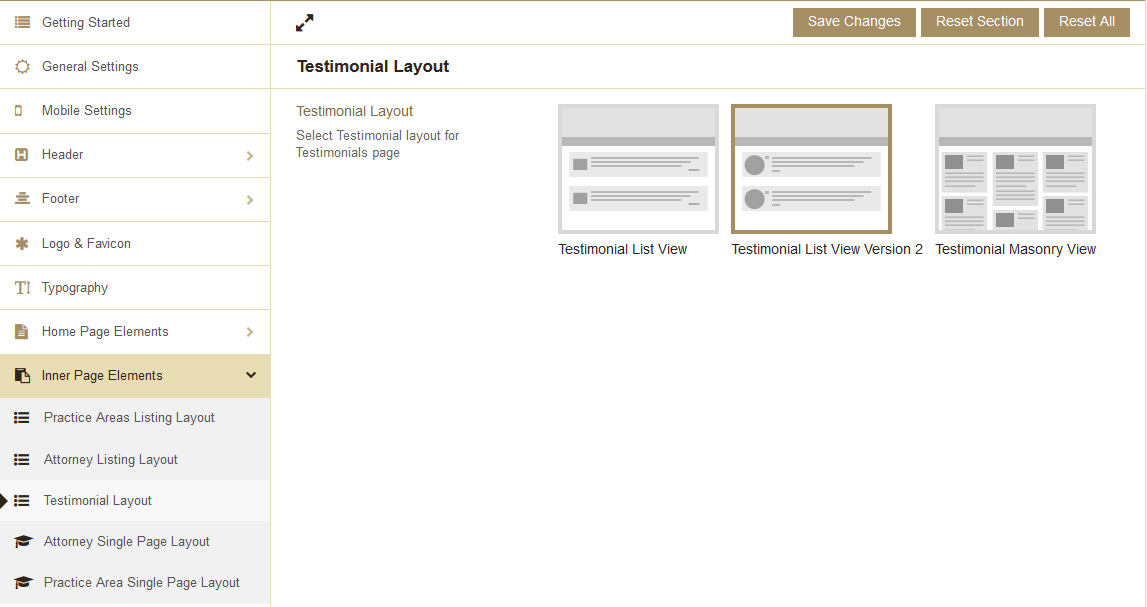
So, if you choose ‘Testimonial Masonry View’ layout then it will be displayed like this:
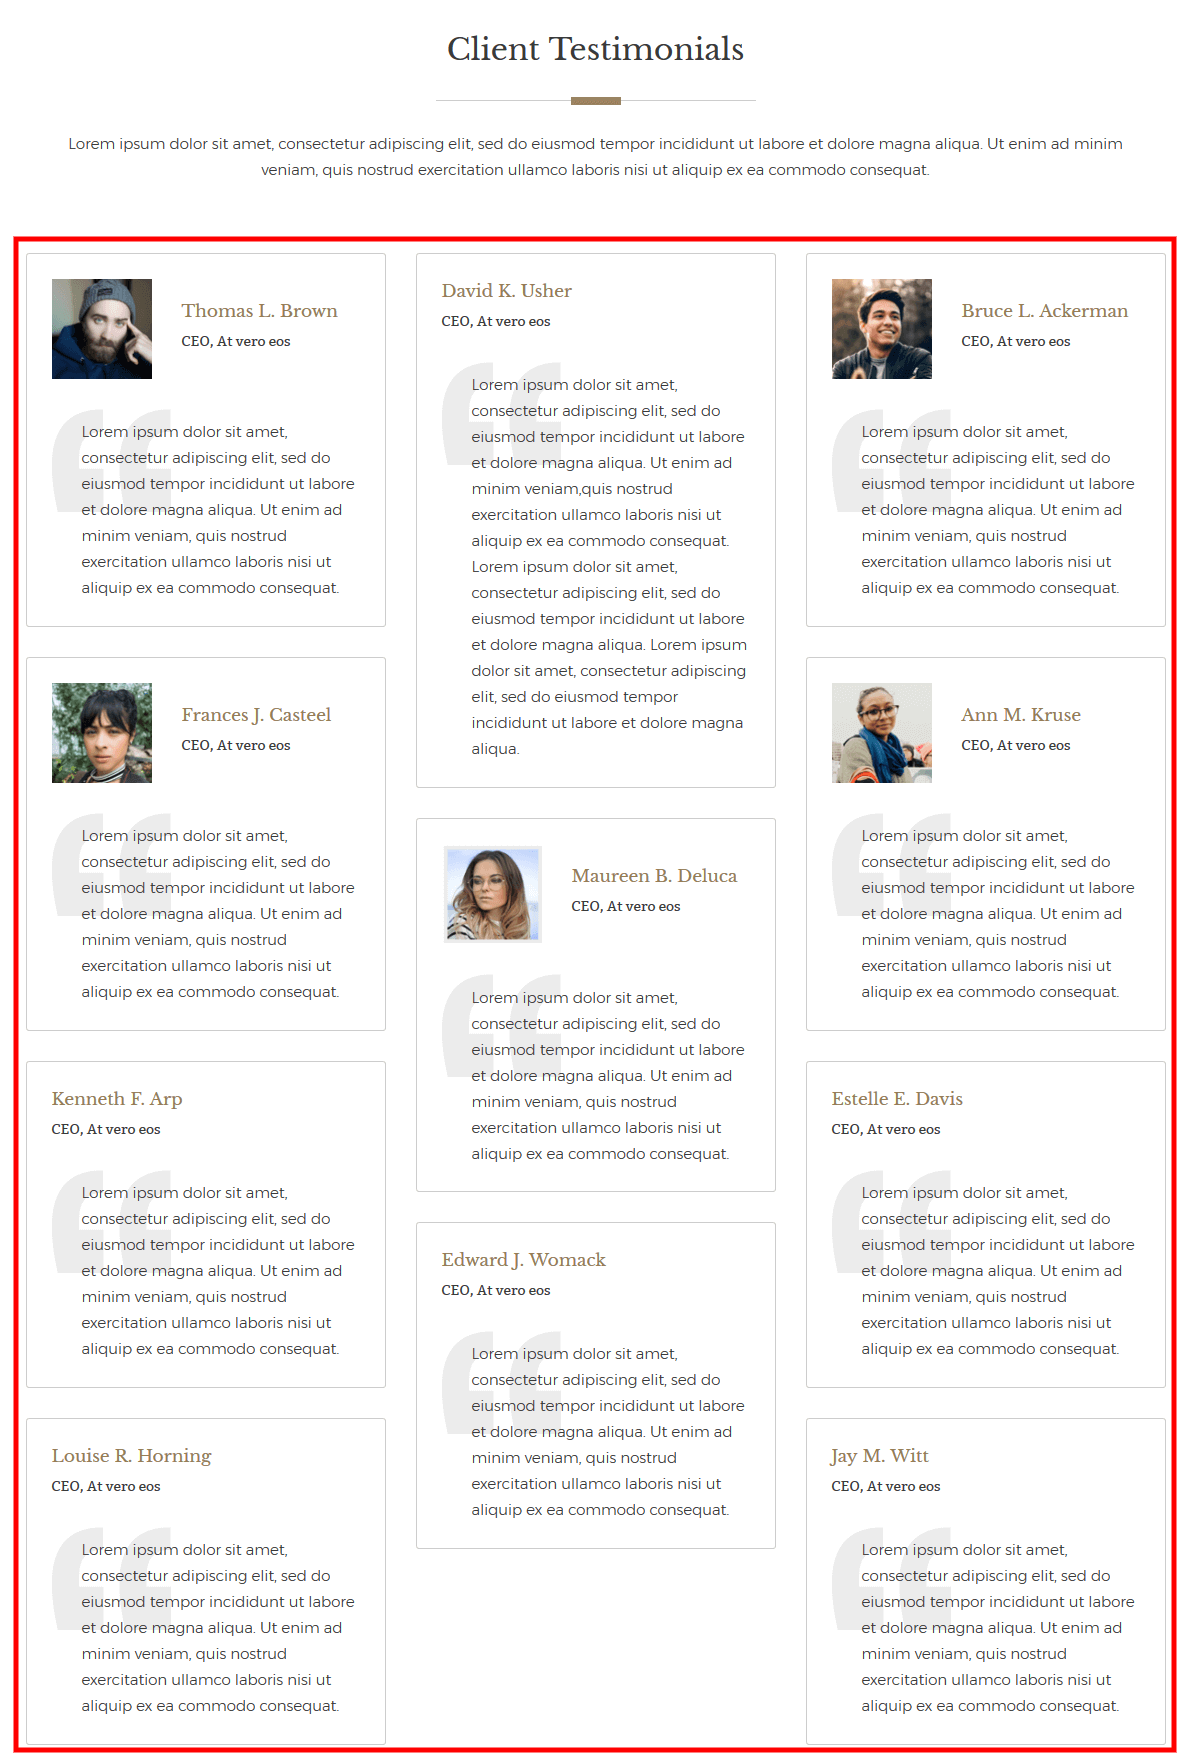
Display view will be changed as per layout selected.
Attorney Single Page Layout
You will get ‘Attorney Single Page Layout’ under ‘Inner Page Element’. There are 3 layouts. Go ahead and experiment with each option.
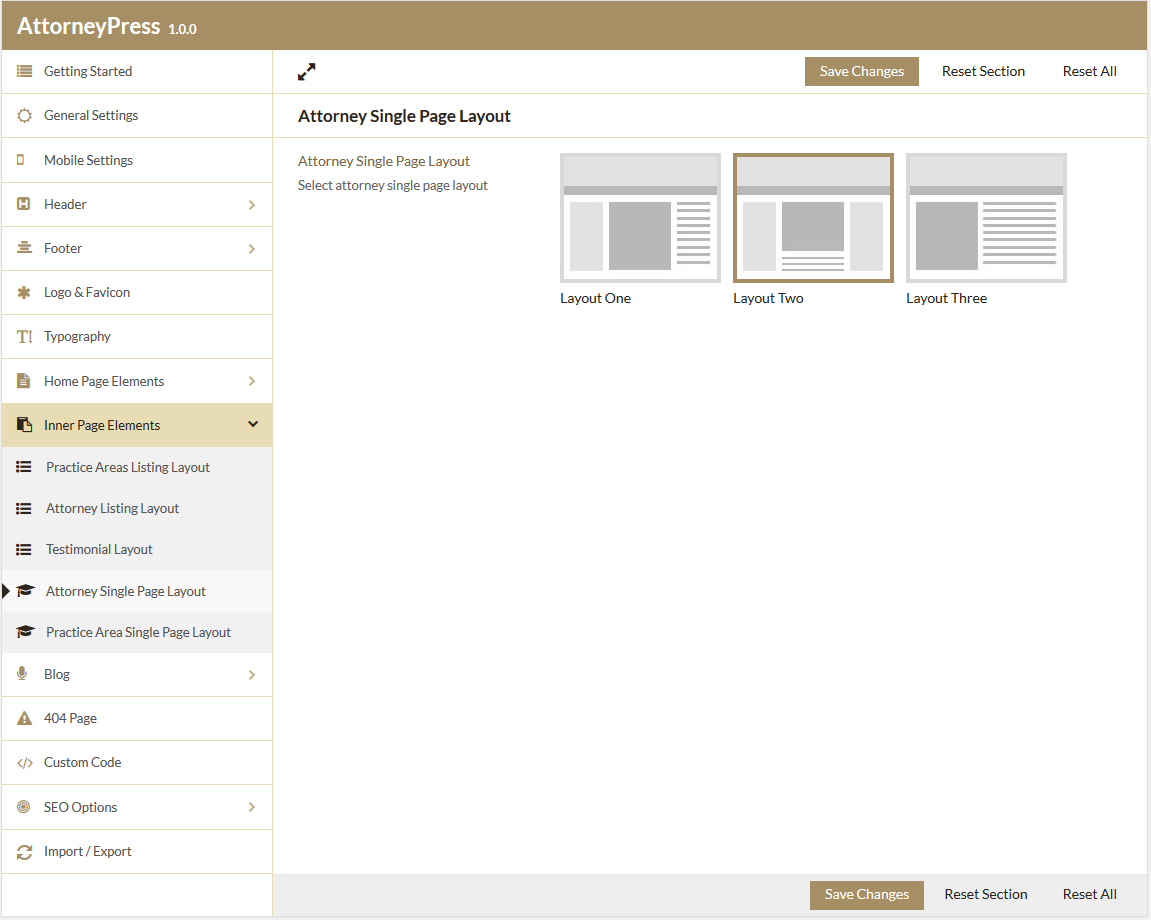
If you choose ‘Layout Two’ layout then it will be displayed like this:
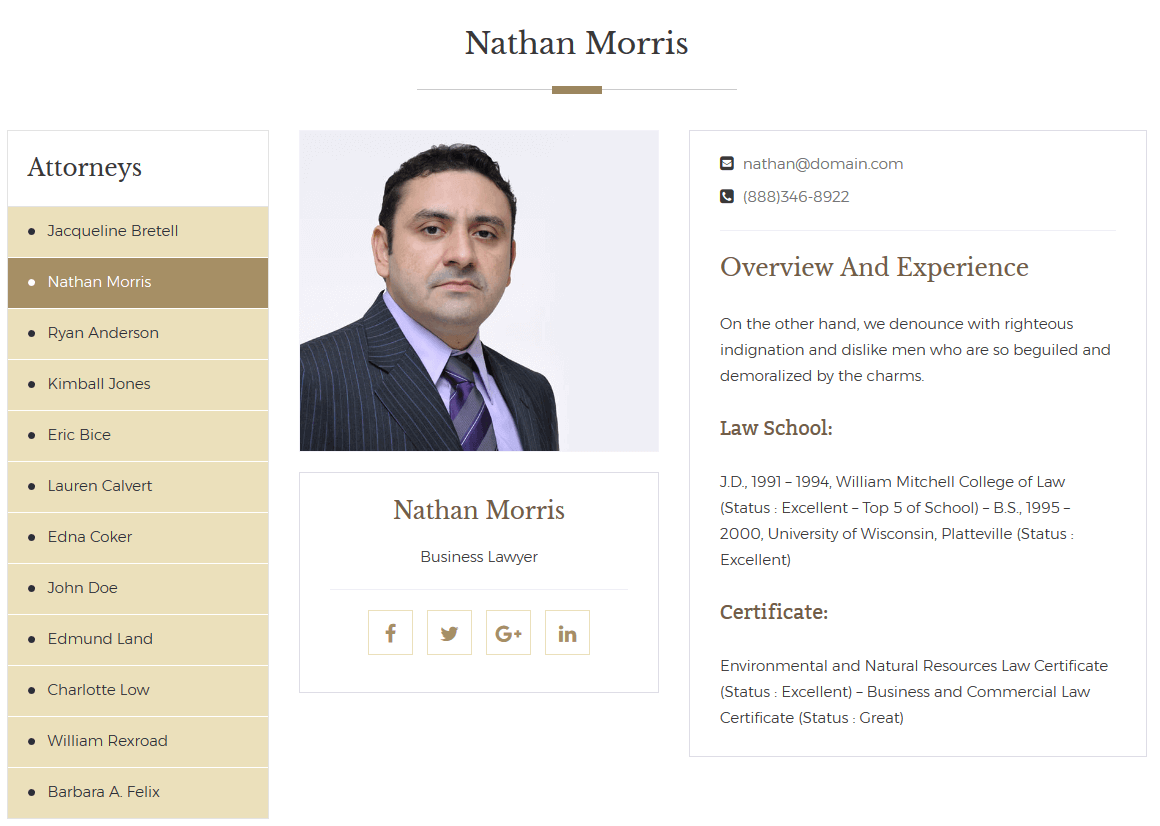
Display view will be changed as per selected layout.
Practice Area Single Page Layout
Under ‘Practice Area Single page Layout’ you'll find 3 different layouts.
If you choose ‘Layout Left Sidebar’ layout then it will be displayed like this:
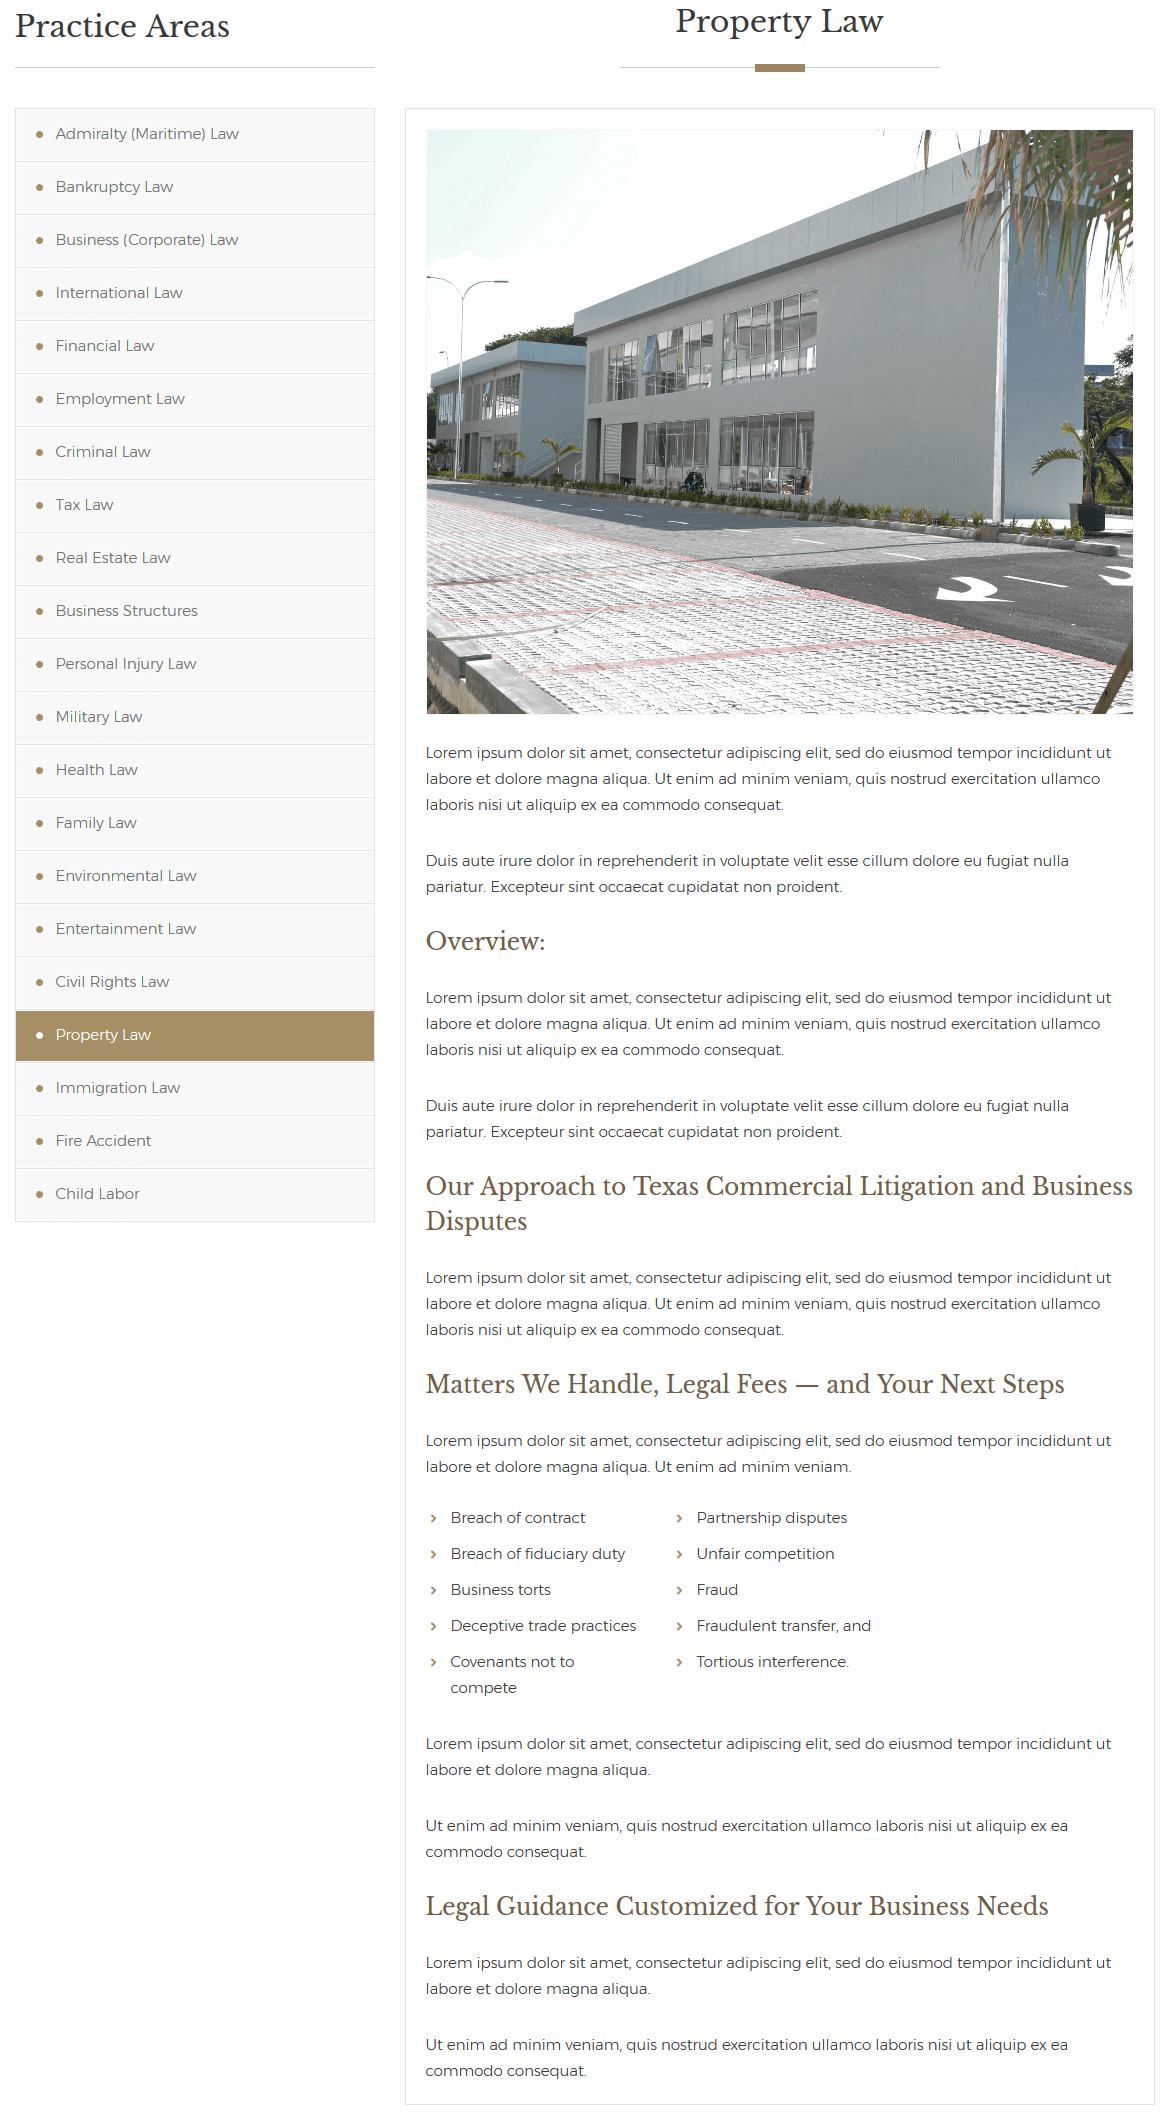
Display view will be changed as per selected layout.
Blog Layout Option
You will get 'Blog' option from Theme Options > Blog. If you want blog in your site then this is the most important part as you can manage your blog from here. You need to assign your ‘Blog’ page as ‘Posts page’.
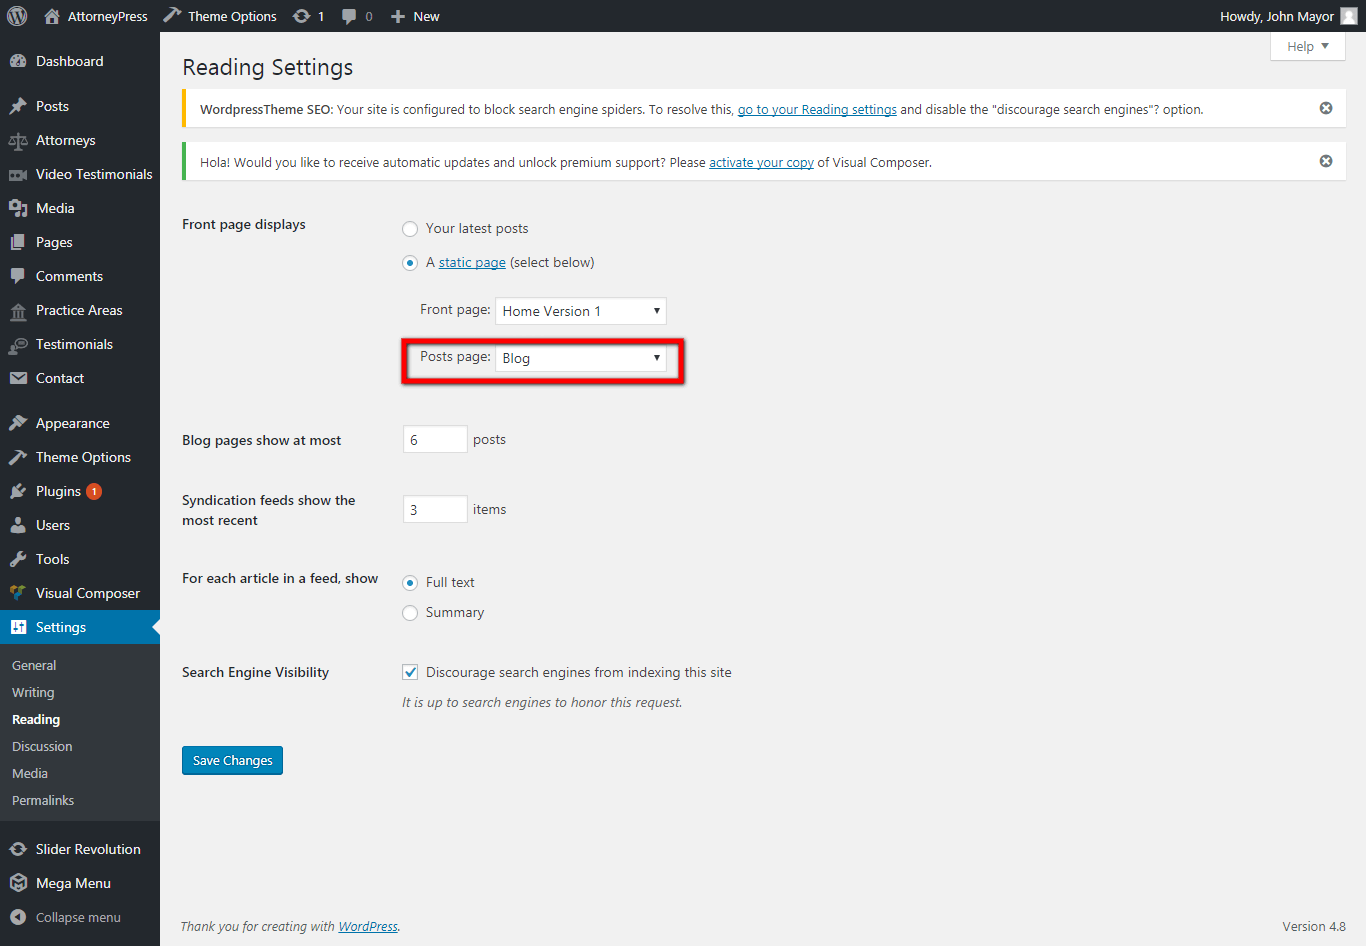
Blog Layout
You can find ‘Blog Layout’ under ‘Blog’. There are 3 blog layouts with left, right and no sidebar. You can choose any blog layout with any type of sidebar and the layout of blog listing on blog page will be changed as per your selection.
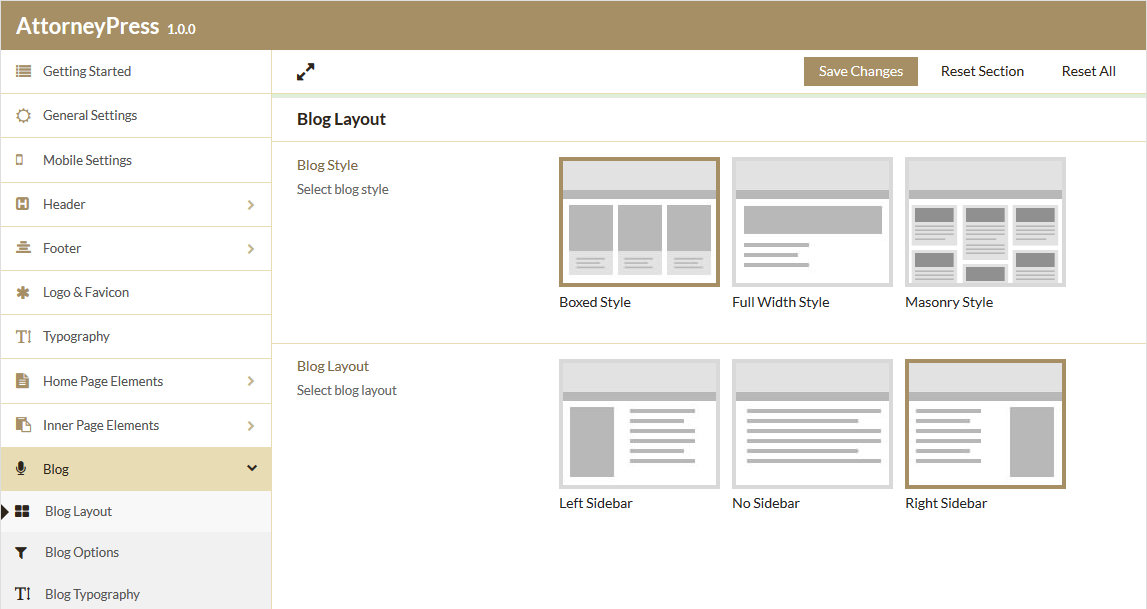
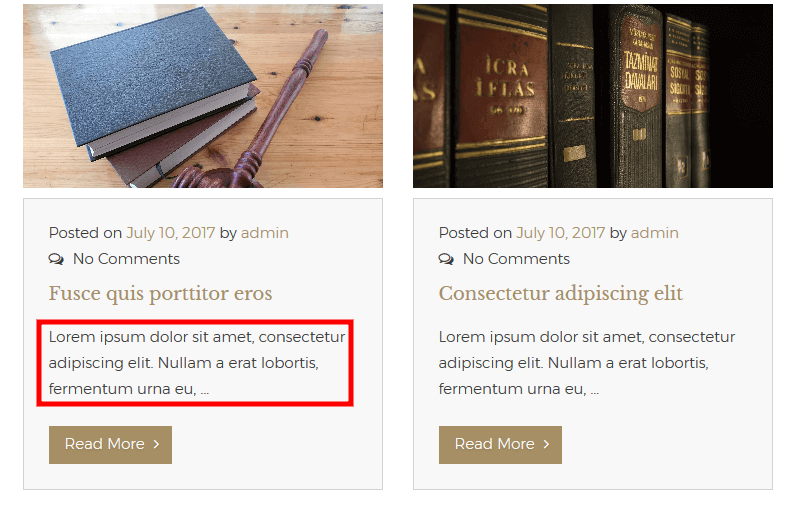
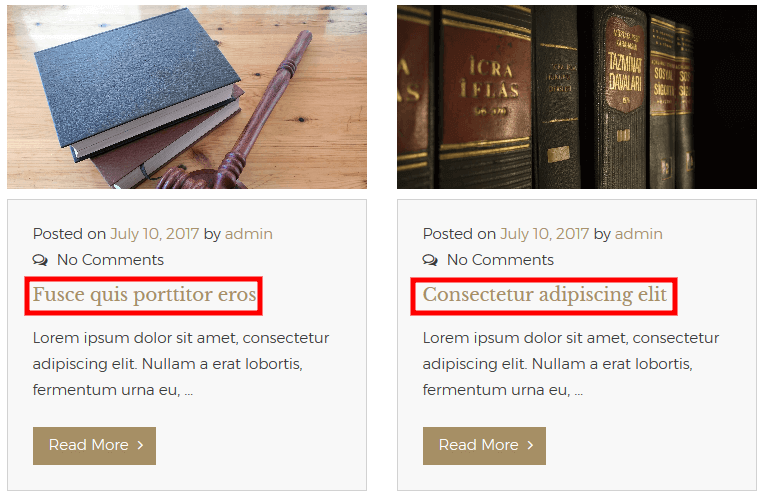
So, if you choose ‘Boxed Style’ with ‘Right Sidebar’ layout then it will be displayed like this:
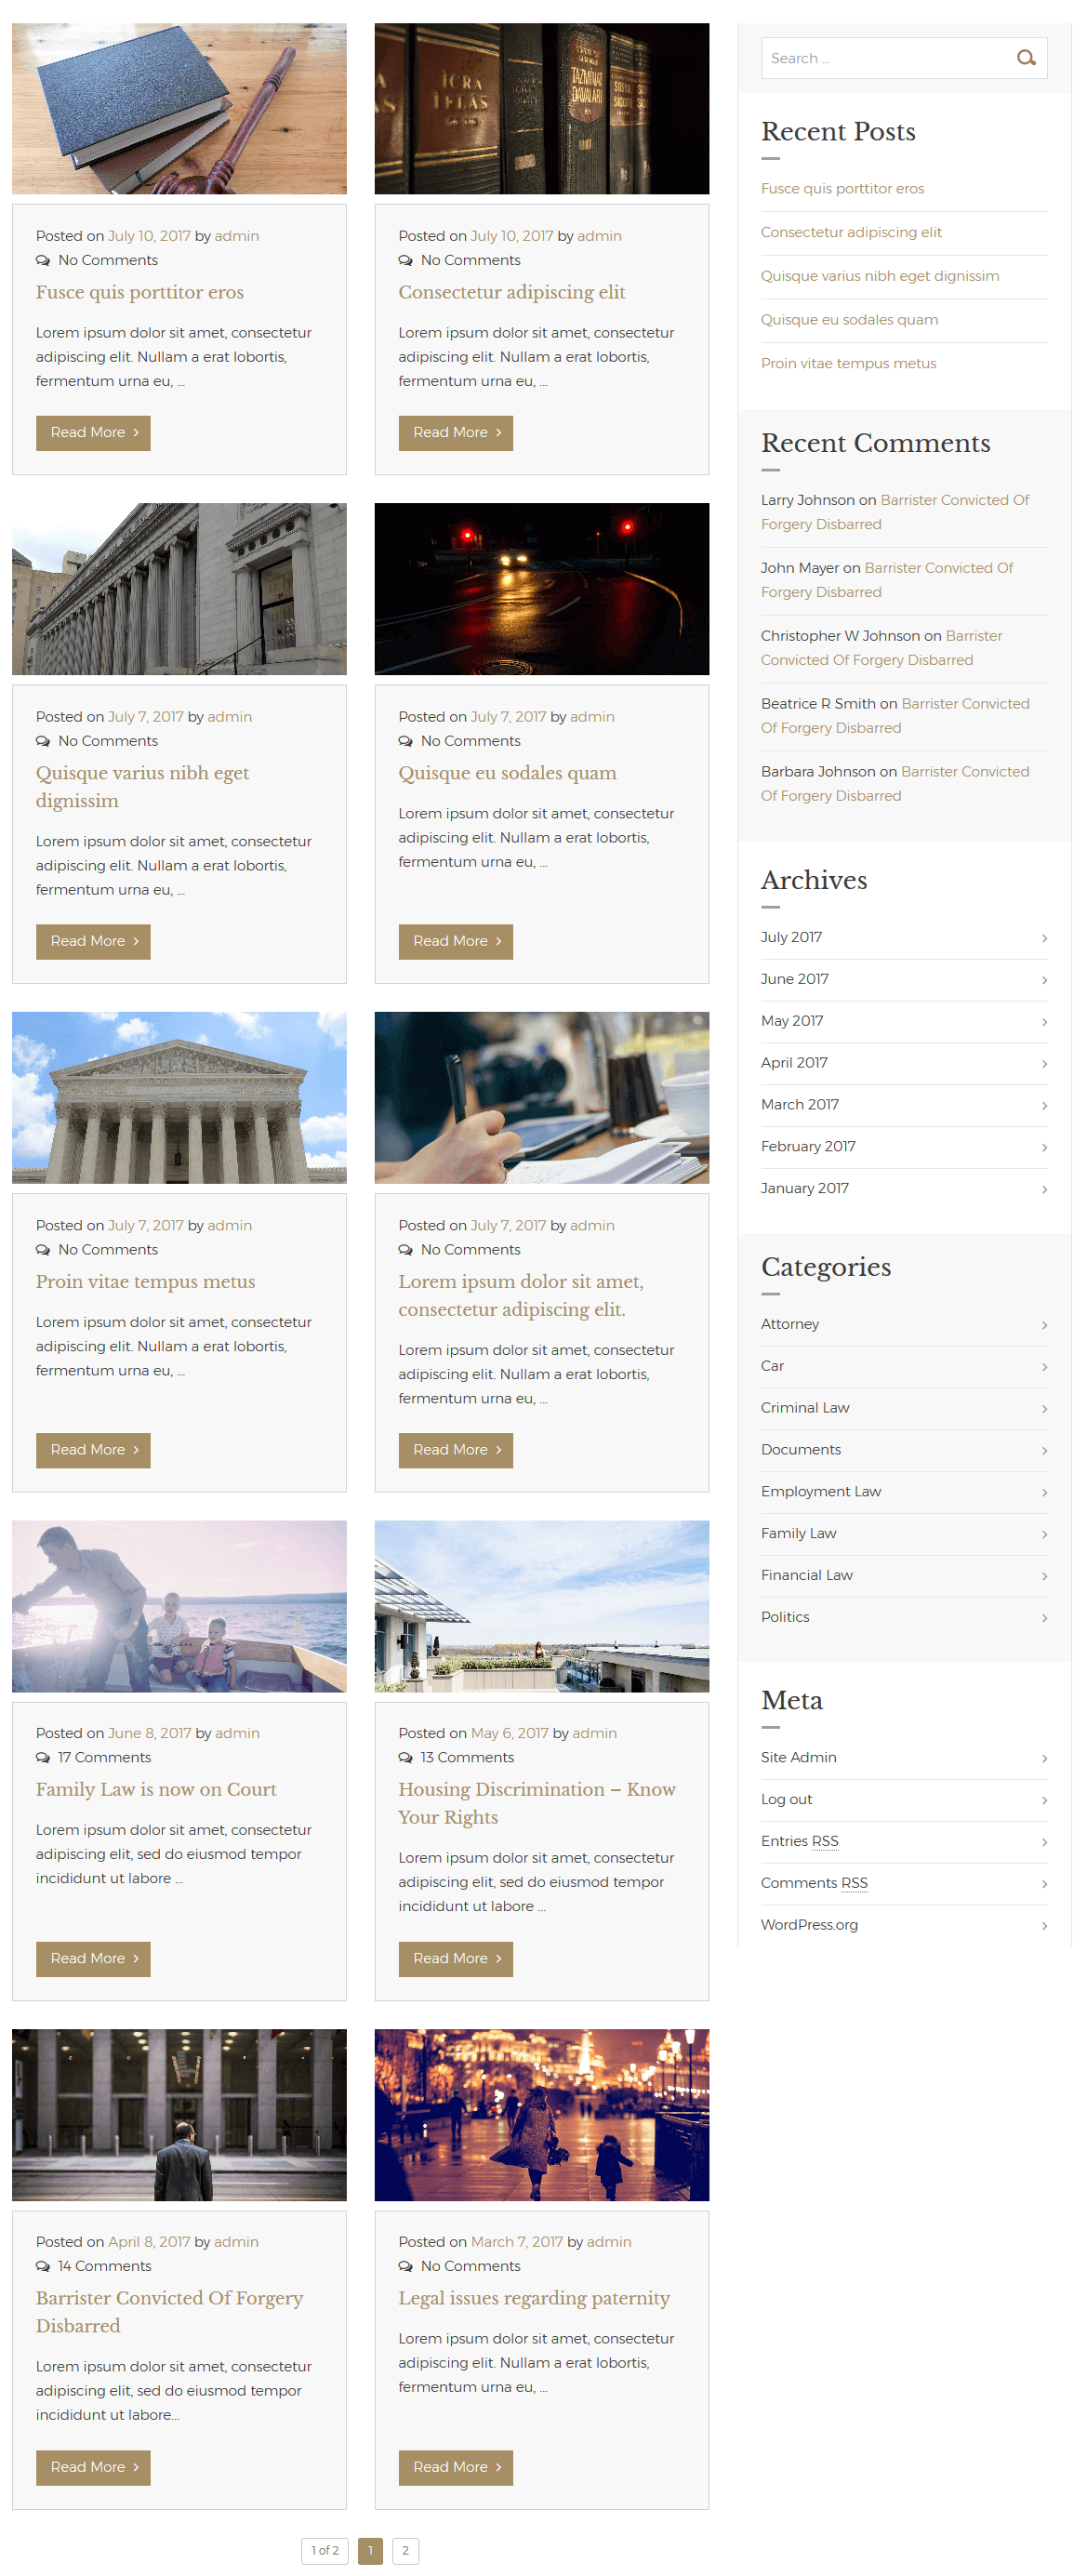
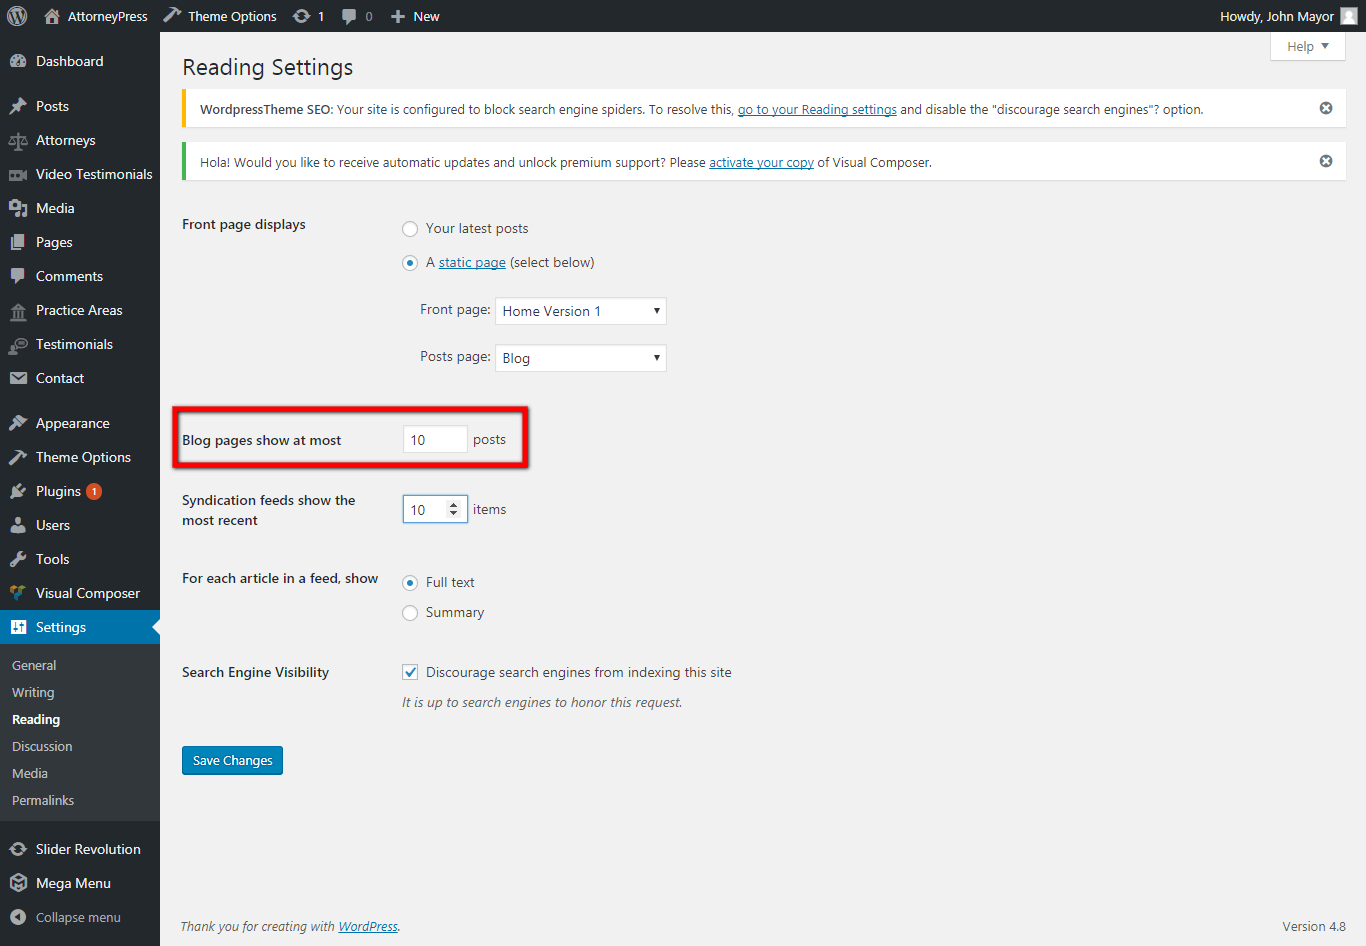
By default, 10 posts will be displayed per page. If post curpasses 10 then pagination will be added automatically. You can change number of post per page from Settings > Reading.
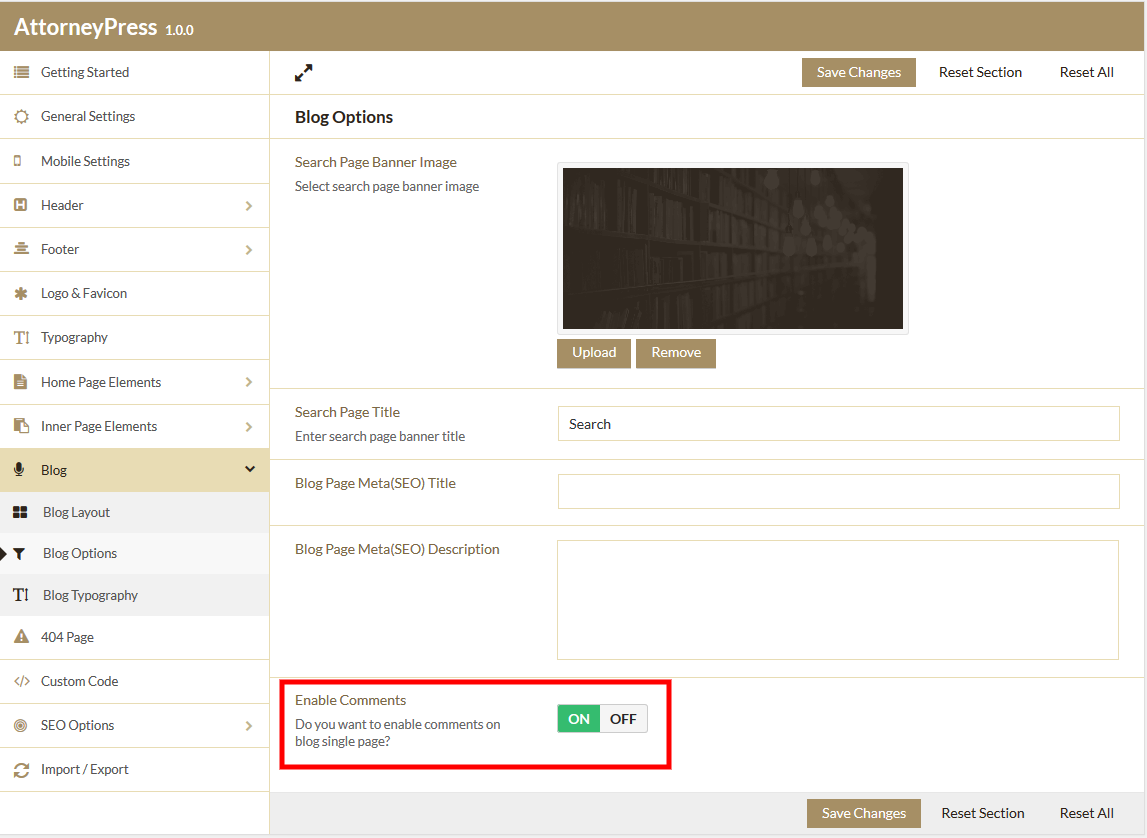
Blog Options
You will get ‘Blog Options’ under ‘Blog’. You can find some vital options here.
If you’re using sidebar then you need to know how to manage all widgets of blog sidebar, So to manage widgets, follow below steps:
- Go to Appearance > Widgets
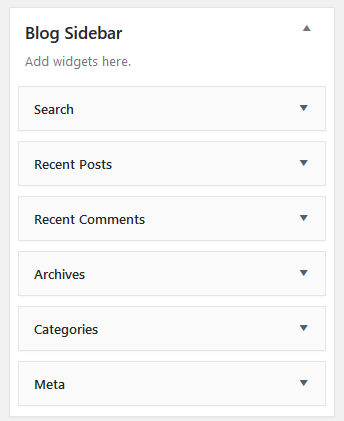
- There you will see ‘Blog Sidebar’ with 6 widgets
- You can delete any widgets from there
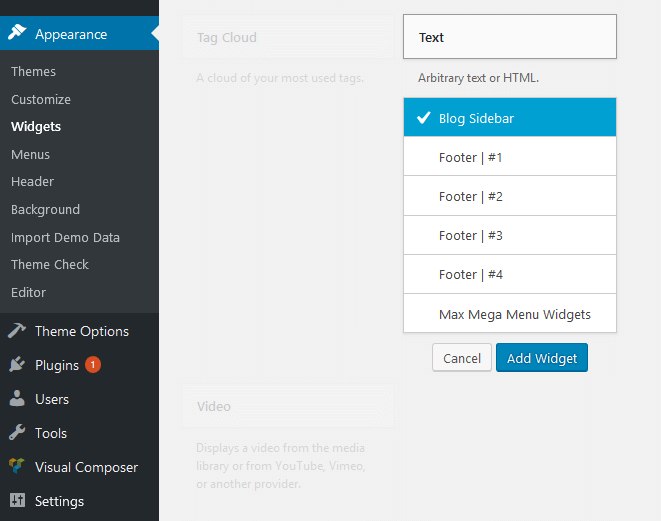
- If you want to add new widget then you can add specific widget from ‘Available Widgets’ like if you want to add ‘Text widget’ then click on ‘Text’ widget and chose location ‘Blog Sidebar’.
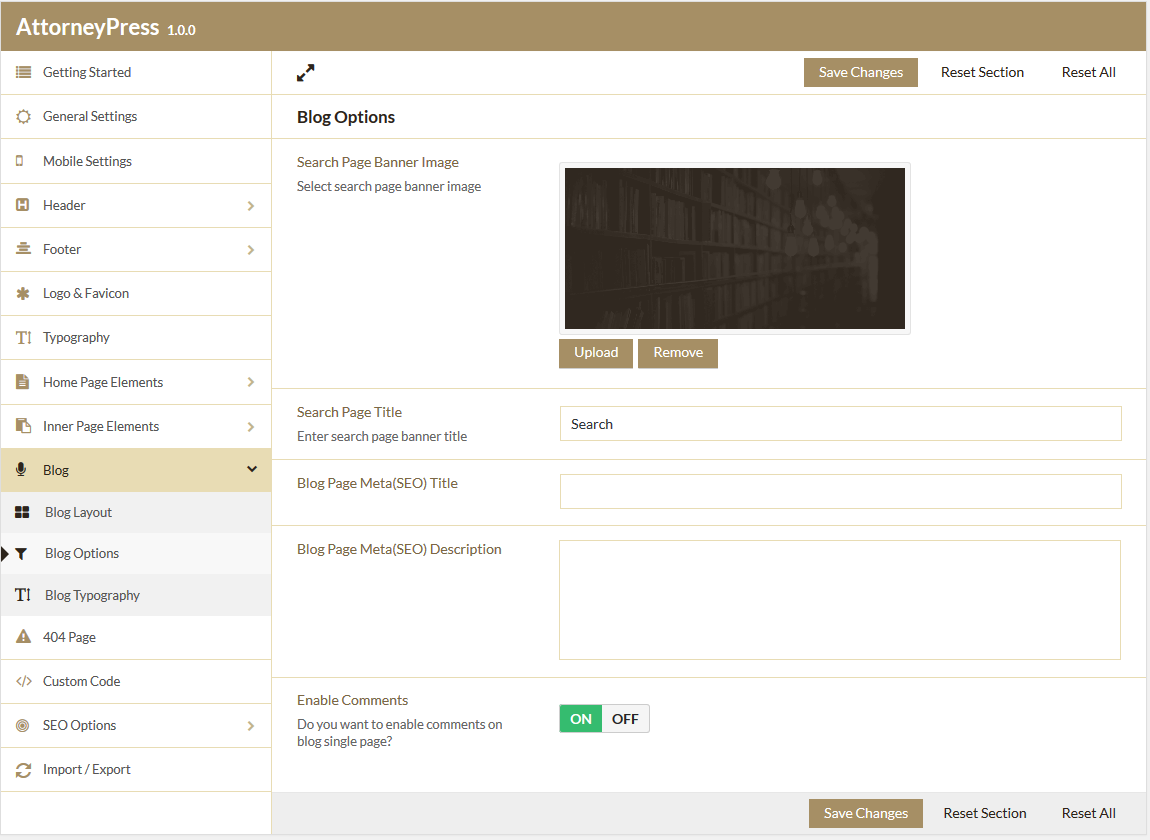
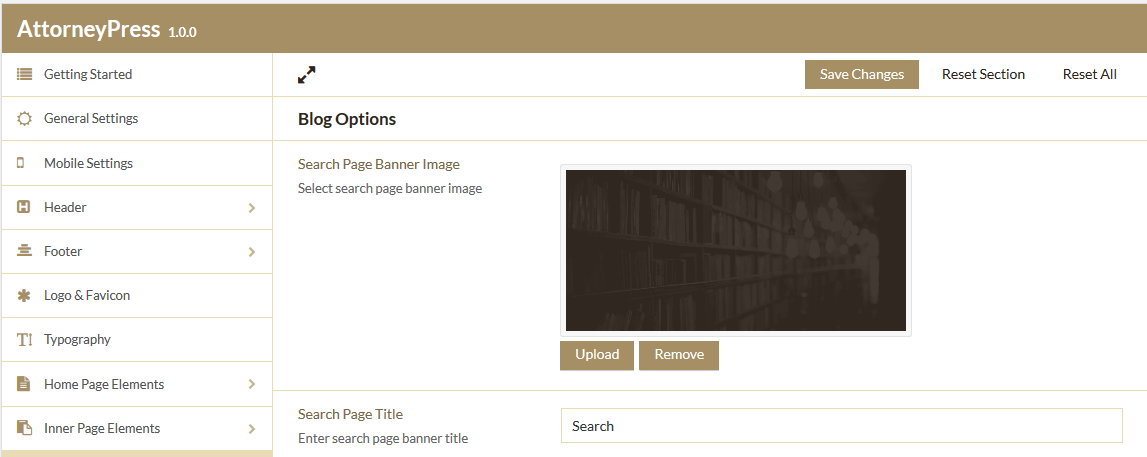
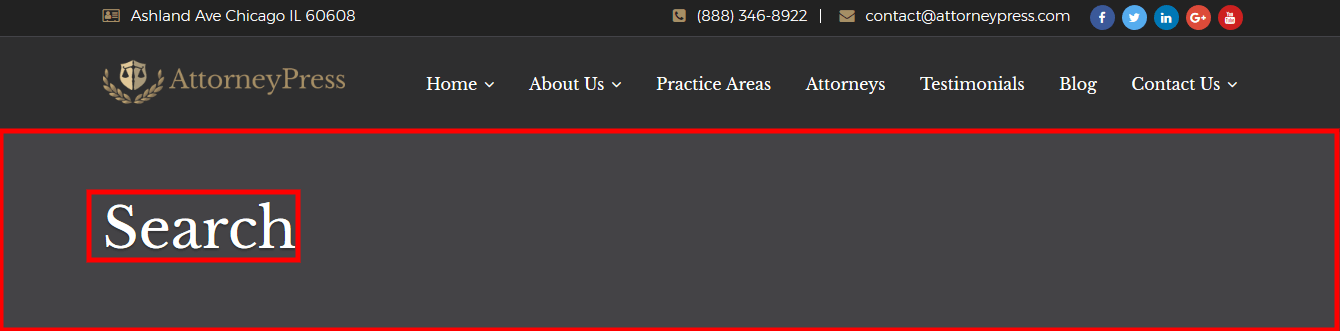
Now, if you search anything on search box in blog sidebar then you will get search result on search page. If you want to change banner image and banner title of search then you can do the same from ‘Search Page Banner Image’ and ‘Search Page title’:
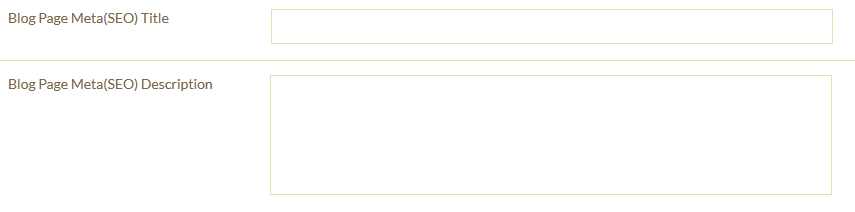
If you have in-built SEO plugin enabled, then you can put blog meta title and description like shown below.
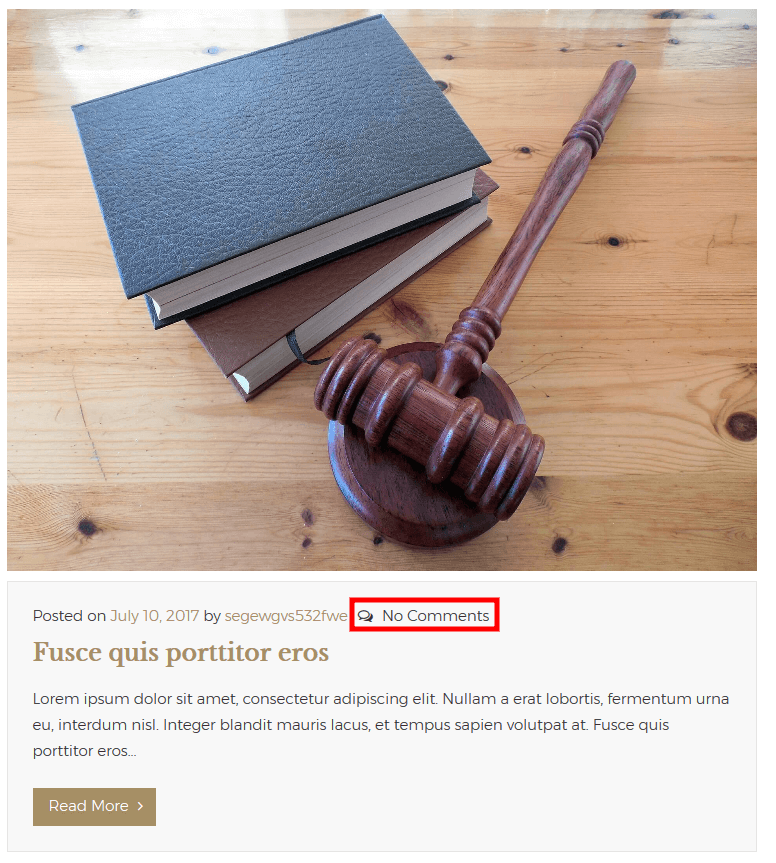
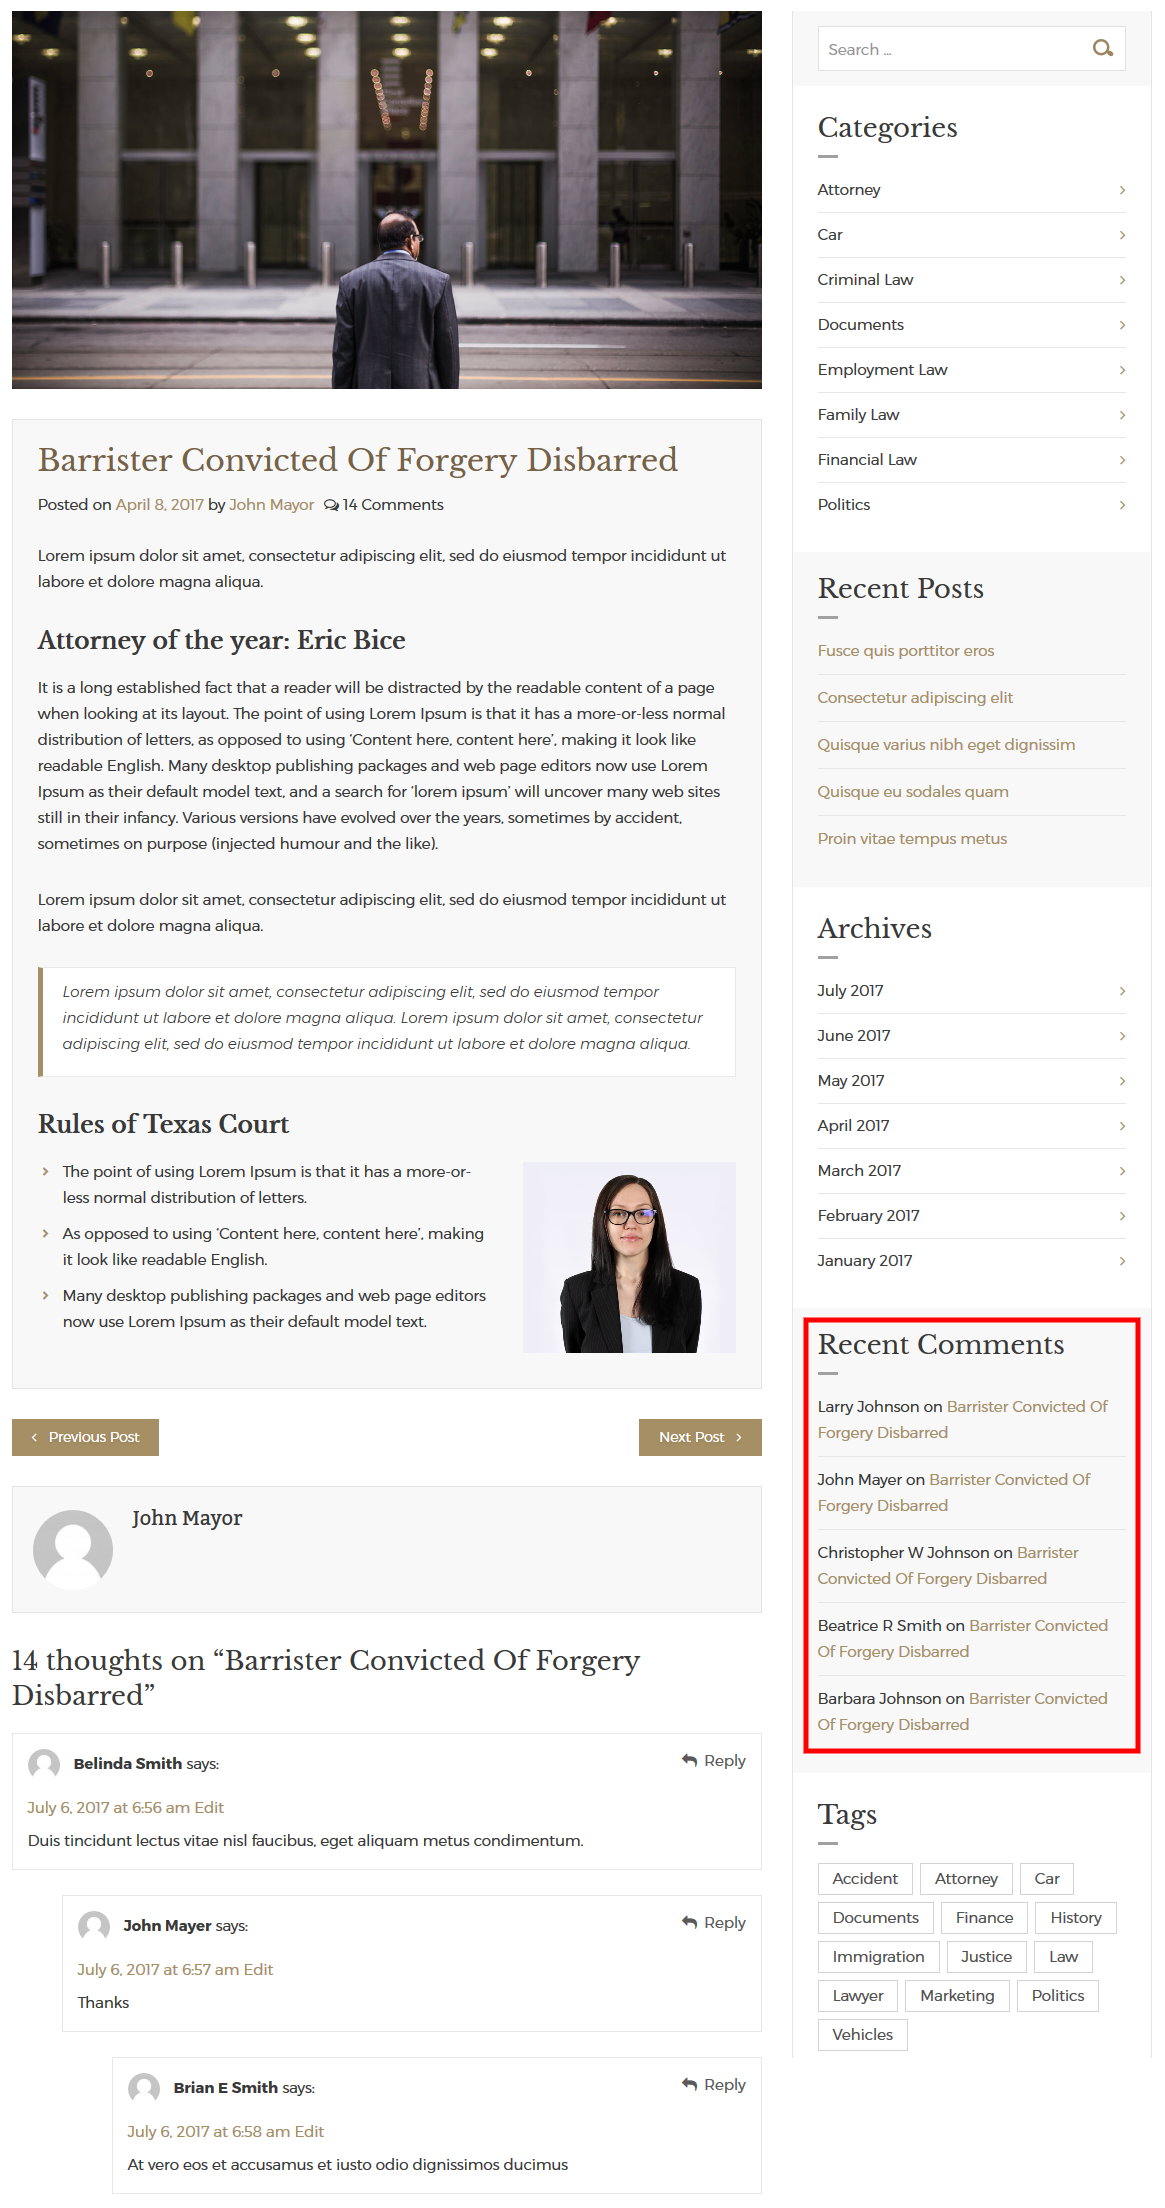
You can enbale/disbale comments for your blog. If you turn comments off then all comments for blog posts won't display.
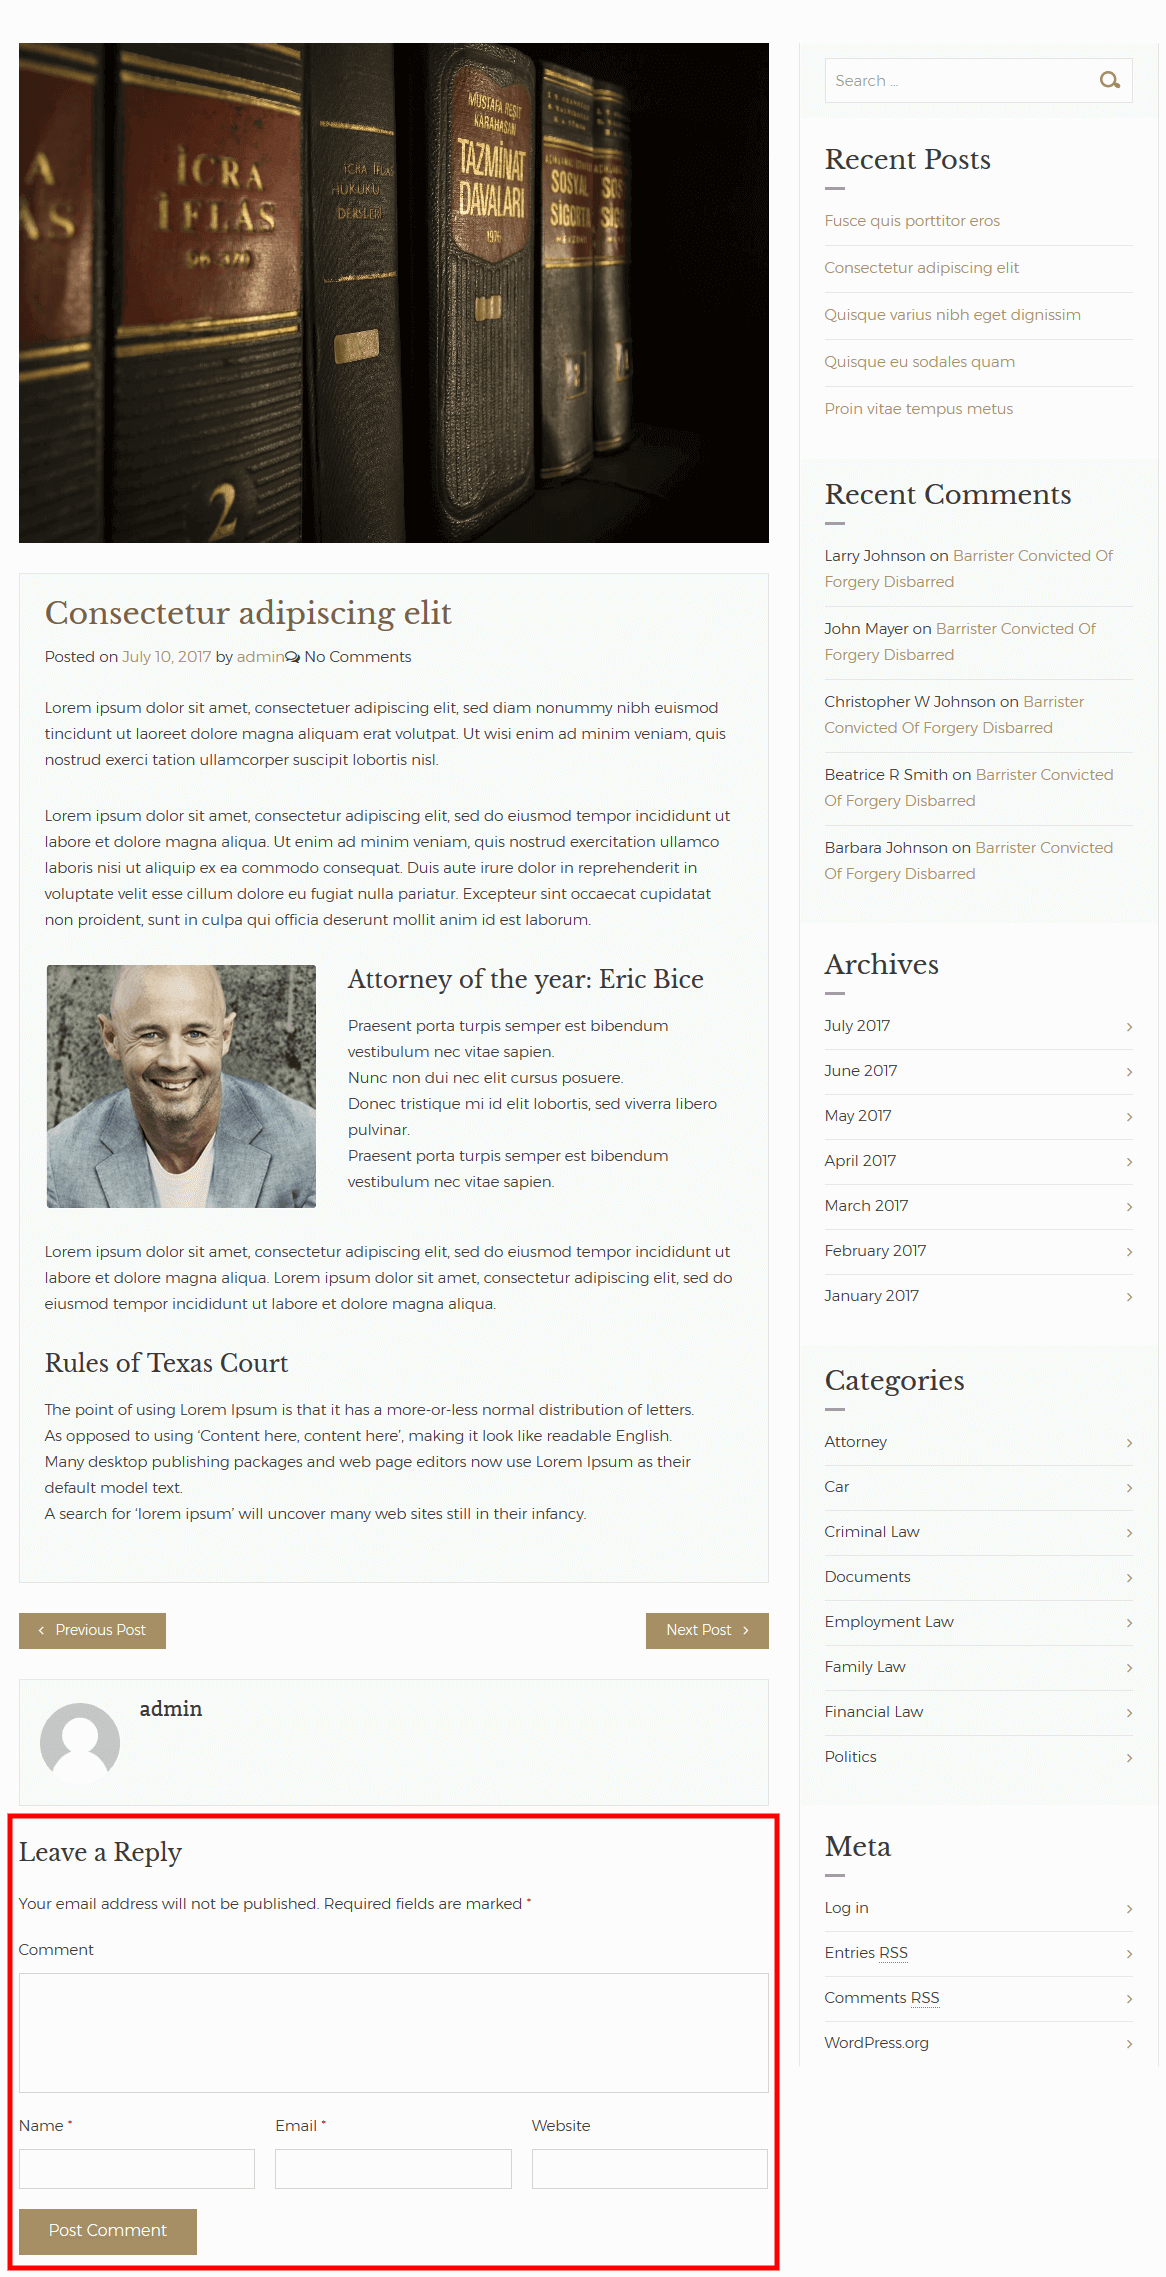
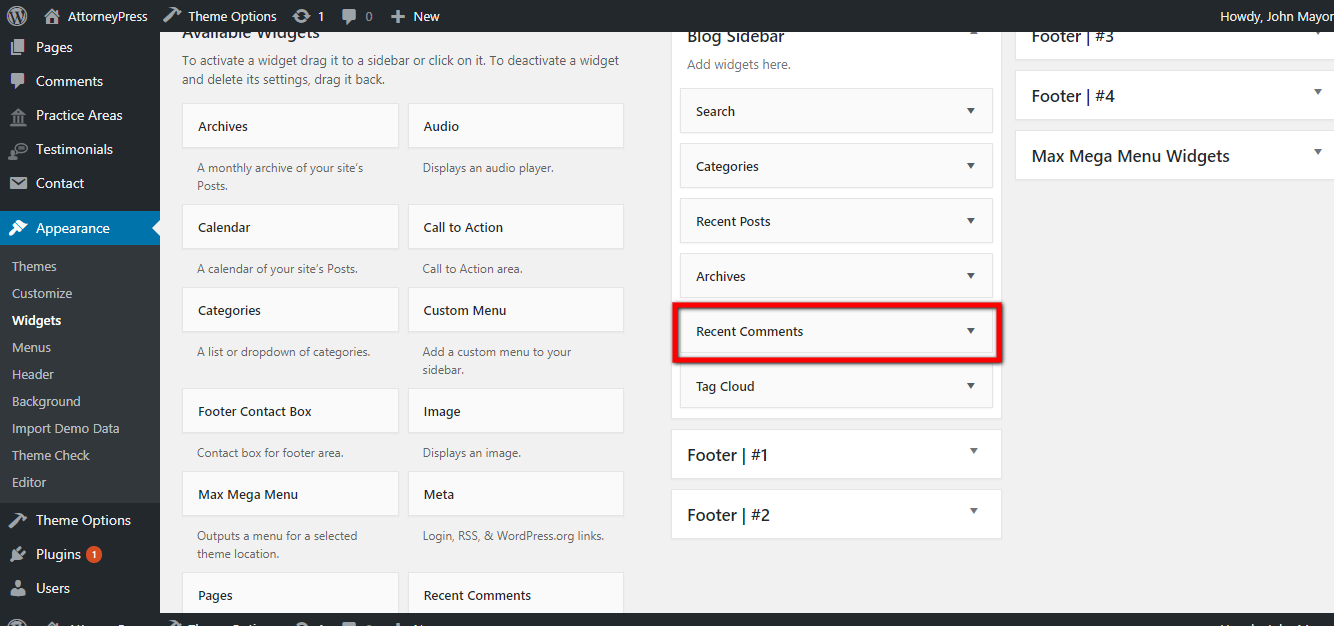
To disable comments from blog sidebar you need to remove ‘Recent Comments’ widget from ‘Blog Sidebar’.
Blog Typography
From 'Typography' option you can change font, font style, font size, line height, font color of blog.
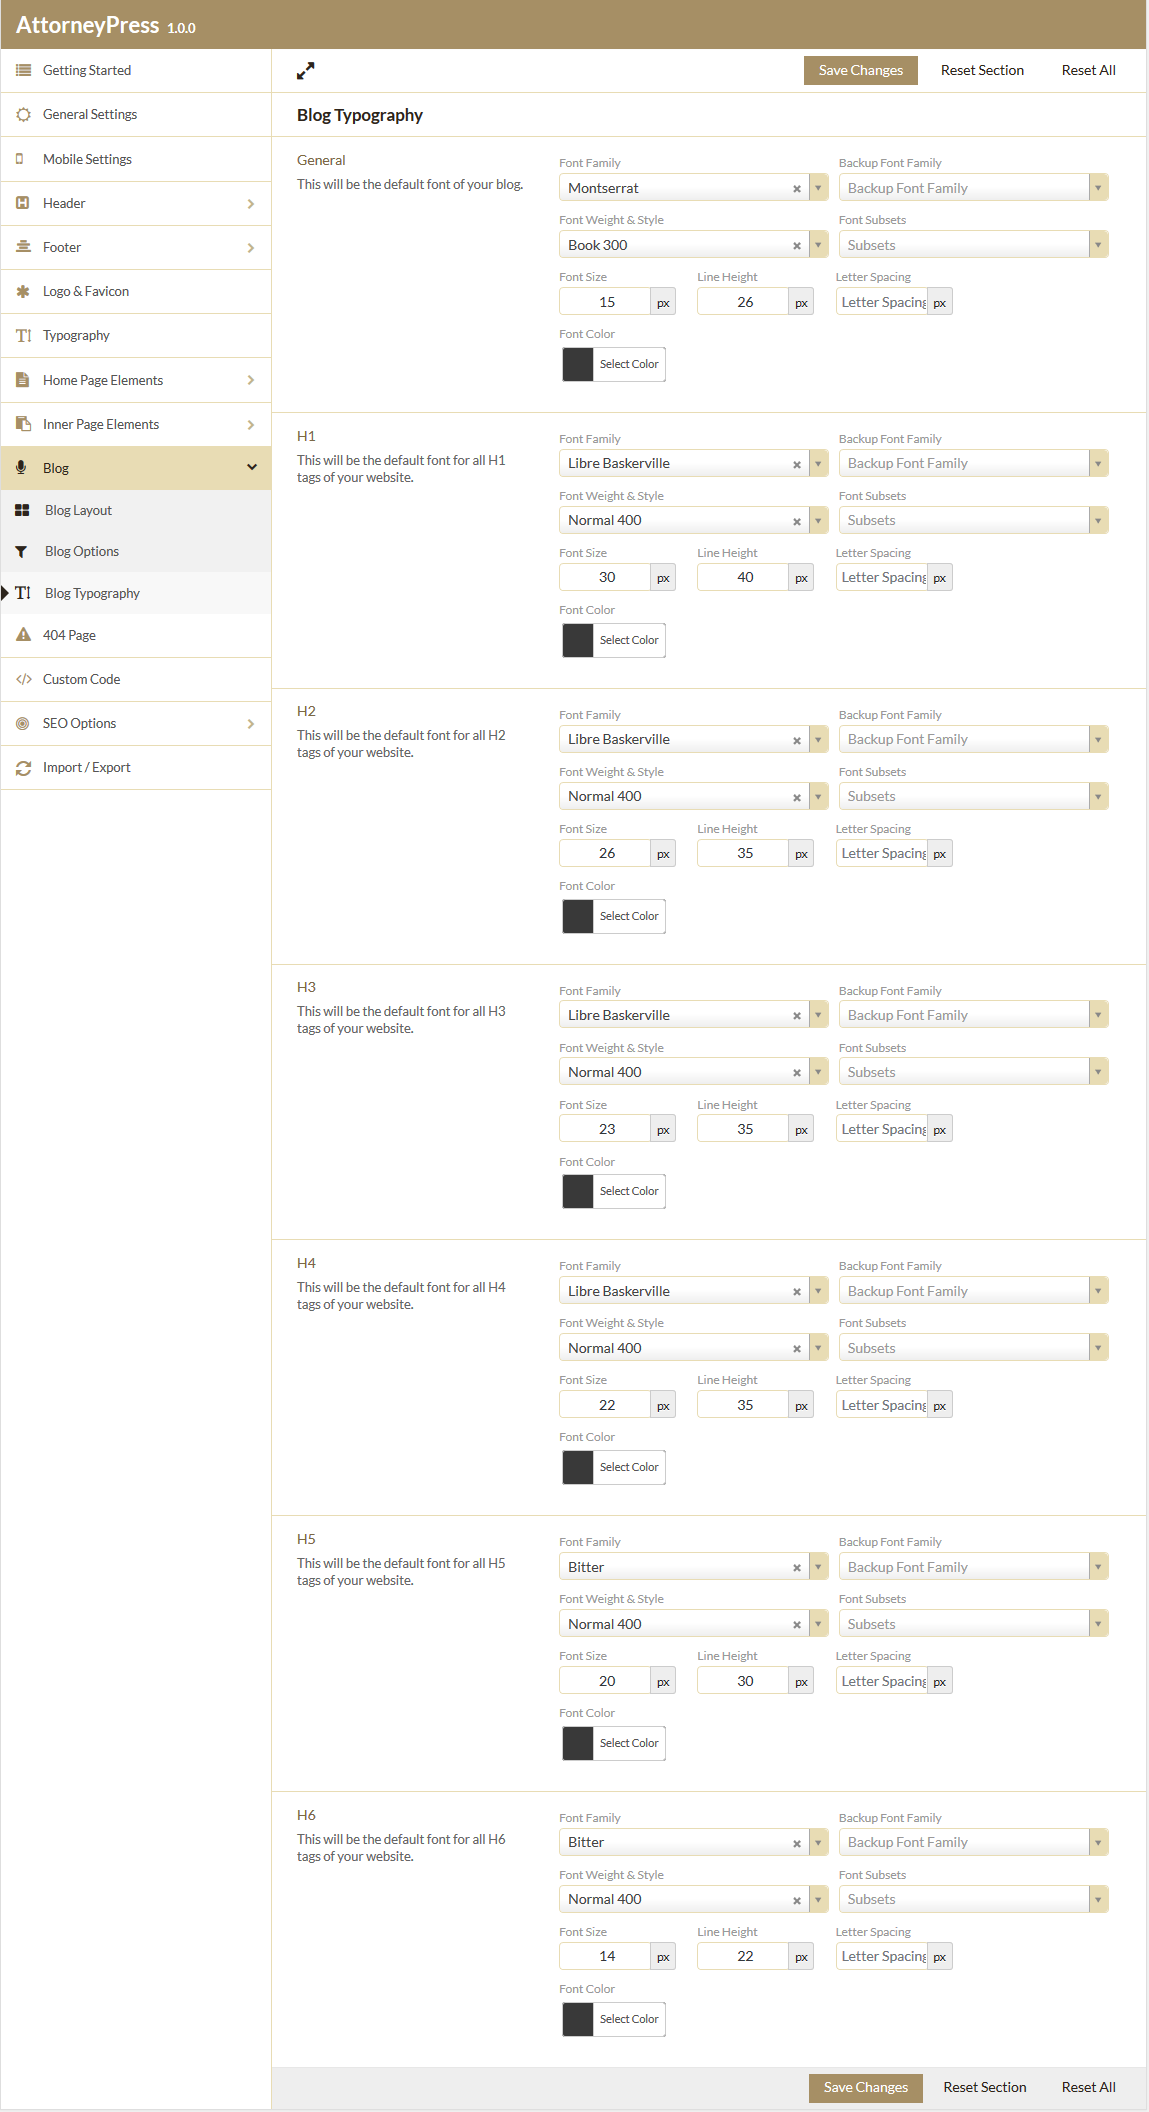
Here you can:
- Change 'General' Typography option. By changing details from here, default body text will be changed on your blog. Body text means only normal content (H1, H2, H3, H4, H5, H6). So, after changing from 'General' this type of body text will be changed
- Change H1, H2, H3, H4, H5, H6 styles. By changing details from there, heading tags will be changed on your blog. Like if you change details of H3 then H3 tags will be changed on blog.
Mobile Settings
From “Mobile Settings” you can change different options related to the mobile/tab view of our AttorneyPress Theme.
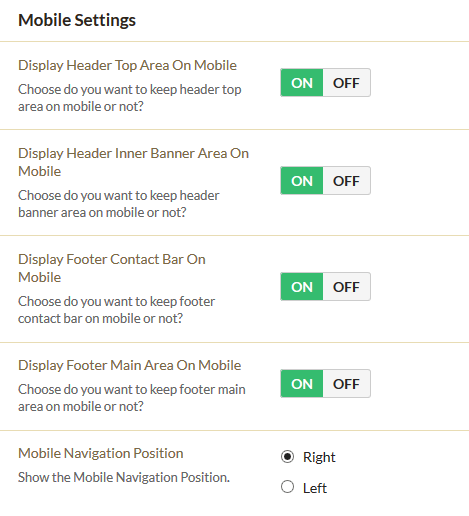
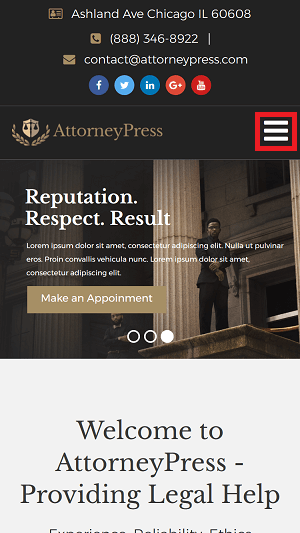
Display Header Top Area On Mobile
By default it’s set to Yes. If you don’t want to display the top header section then click on 'NO' option.
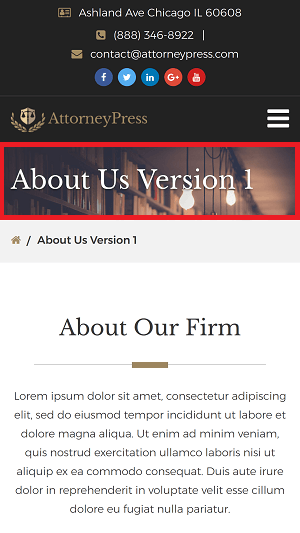
Display Header Inner Banner Area On Mobile
This option is for inner pages. If it's set to Yes then a Header Banner will show; if you don’t want to display header banner image on Inner pages then set this to No.
The banner image can be set from the featured image section in pages.
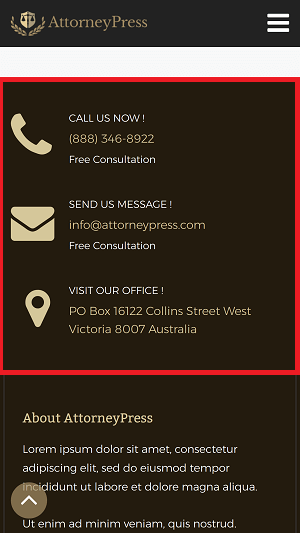
Display Footer Contact Bar On Mobile
By default it’s set to Yes, if you don’t want to show the Contact bar in the footer section then set it to No.
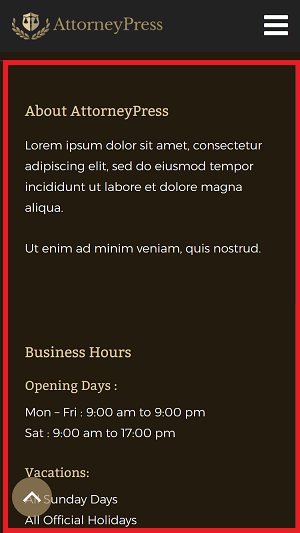
Display Footer Main Area On Mobile
By default it’s set to Yes, if you don’t want to show the Footer Main Area then set it to No.
Mobile Navigation Position
By default the mobile navigation bar is set to right, if you want to set it in the left click on the Left radio button.
Footer Options
From 'Footer' option, you can select footer layout, and edit all details of the footer.
You can select from two different footer layout styles.
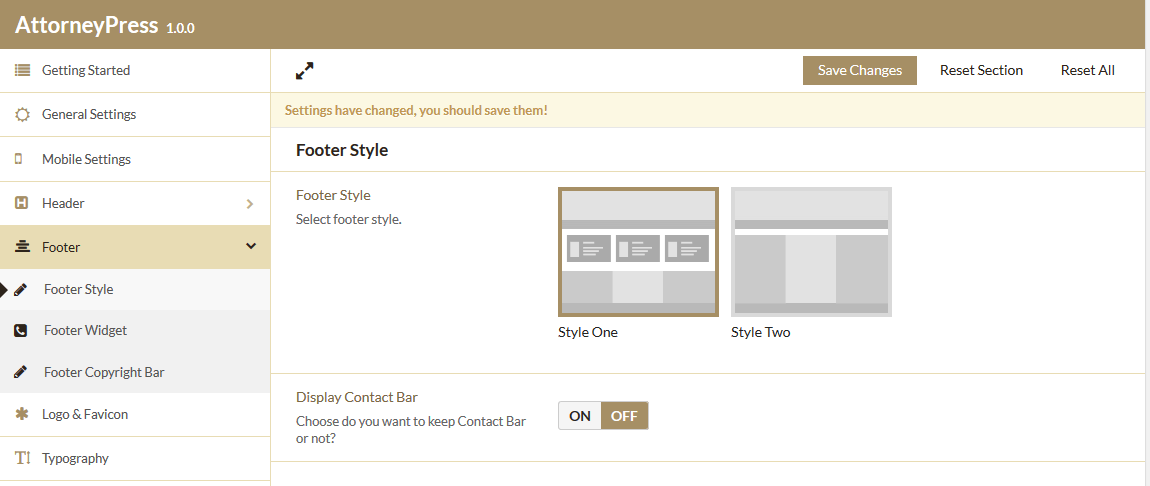
Style One
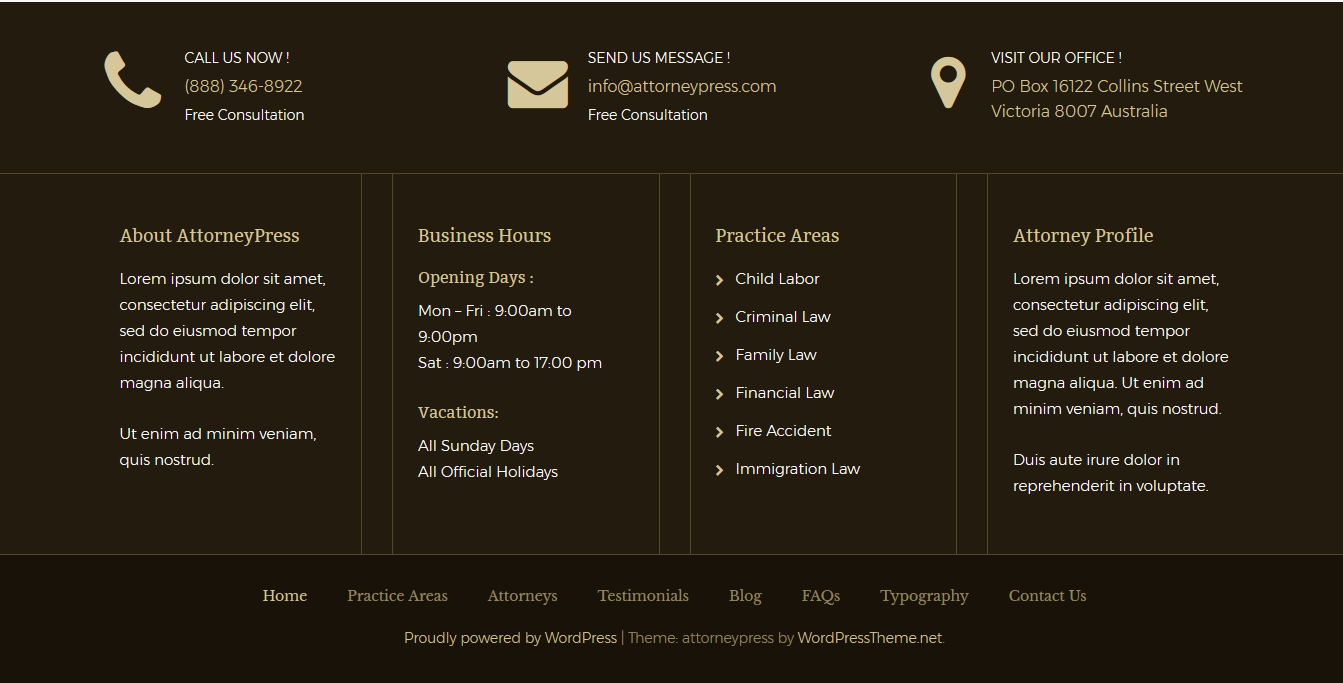
'Style One' consists of an optional contact block, an optional Widget Block which is a 4 column block having 4 Sidebars, a custom Footer Menu and a Copyright Text. Footer with 'Style One' looks like this:
1) Contact Block
The contact block will be automatically enabled when you select 'Style One'. But you can turn it 'on' or 'off'. You can change all details from here:
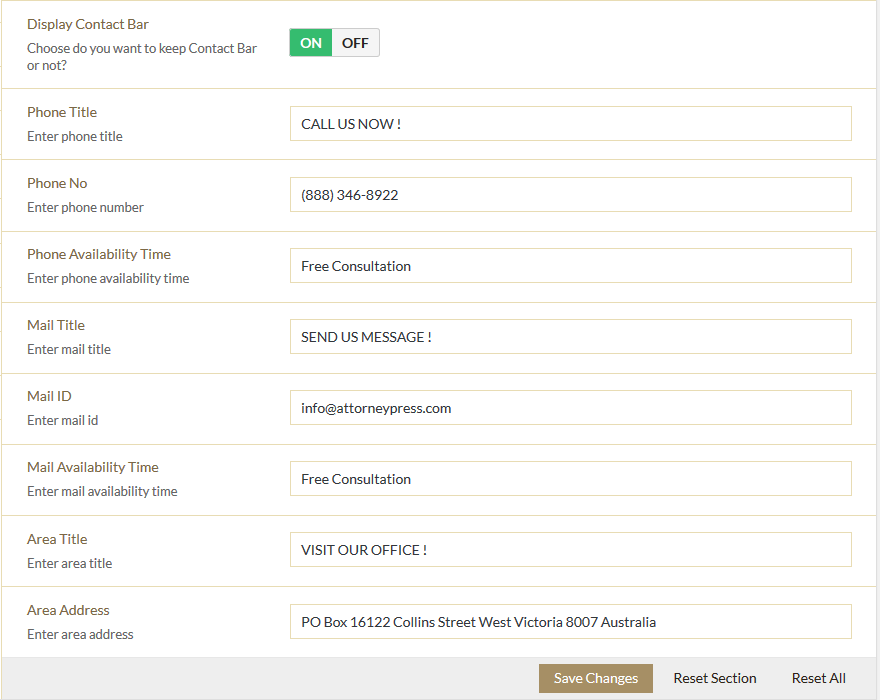
Contact block will be displayed in this manner:

2) Widget Block
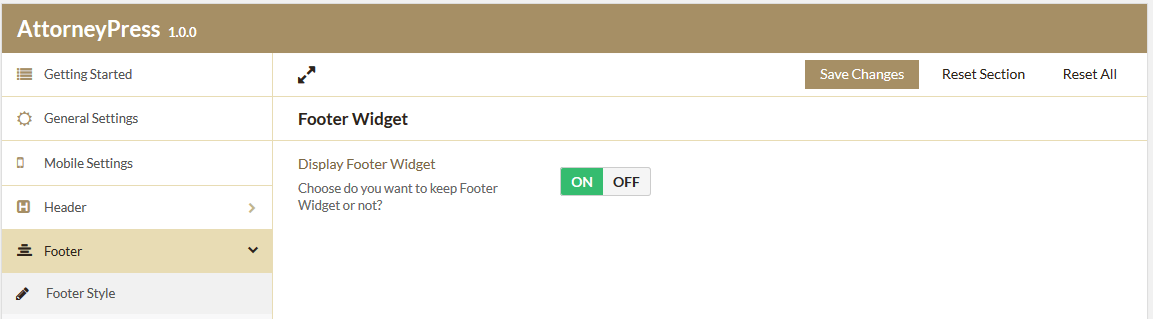
Similar to Contact block, Widget Block is optional. So, you can turn 'on' or 'off' from Theme Options > Footer > Footer Widget
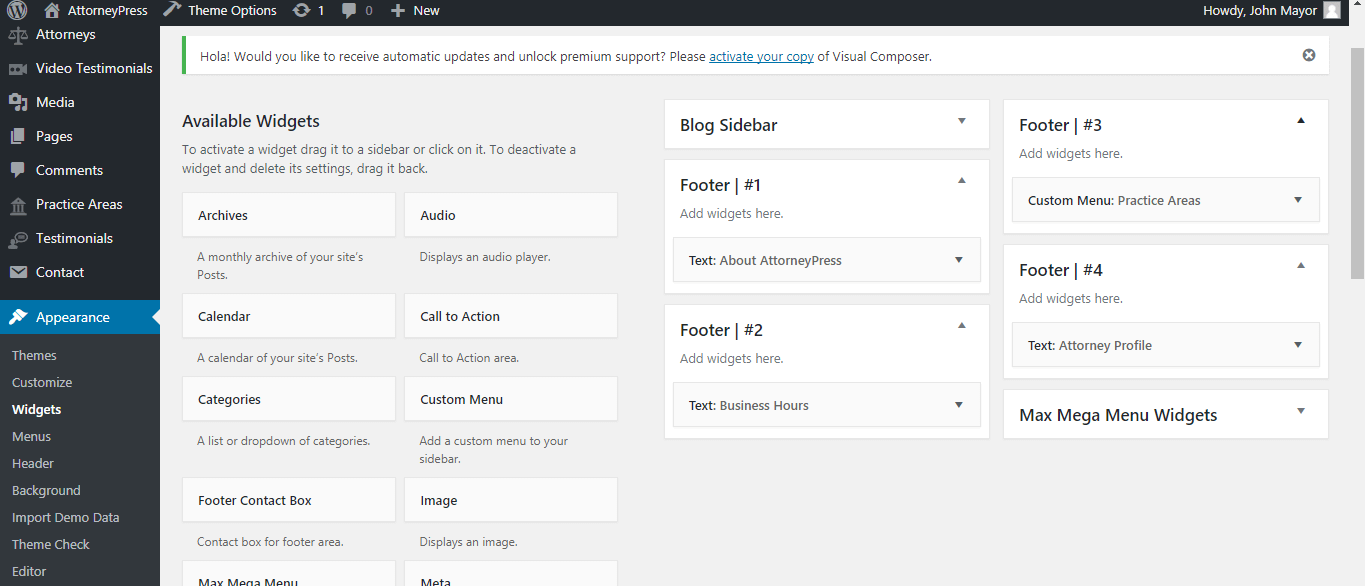
The Widget Section is a 4 column block having 4 Sidebars. To set up Widgets, navigate to Appearance > Widgets.
If you have used the 'One Click Import' to import the demo content, you will see there are 6 available sidebars. Out of these sidebars, "Footer | #1", "Footer | #2", "Footer | #3", "Footer | #4" are used for the Footer Widget Block.
"Footer | #1", "Footer | #2" and "Footer | #4" contains Text Widgets and "Footer | #3" contains a Custom Menu Widget.
You can however use any widget from the Available Widgets section and drag those widgets to Footer | #1 to Footer | #4 or click on the widgets from the Available Widgets section and then select the desired location.
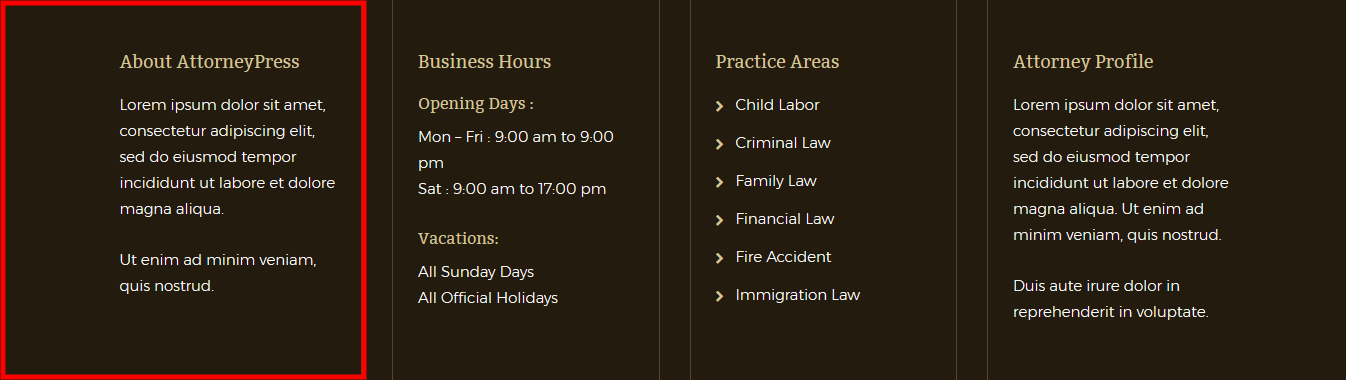
If you want to change the footer section from four columns to three columns, use three sidebars from "Footer | #1" to "Footer | #4"; similarly if you want two columns, use two sidebars from "Footer | #1" to "Footer | #4" and if you want 1 column, use one sidebar from "Footer | #1" to "Footer | #4".
So, each sidebar from "Footer | #1" to "Footer | #4" represents a column.
N.B.: If you want to add 'Text' widget(s) under any sidebar, you can follow the instructions mentioned below.
How to add a text widget?
- Go to Appearance > Widgets.
- There, you will get all widgets under 'Available Widgets'.
- Click on 'Text' widget and choose in which location you want your widget (any from "Footer | #1" to "Footer | #4").
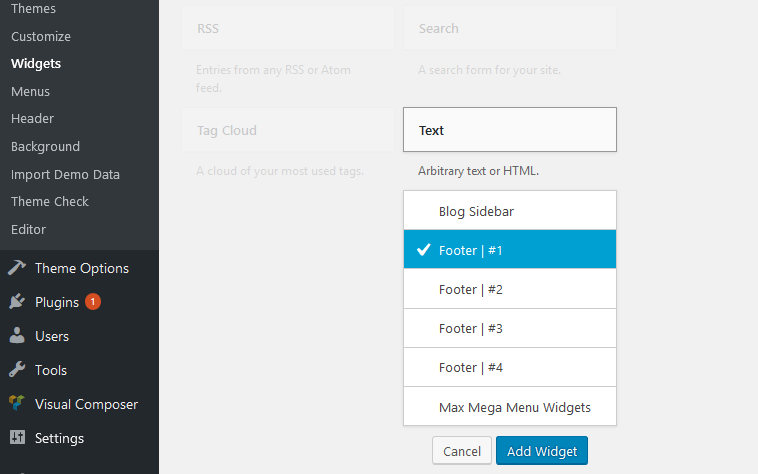
- Suppose, if you have selected your location as "Footer | #1" then widget would automatically come in sidebar "Footer | #1".
- Now you can add your title and content in your widget.
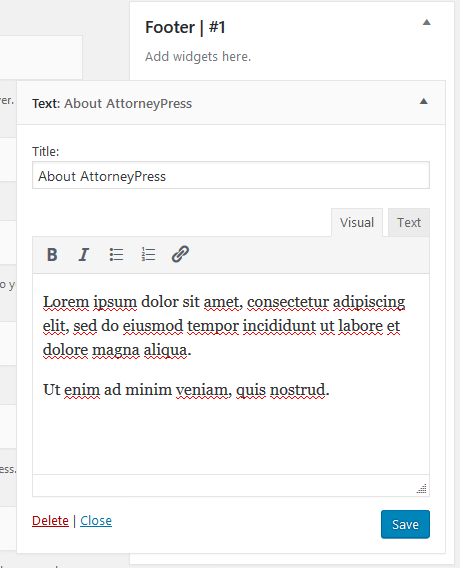
- Click on 'Save' button to save all the details.
Similarly, you can add other text widget(s).
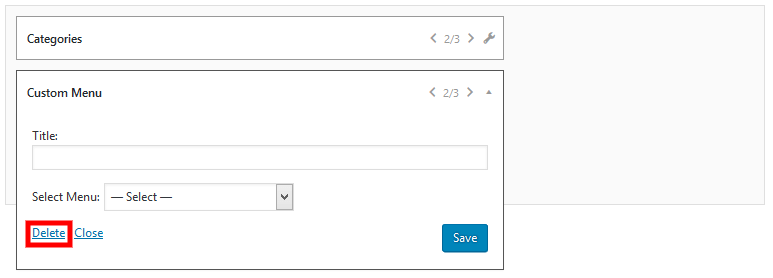
N.B.: If you want to add 'Custom Menu' widget(s) under any sidebar, you can follow the instructions mentioned below.
How to add a Menu widget?
1) Go to Appearance > Widgets
2) Click on 'Custom Menu' widget and choose in which location you want your widget (any from "Footer | #1" to "Footer | #4")
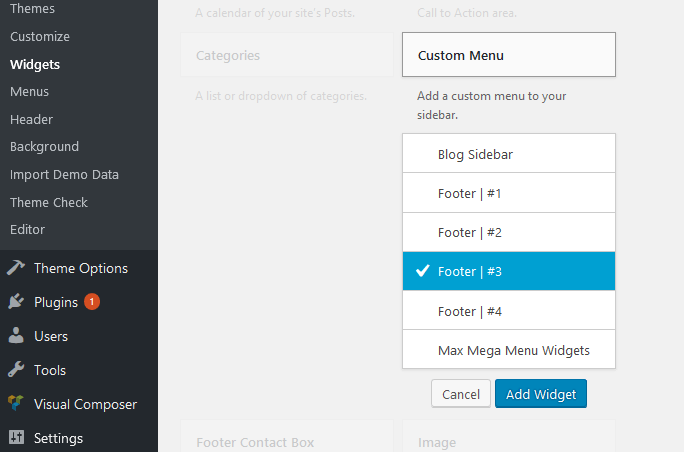
Suppose, if you have selected your location as "Footer | #3" then widget would automatically come in sidebar "Footer | #3".
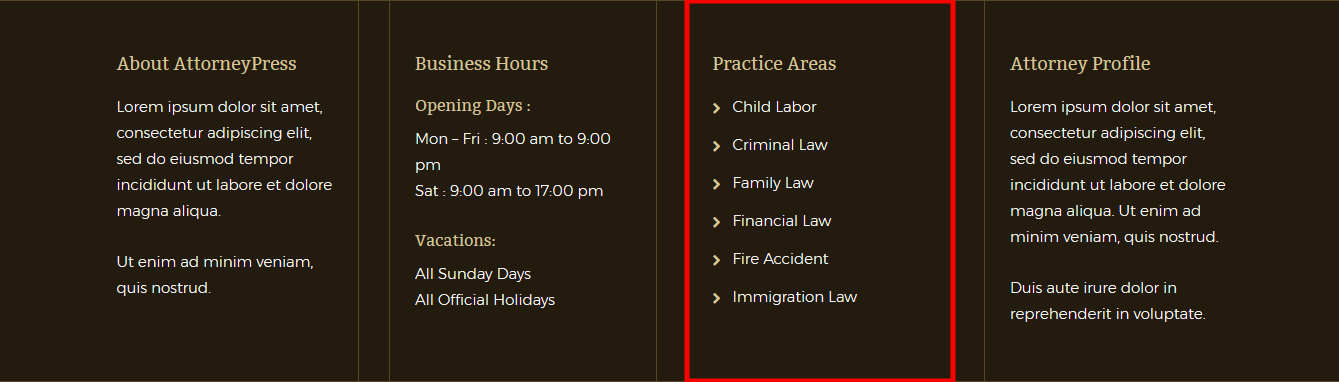
5) Now, you can add your menu and menu title in your widget. You will get multiple menu in 'Select Menu' dropdown field. You can select any one of them. For example, here we have used 'Practice Areas' menu with 'Practice Areas' title. Similarly, you can also use 'Attorneys' menu with 'Attorneys' title or for that matter, any other title you want.
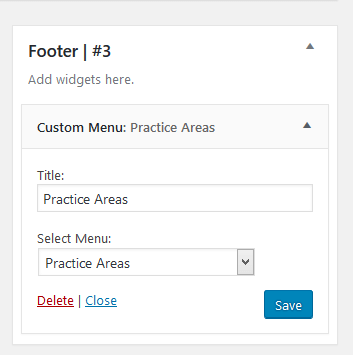
6) Click on 'Save' button to save all the details.
Custom menu widget will be displayed in this manner:
Now, if you turn off the 'Contact Block' and instead of that you want same contact details as widget, then you need to use the 'Footer Contact Us' widget which is specially created by us. Here, we've provided the steps to add 'Footer Contact Us' widget:
1) Go to Appearance > Widgets
2) There you well get lots of widget under 'Available Widget'
3) Click on 'Footer Contact Box' widget and choose in which location you want your widget (any from "Footer | #1" to "Footer | #4")
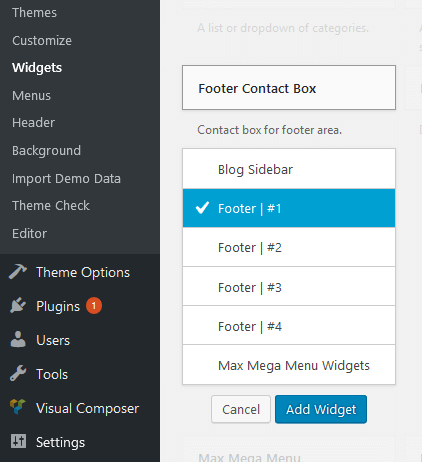
Suppose, if you have selected your location as "Footer | #1" then widget would automatically come in sidebar "Footer | #1".
5) Now you can add all of your contact details in your widget
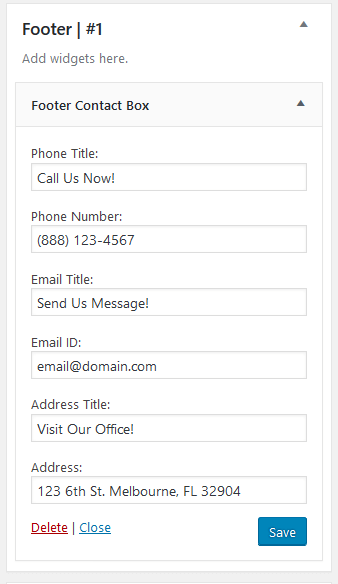
6) Click on 'Save' button to save all the details. By clicking on 'Delete' you can 'Delete' option, you can delete this specific widget.
Footer contact box will be displayed in this manner:
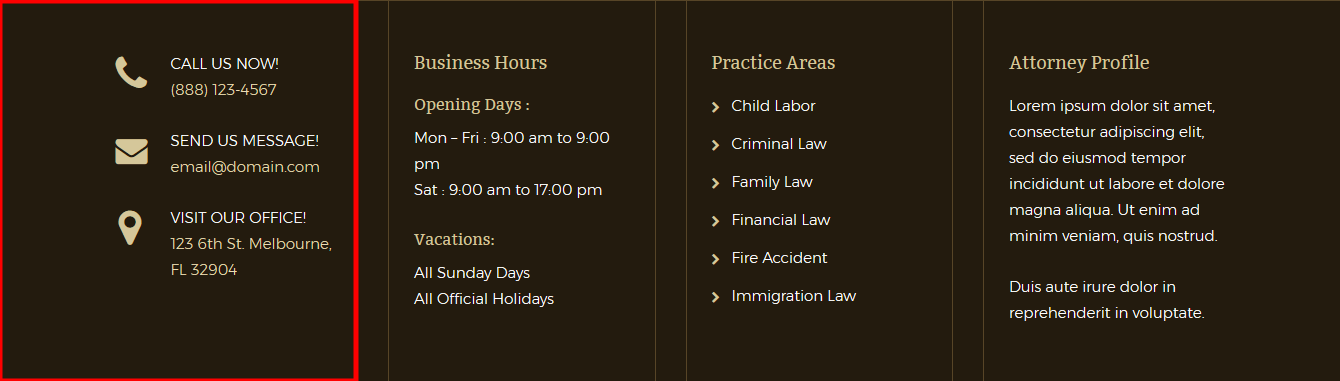
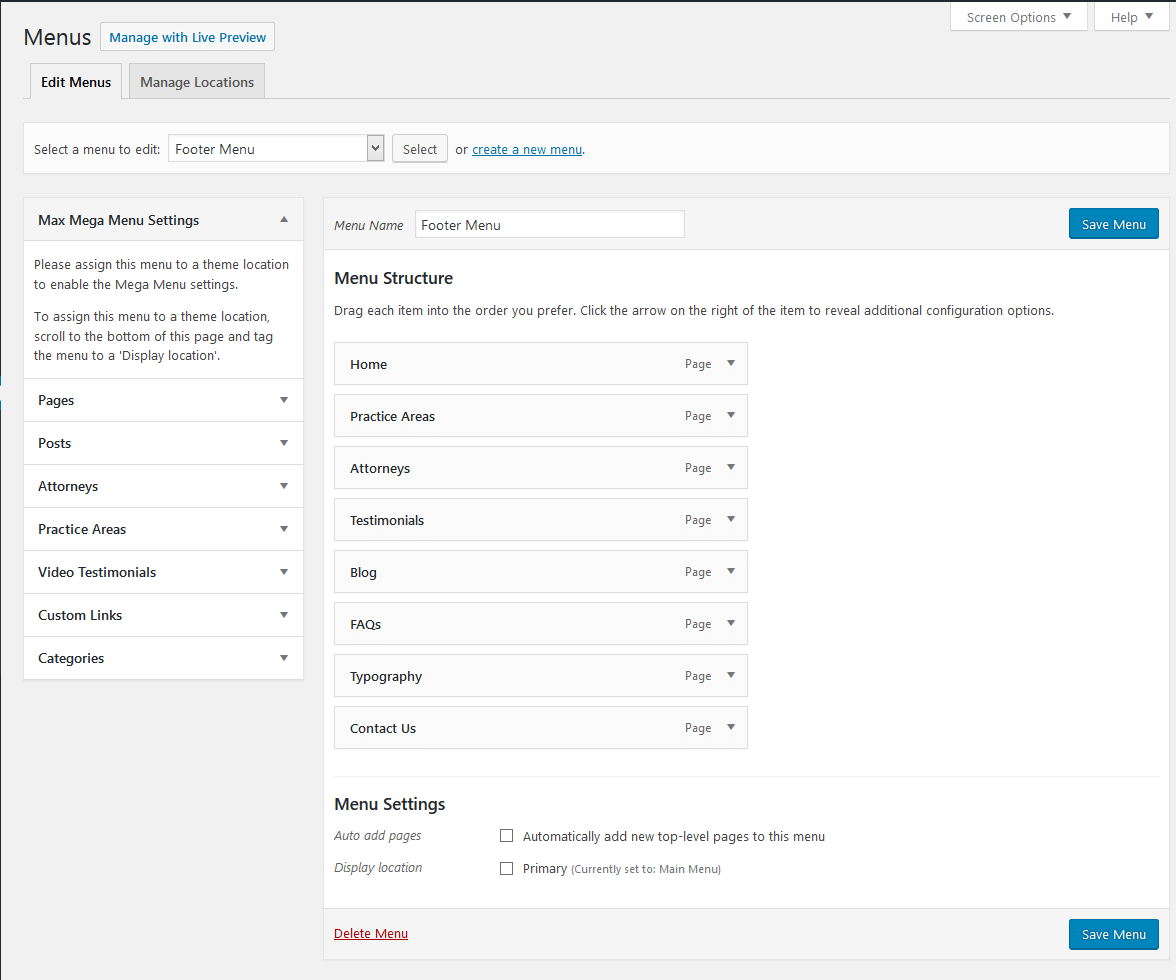
3) Custom Footer Menu
Under the Footer Section Block, there is a custom menu with menu name as "Footer Menu". To change the menu items, please navigate to Appearance > Menus and select the "Footer Menu" from the dropdown with label "Select a menu to edit". Here you can add or remove any menu items. (You will get proper tutorial to manage menus in 'Setup Menu & Submenu' section)
Footer custom menu will be display in this manner:

4) Footer Copyright Bar
To add or edit the Footer Copyright Text, navigate to Theme Options > Footer > Footer Copyright Bar and edit the "Copyright Text" field.
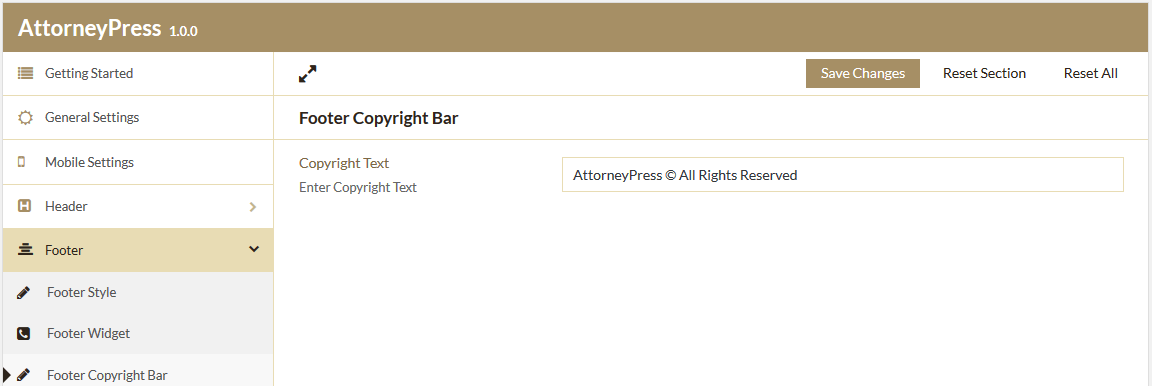
Copyright Text will be displayed in this manner:

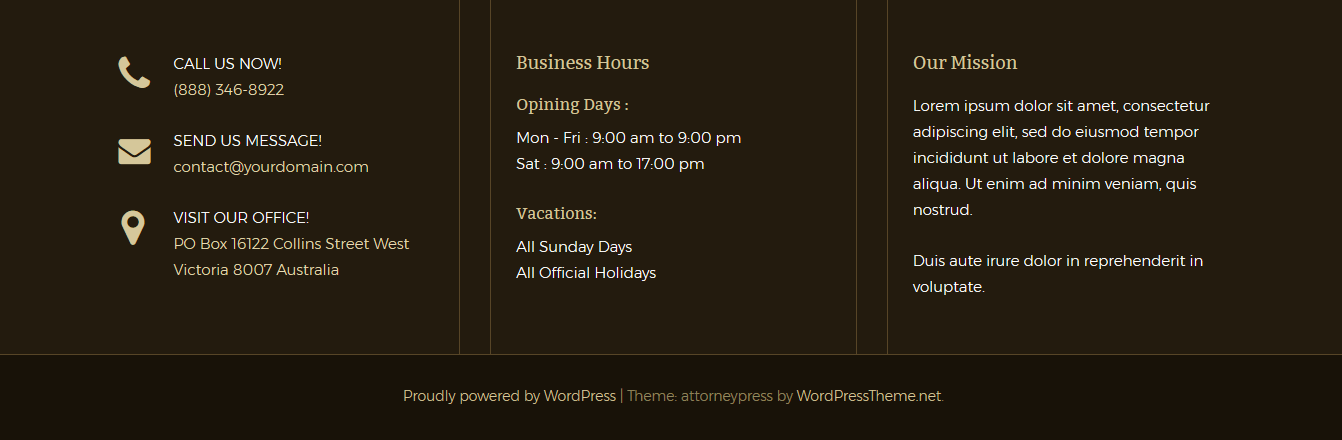
Style Two
'Style Two' consists of an optional Widget Block and a Copyright text. You can change these by following same tutorial of 'Style One'.
Footer with 'Style Two' will be displayed in this manner:
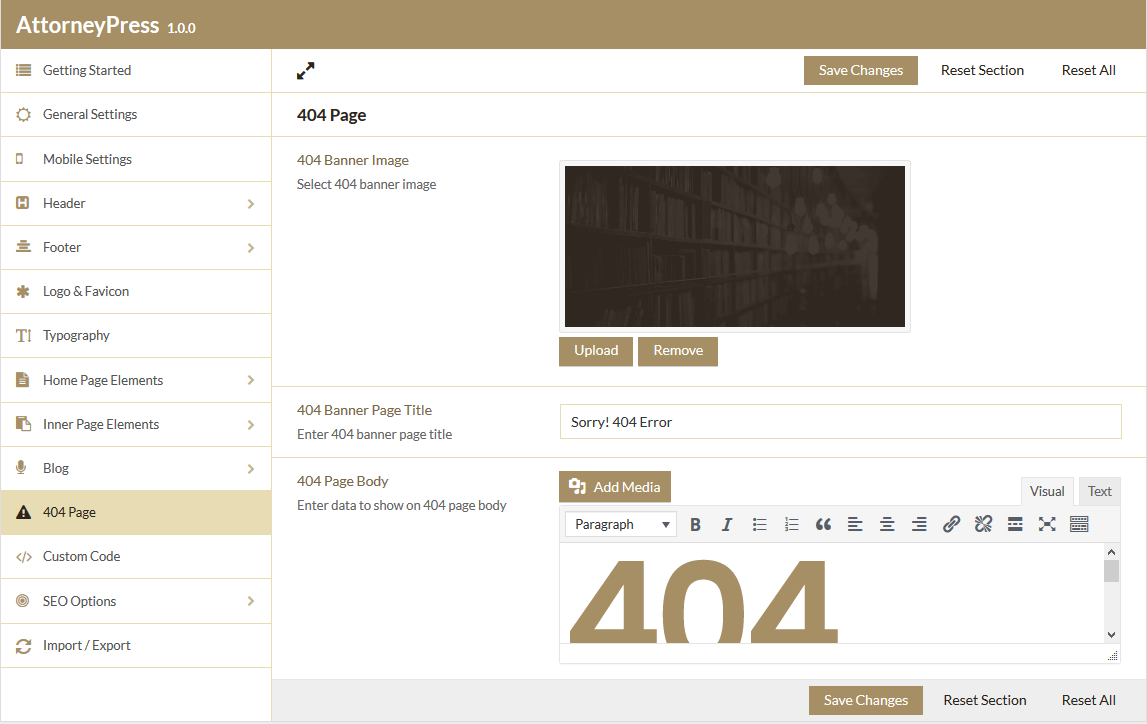
Setting Up 404 Page
You can manage 404 page banner details and content from Theme Options > 404 Page. You can add 404 banner from ‘404 Banner Image’, banner title from ‘404 Banner Page Title’ and page content from ‘404 Page Body’:
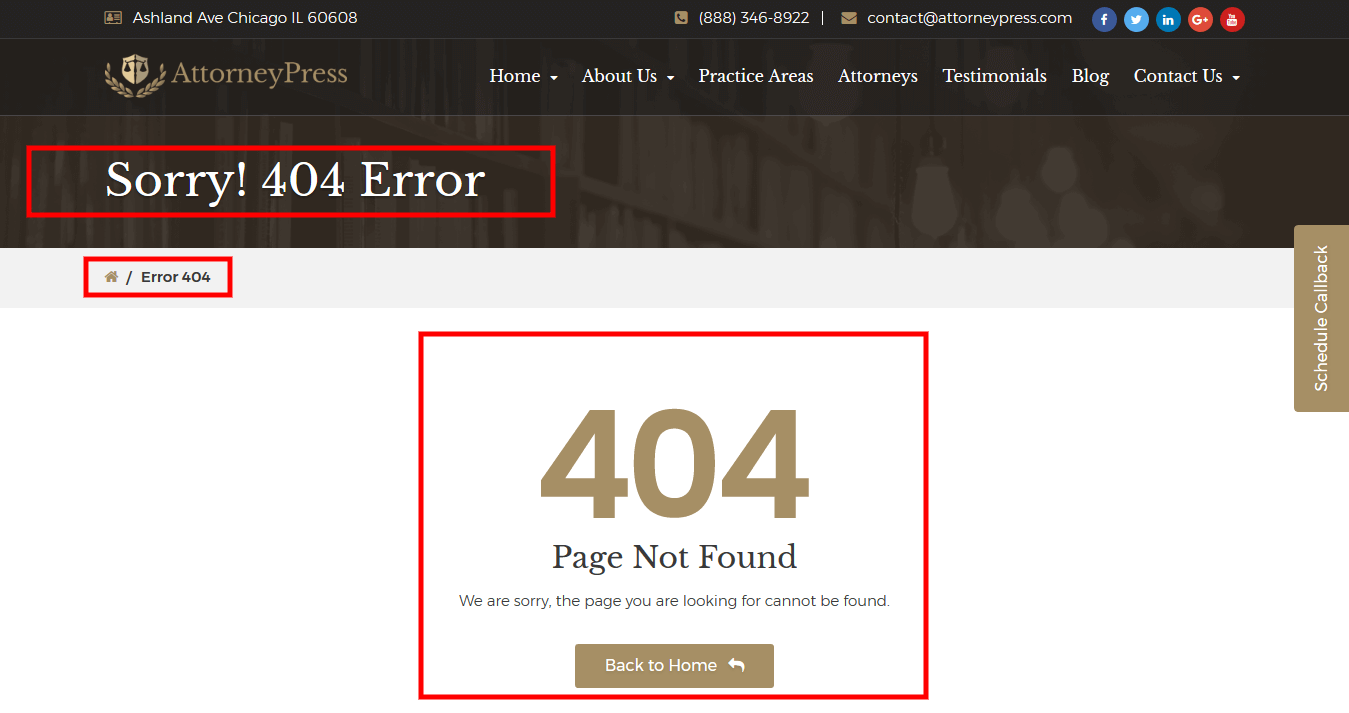
404 display view will be like this:
SEO Options
If you have installed and activated our recommended plugin “WordpressTheme SEO” which is bundled with our AttorneyPress theme, then only you can use this section.
SEO Fields
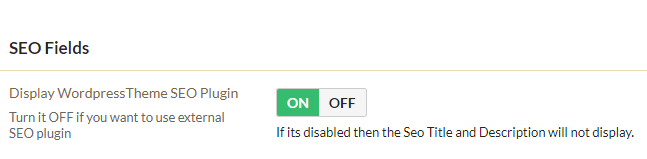
This is used for displaying SEO Title, Description and Meta Robot of all the Pages, Posts, Custom Post Types (Attorneys, Practice Areas, Testimonials) & in Category pages.
To add SEO Title, Description and Meta Robot in Pages navigate to Pages; then either create a new Page by clicking on “Add New” button or select a already created page and navigate to the bottom of the page to the metabox titled “WordpressTheme SEO Options”.
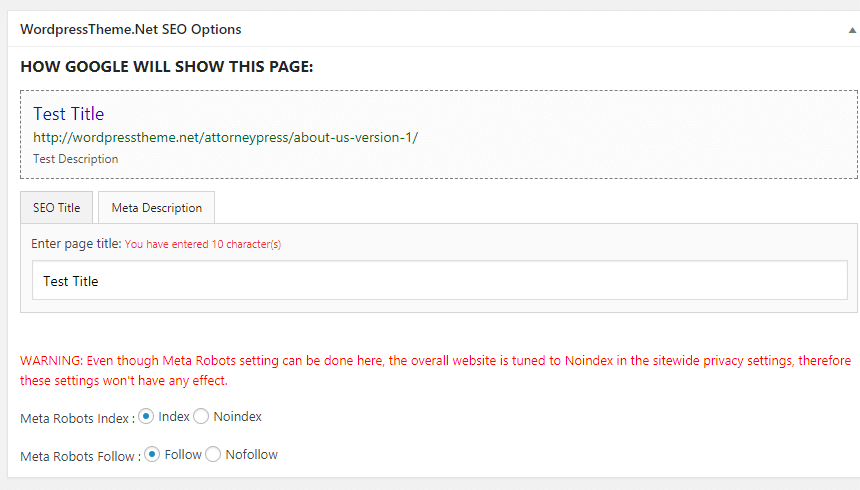
In the SEO Title tab, enter Title and Description in the Meta Description tab respectively. Then choose the meta robots option according to your preference.
If you leave the SEO Title empty, the “%Page name% - %Site Title%” will be used as the Title.
This is same for Posts and Custom Post types.
For Category please navigate to Posts > Categories.
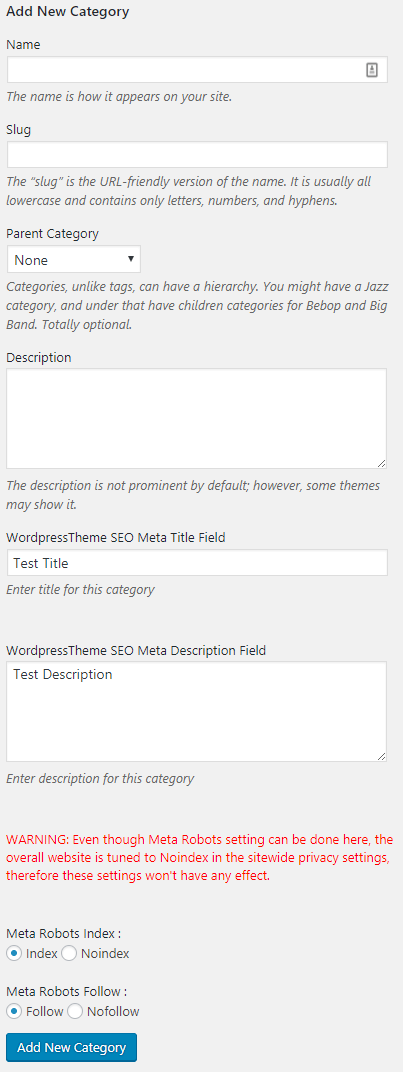
In the Add New Category section enter the title in “WordpressTheme SEO Meta Title Field”, description in “WordpressTheme SEO Meta Description Field” and choose the meta robots.
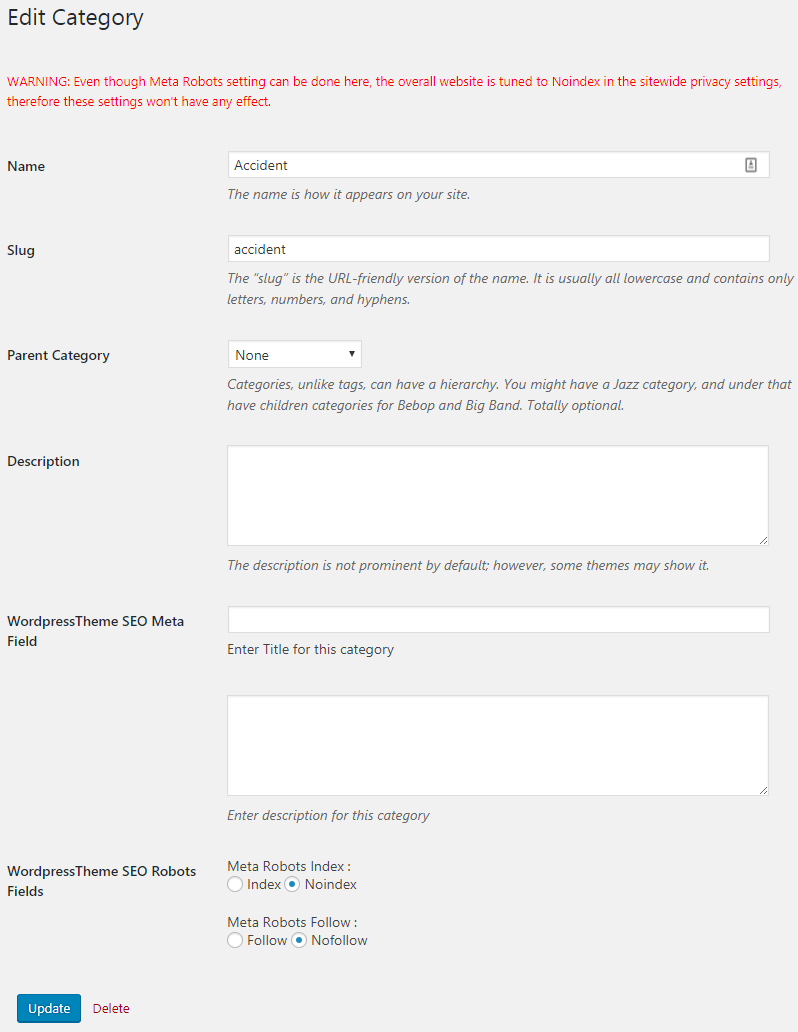
For already created category navigate to Posts > Categories then select a category and there enter the title in “WordpressTheme SEO Meta Title Field”, description in “WordpressTheme SEO Meta Description Field” and choose the meta robots.
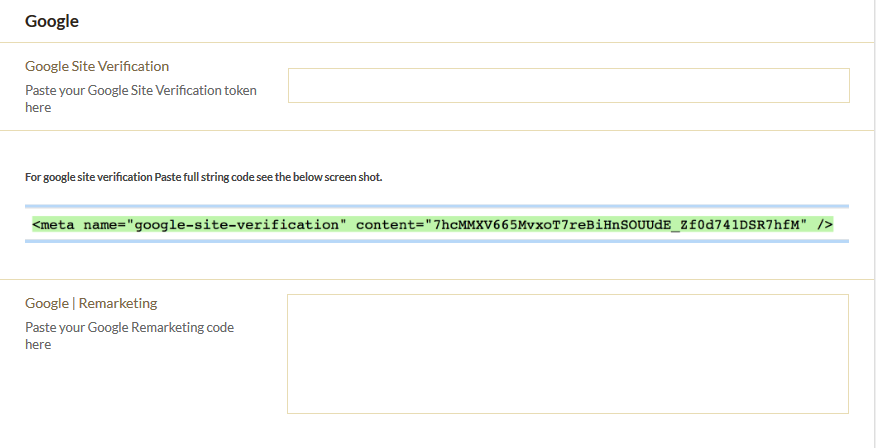
You can add Google Site Verification Code and Google Remarketing from this section.
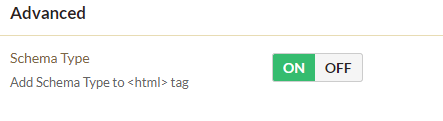
Advanced
Here you have the option to enable or disable Schema Type to <html> tag.
XML Sitemaps
As the name suggests, with this option you can generate XML sitemaps for your site. If you want to exclude some posts or pages or any custom post types, just enter a comma separated string with the Post ID.
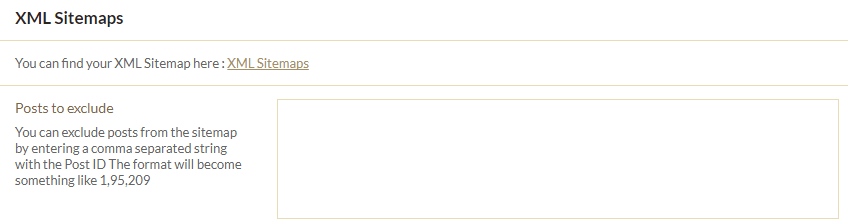
To know the ID of a post or page or custom post type visit the edit page of a post or page or custom post type and check out the URL. It should look something like this:
https://yourwebsite.com/wp-admin/post.php?post=137171&action=edit
The 137171 in the example above is the ID of the post. But if it's a bit difficult you can also install Reveal ID’s. It show the ID of posts, pages, users, categories, custom taxonomies, custom post types and so on
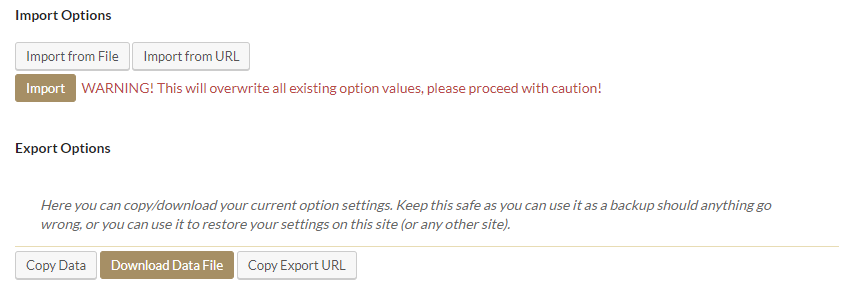
Import/Export
From the "Theme Options" section, you can Import/Export all the values. In any case, you want to restore the entire "Theme Options" portion, you can do it easily from the Import/Export section.
Note: After dummy data import you don’t have to export/import as while importing these values will also be imported.
Plugins
Please read the topics below to learn more about installing/updating WordPress Plugins.
Plugins Installation
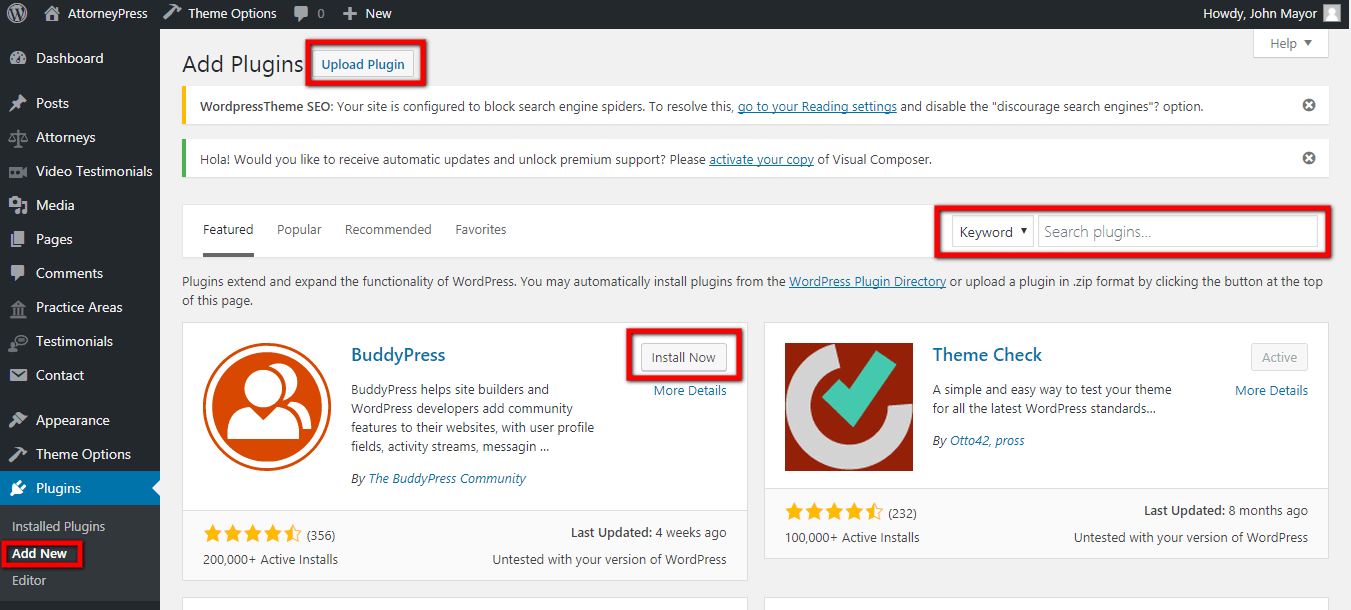
How to Install Plugins?
Highly suggested plugins installation interface is shown below. You can search for plugins by typing in the keyword box. Once the plugin matches, it's ready to install by clicking on the “Install Now” button.
Premium “Pre Packed” plugins documentation is now available here:
- AttorneyPress post types (Custom post types in AttorneyPress to be enabled by Core Plugin)
- Slider Revolution
- Visual Composer
You may find these links useful:
Slider Revolution
Check nice video tutorial to understand how Slider Revolution works.
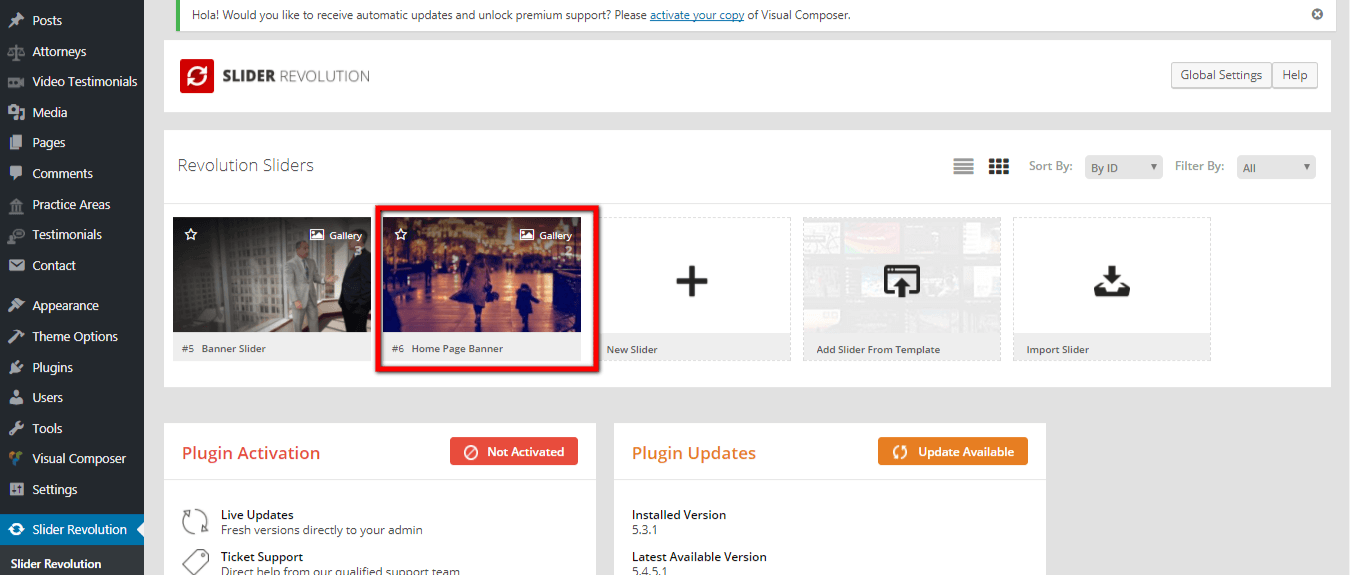
1. Creating Slider
Slider Revolution will let you create custom banners with arbitrary number of images as well as with various other animation options.
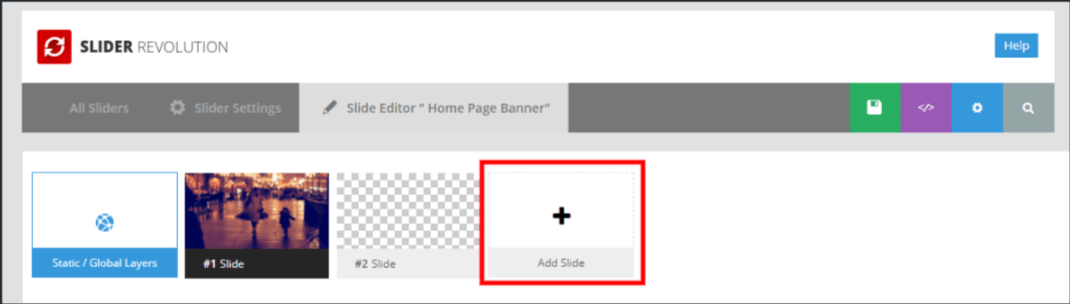
To create a slider, user must go to Slider Revolution. To add new slider, you must click on Add Slider.
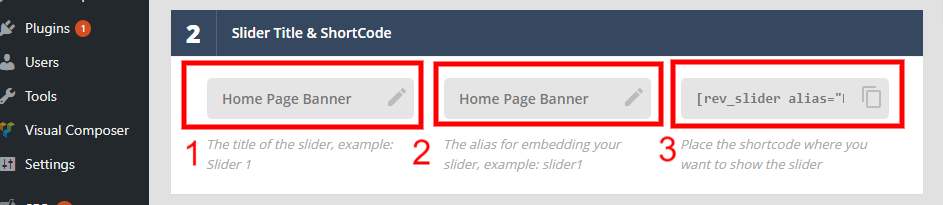
2. Add Slider details
Once you create a slider, you must specify a name and an alias for it. Here, box 1 is supposed to be slider name, box 2 should be alias for the slider and box 3 will have an auto generated short-code which can be used in pages to call the slider.
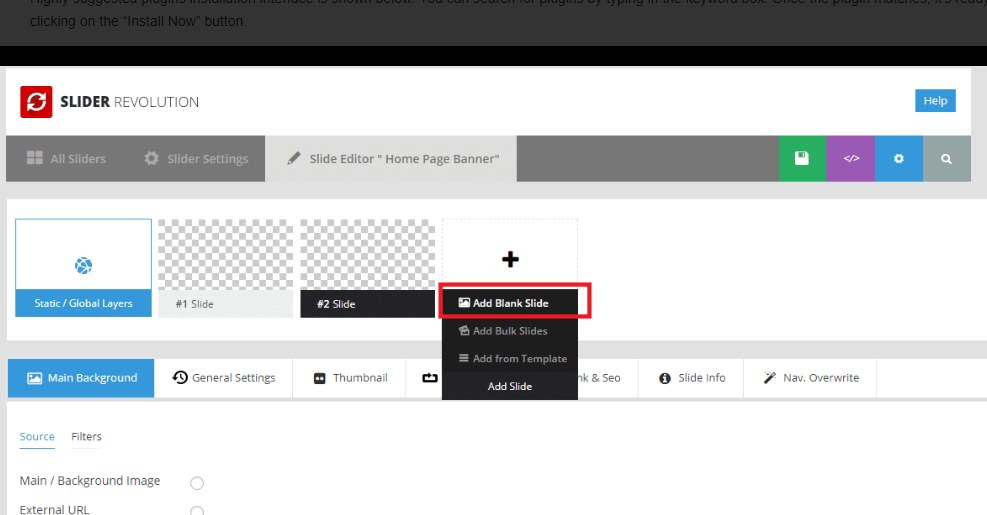
3. Add slides to Slider
Once a slider is created, now we need to create each slide with custom image, text, animation and styles. We need to create a new slide or edit the existing one. To create slide, hover over Plus sign and click on Add Blank Slide.
4. Add Image background to Slides
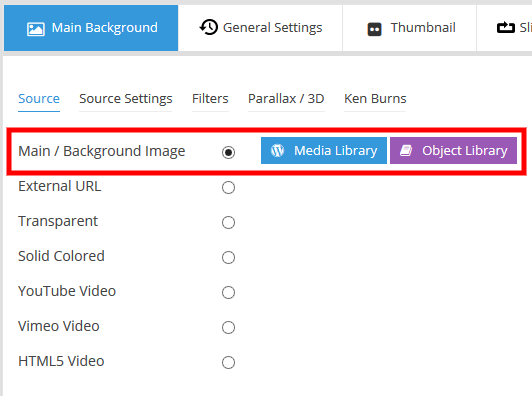
In each slide you can set up a background image. You need to go to Main/background image and check the radio box and click on Media Library.

A popup will appear with the choice of all uploaded images. Select an image and click on Insert. You may also upload new image from Upload Files Tab.
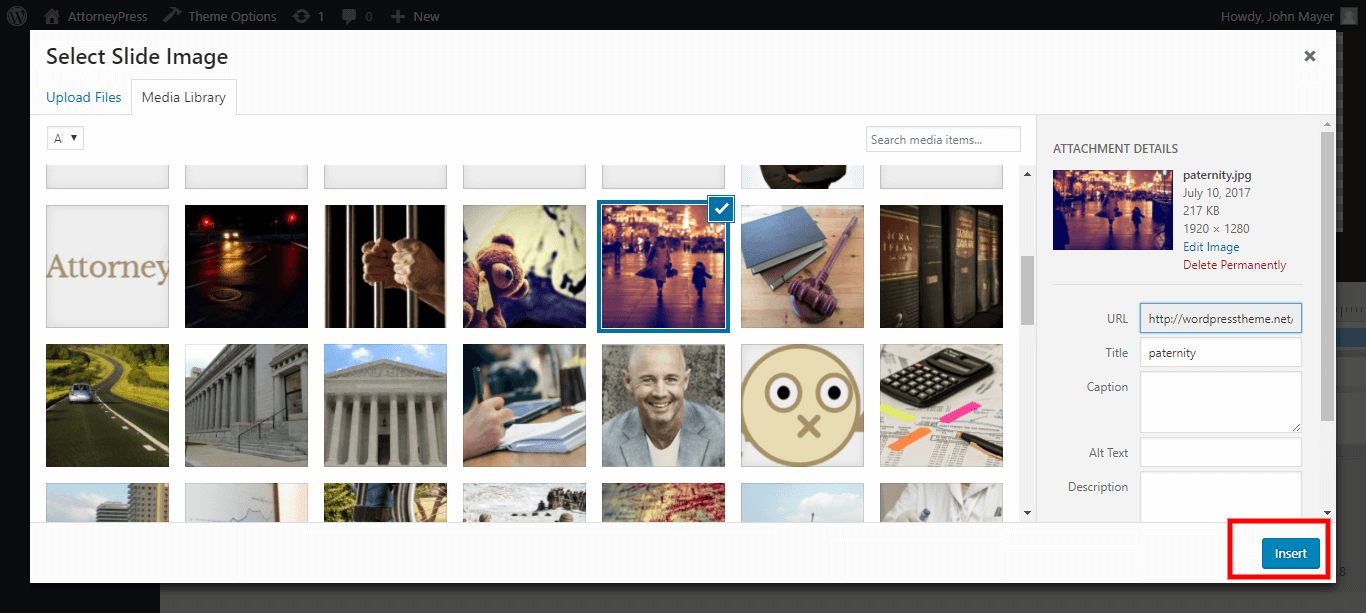
Browse already uploaded images from media gallery, select one and add it to background.
5. Add Layer
Once background image is added, now it's time to add new layers for text and buttons and other components. By clicking on Add Layer, we can see all the available components that we can add in our layer.

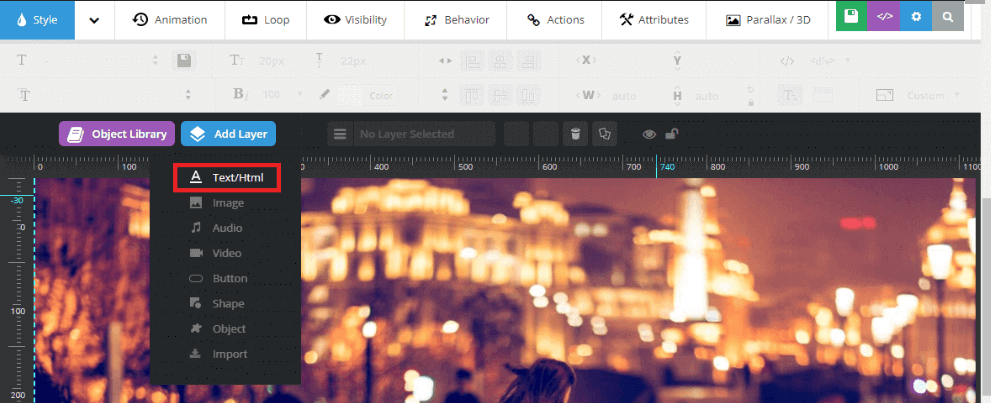
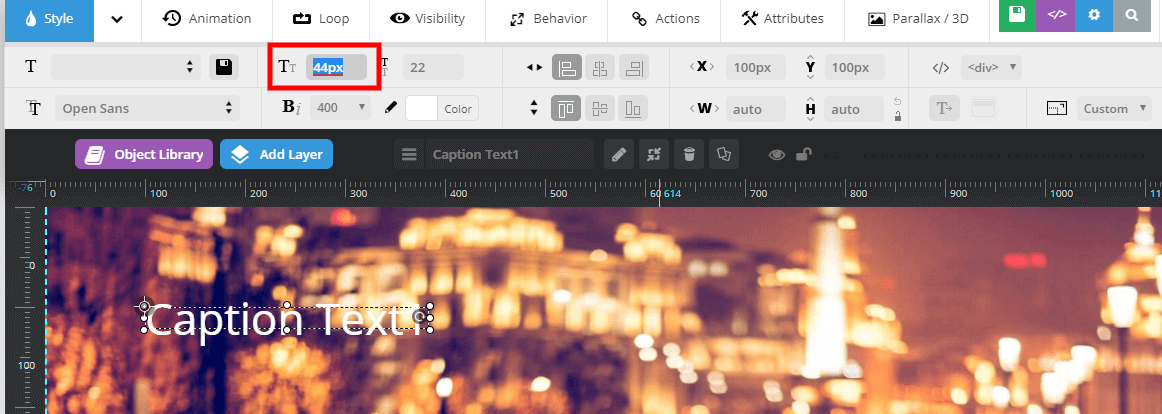
6. Add Text component layer to slides
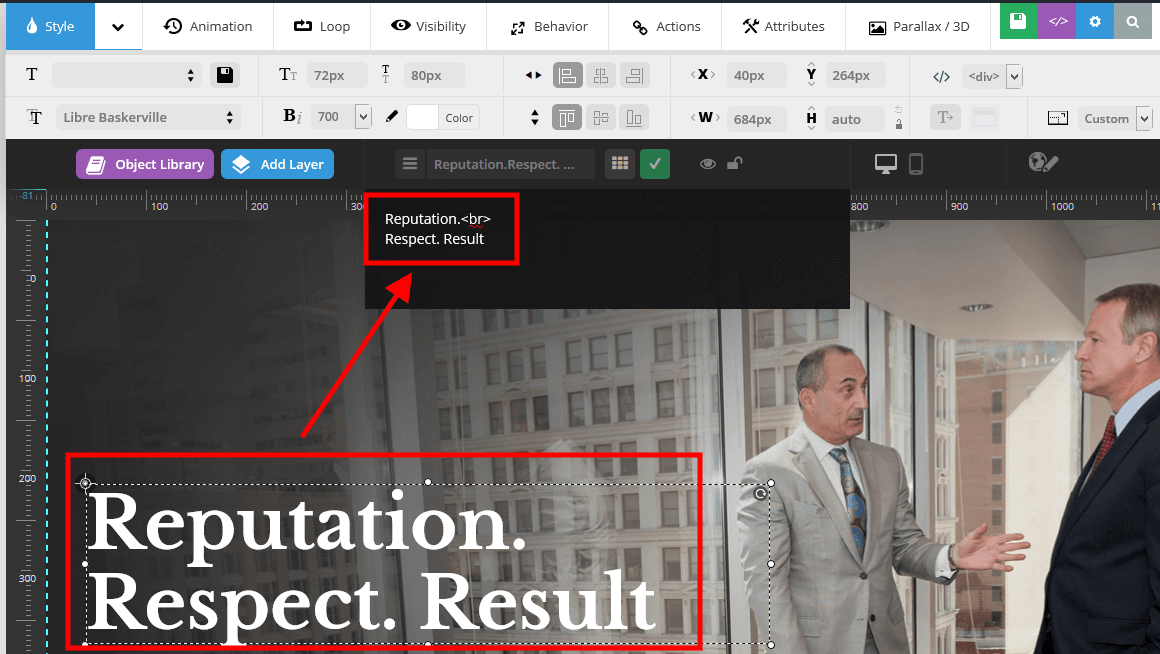
Now you can click on Text/HTML to add text and HTML content. You can write the content in the text box and press “enter” to show it slide. See a screenshot below to understand how image text size, color, font and other attributes can be changed from text toolbar.
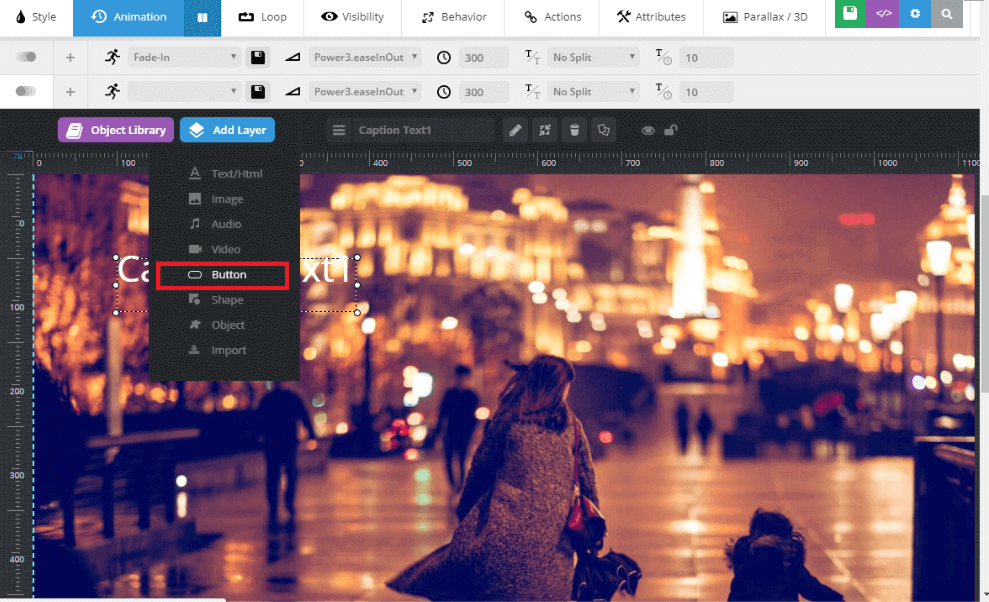
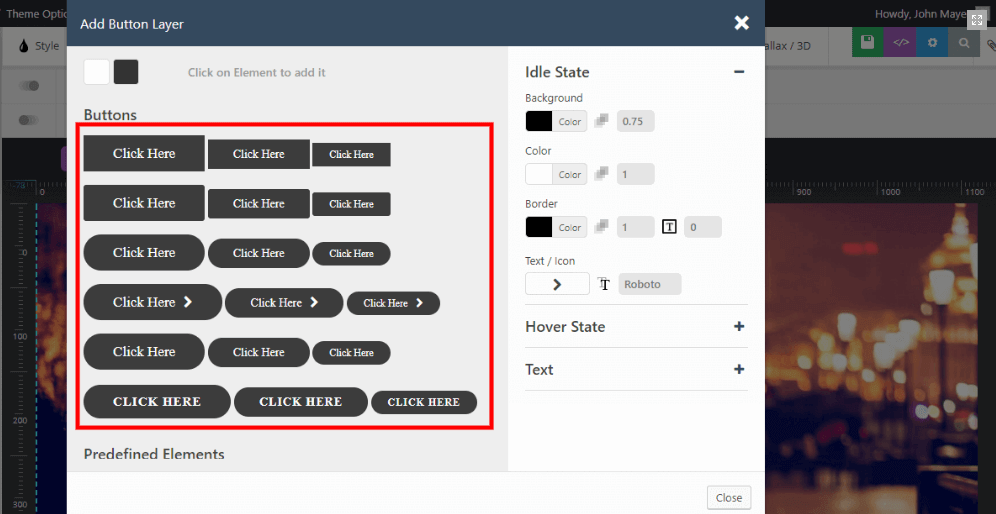
7. Add Button component layer to slides
To add a button, you need to click on Button from the drop down menu. Once clicked, a modal will appear with different style of preset buttons and options to customize them. You can choose any button from the list and it will appear within the slide.
Adding button in slide
Choosing different button style from popup modal
Once button is added to the slide, the text and image can be changed from clicking the pencil icon. Once clicked, a text area will appear where any HTML or string can be added. Save the setting and you'll see that the html text appears over the slider.

Editing button text and icon.
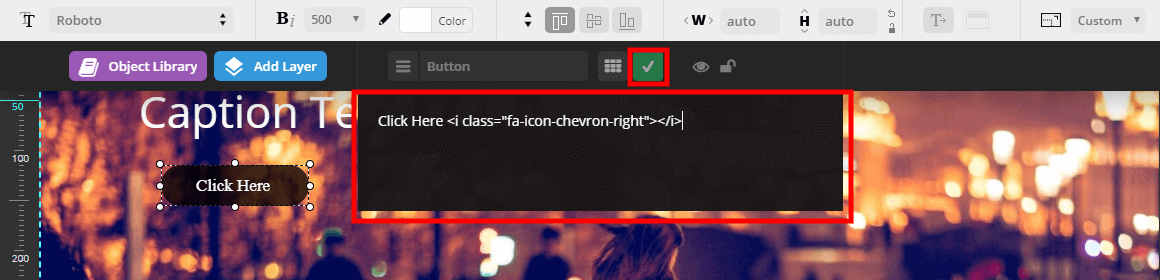
Edit field for button
8. Add Animation to layer in slides.
Animation option can be set from Animation menu. Each layer can be selected and animation can be set from the drop down. There are multiple type of predefined animation with options and effects from the animation toolbar.

Add animation to layer.
9. Saving slides
There are several options to customize each slide to change style, behavior and attributes. Hit the green save icon to save the layer.

Saving layers
You may repeat above process to add multiple layers and slides.
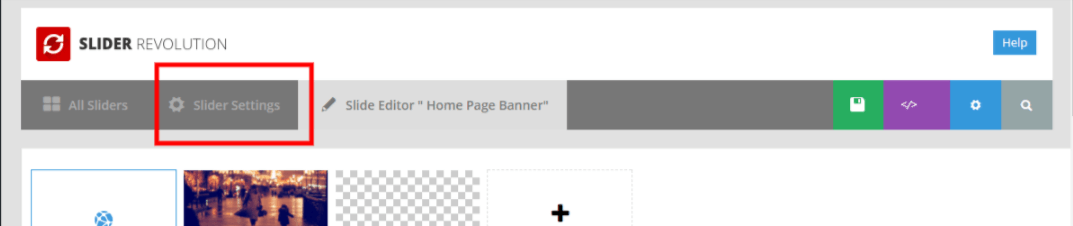
10. Settings:
If you wish to change setting of your slider then you may do it by going to Slider Revolution > Slider Settings.
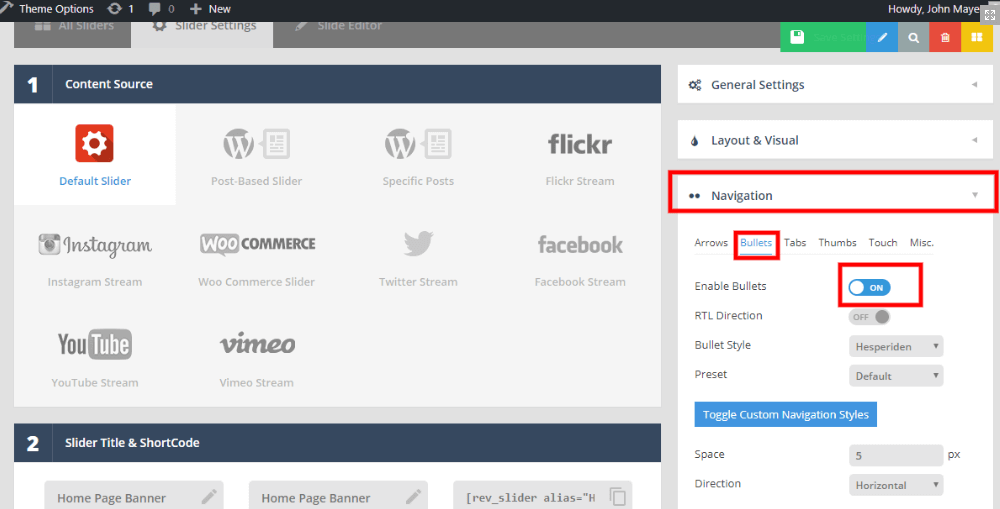
Change Settings. Change Navigation setting
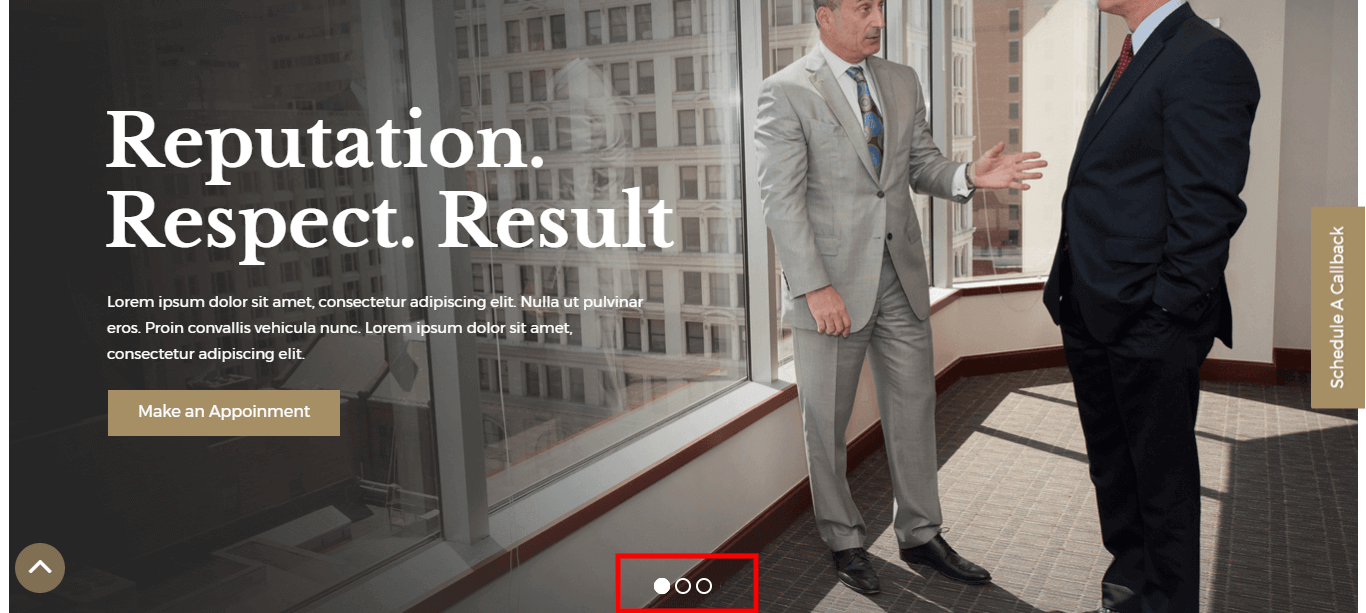
Slider Navigation changed to bullet type.
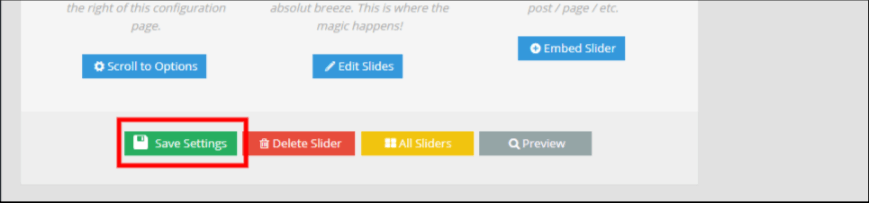
Once All settings are set, it can be saved by clicking Save Setting at the bottom of the page.
11. Integrate Slider Revolution to Pages:
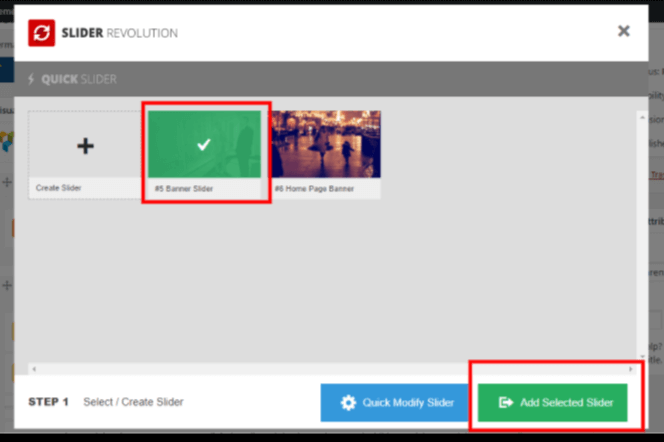
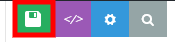
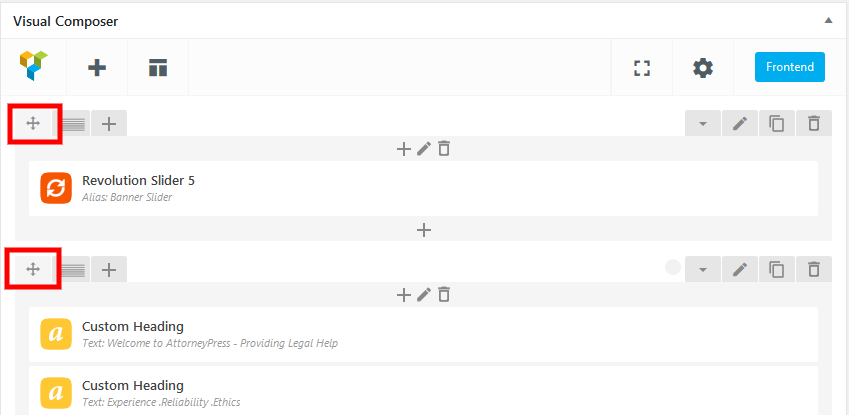
To integrate slider revolution within page, first go to Admin Panel > Pages > Home Version One. Go to Revolution Slider design block and click on edit button with pencil icon.

Once Edit Slider is clicked, a popup will appear with all available sliders. You can choose one or more than one slide and click on Add to Selected Slider. Once clicked, the slider will appear on home page.
Contact Form 7 (Official Help Document is Available Here)
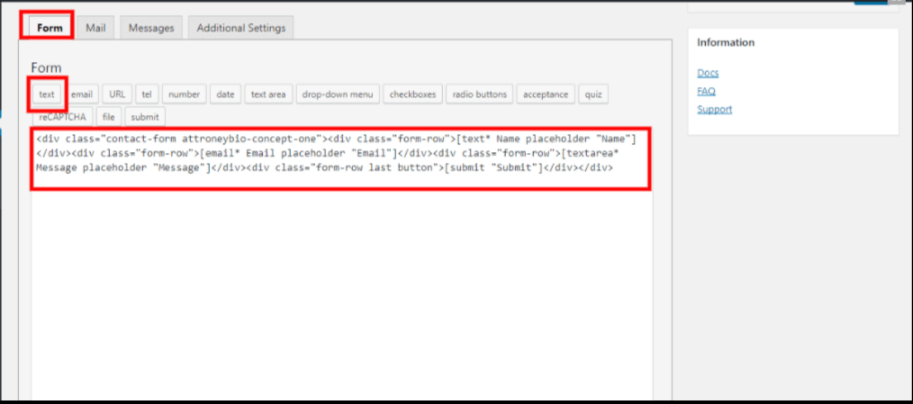
1. Contact Form
Contact form 7 is used to create easy to handle and easy to customize forms. AttorneyPress theme has five pre-built forms. Goto Admin > Contact forms to check all pre-built contact forms.
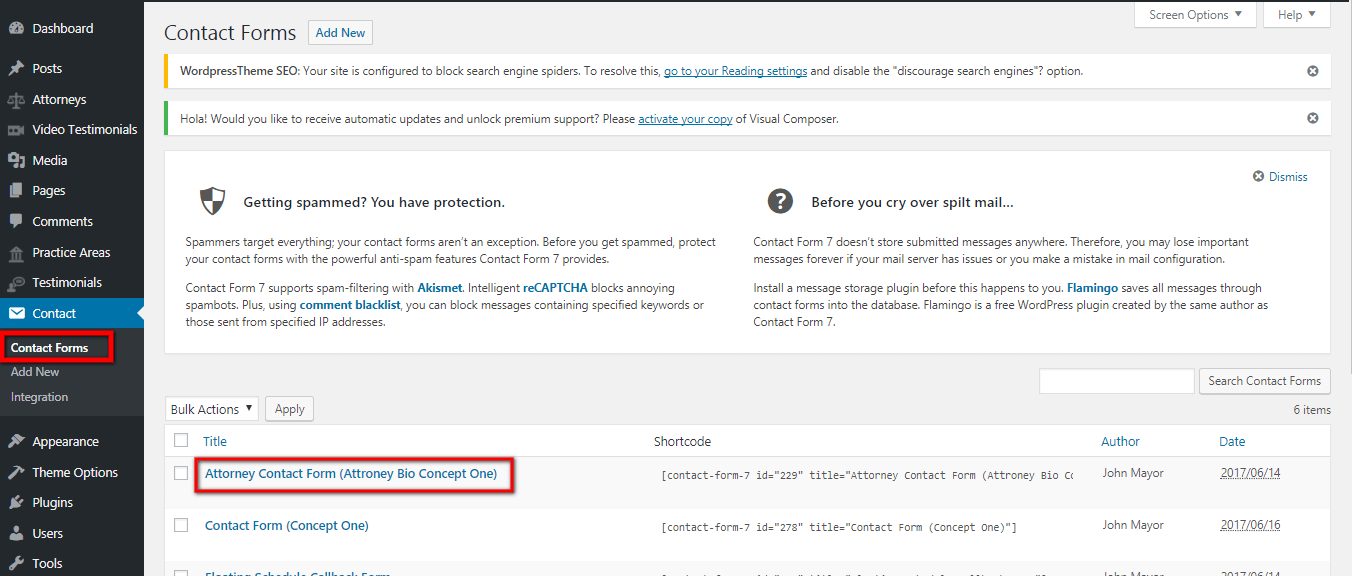
Click on an available form and it will take you to to “Detail” form configuration form where you can adjust / customize “form appearance” and other settings. There are many predefined fields which can be added as short-codes within HTML code. If you want some other field and can't understand what to do, feel free to open a support ticket and ask.
Contact form edit form settings
Under mail tab, you can change Mail fields like "To" , "From", "Subject", "Additional header," "Message" and file attachment used in the form. There are predefined set of short-codes which can used to get value of posted form data. e.g. [name], [email], [message]. You can use those placeholder in the fields like 'To', ' from', 'subject', 'body message' etc.

Contact form edit mail settings
Form Message also can can also be changed from Message tab.

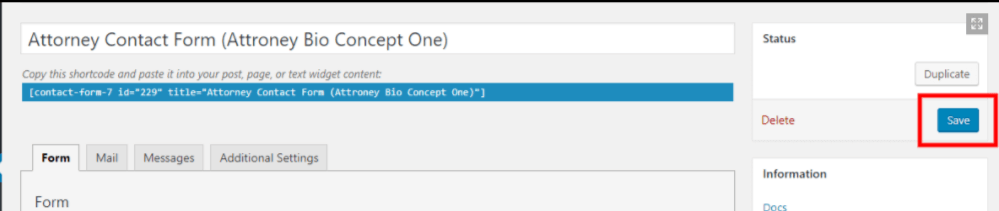
Once everything is set, you need to click on save button to retain the changes.
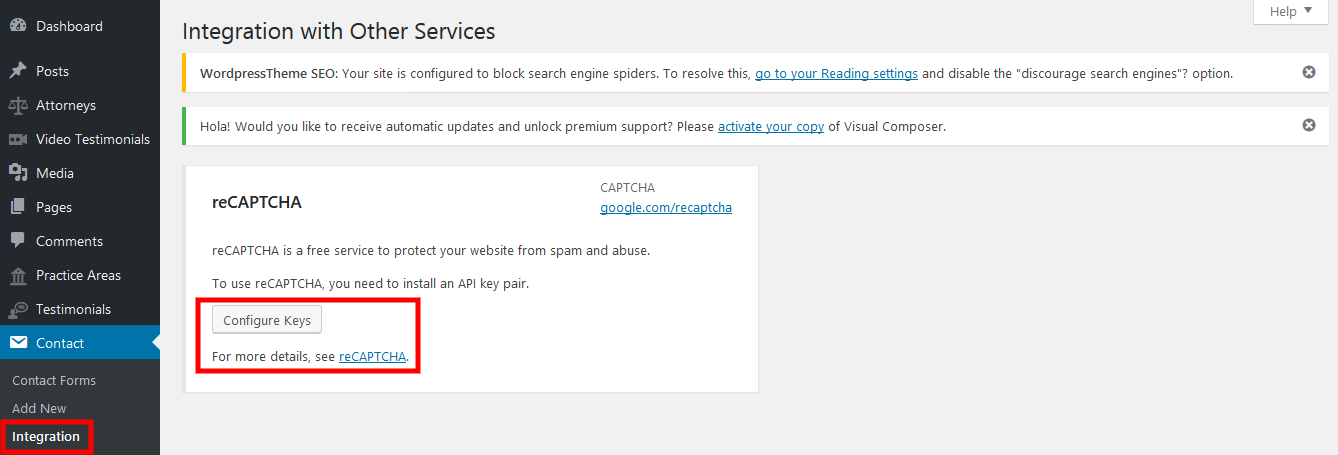
Go to Admin > Contact > Integrations to integrate Google reCaptcha (to protect you from getting spam messages) in contact form 7. Here you can also read about additional settings.
Integrating Contact Forms:
Go to Admin > All Pages select any page where you need to add or edit contact form.
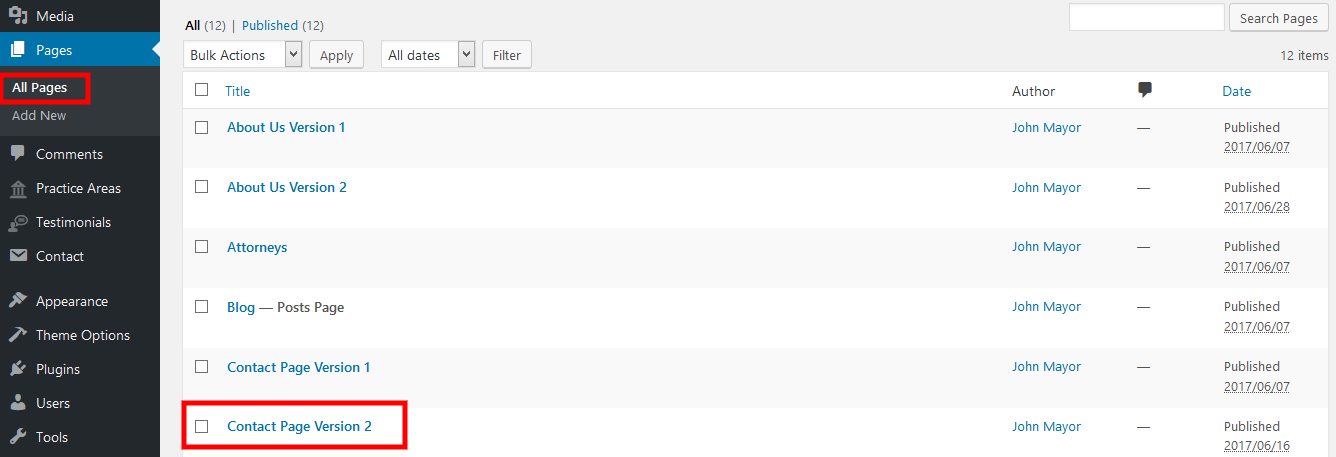
Page list
Once the edit window opens, click on the marked pencil icon to edit contact form.
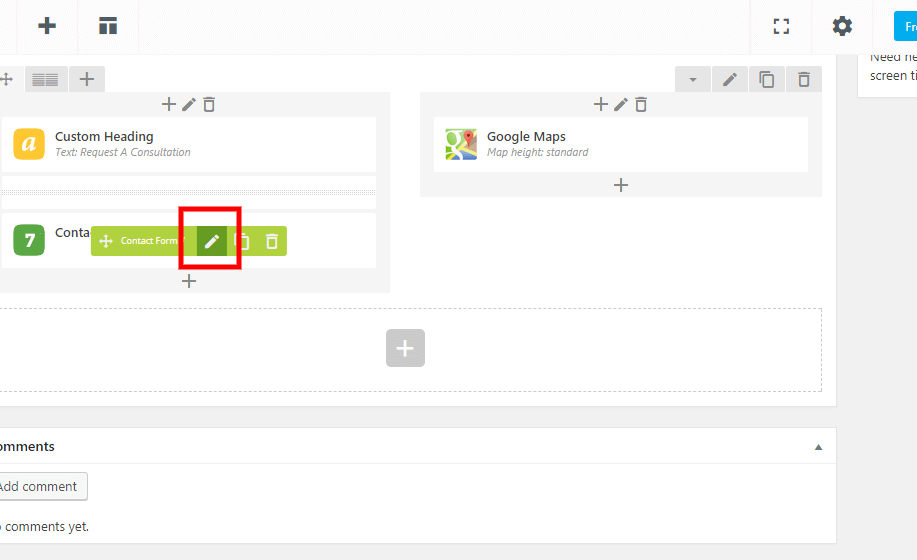
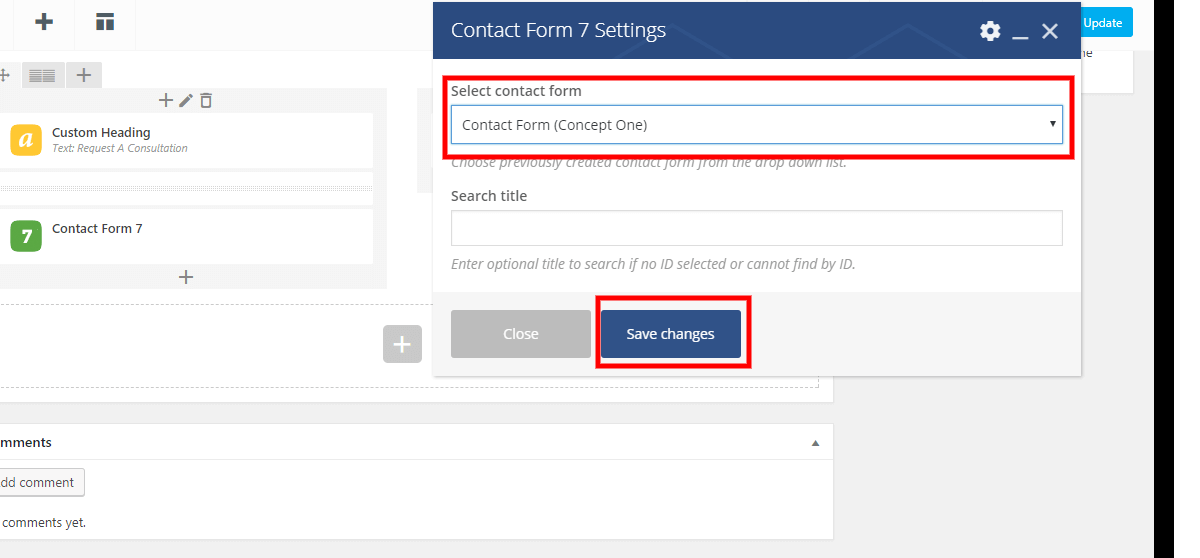
From the marked drop down menu, you can choose from available contact forms. Once a form is selected then click on “Save Changes” button to save the page.
Create Main Menu
Please go through the following points to know how to create Main Menu:
- Login to WordPress admin panel (URL should be www.yourdomain.com/wp-admin ).
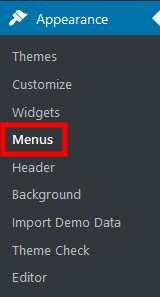
- Navigate to "Appearance > Menus" (see screenshot below).
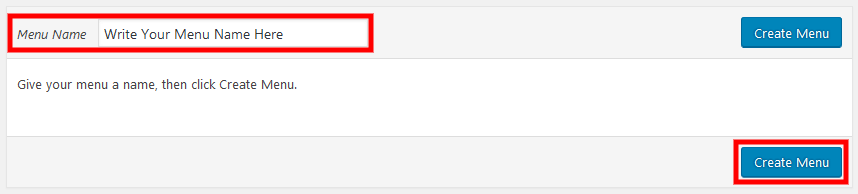
- Click on "create a new menu" link (see screenshot below).

- Give a menu name and click on "Create Menu" button (see screenshot below).
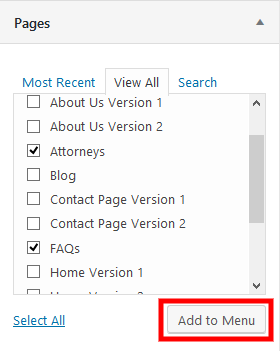
- Click on "Pages" and open and TICK those pages which you want to add within your created menu.
- After that, click on "Add to Menu" (see screenshot below).
- Then scroll a bit and check on "Primary" to make it visible on the main navigation menu (see screenshot below).

Create Max Mega Menu
First, you need to create a menu and make that "Primary", only after that you can make that created menu as MEGA MENU (opt for it only if you need it). We're using "Max Mega Menu" plugin to create mega menu on AttorneyPress.
Please go through the following points to know how to create Max Mega Menu:
- Login to WordPress admin panel (URL should be www.yourdomain.com/wp-admin ).
- Navigate to "Appearance > Menus" (see screenshot below).
- From drop-down, select the menu you want to make "Primary" and click on "Select" button (see screenshot below).

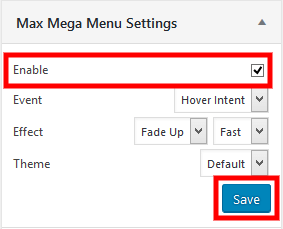
- On "Max Mega Menu Setting", check on "Enable" and click on "Save" button to make that menu, “mega menu” (see screenshot below).
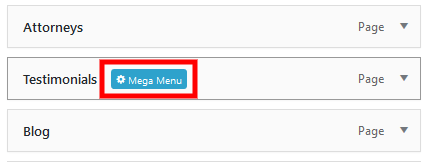
- Now, hover on menu items and you will see a blue button appears, click on that button (see screenshot below).
- A popup window will open. Now, you have to create mega menu by selecting "Mega Menu" from "Sub menu display mode" (see screenshot below).

- At the right hand side, select the widget you want to display. For example, if you want to make a menu, then select "Custom Menu", if you want to write some text then select "Text". After selecting, you can see a widget of your selection will appear on below area (see screenshot below).

- You have to set columns for displaying widgets. Select number of columns from extreme right hand side drop-down. For example, you can select 3 columns if you want to show 3 sections on your menu (see screenshot below).

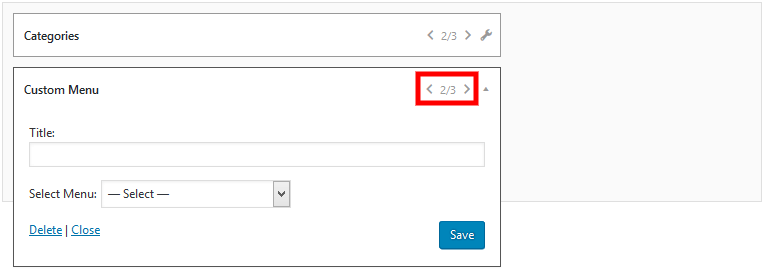
- Now, you will have widgets and you have to adjust their width by clicking on arrows (see screenshot below).
- To edit that widget or put content on them or delete them, you have to click on the wrench icon as shown below (see screenshot).

- Finally click on "Save" button to save that menu.

Customizing Home Page
Please go through below points to understand how can you change the Home Page elements.
Set Front Page
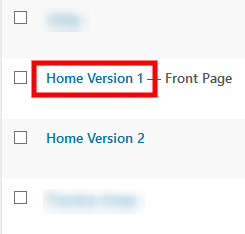
We have included two home page layouts with AttorneyPress. See below to understand the process of setting front/homefselect which page you want to set as "Front Page" page.
- Login to WordPress admin panel (URL should be www.yourdomain.com/wp-admin ).
- Navigate to "Settings > Reading".
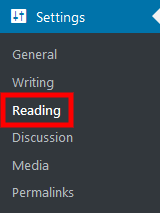
- From dropdown, select which page you want to set as "Front Page".
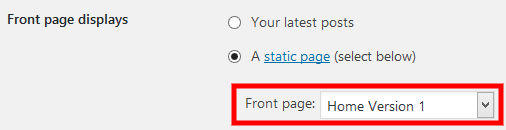
(N.B.: You need to select front page to "Home Version 1" or "Home Version 2". Don't select any other page, otherwise theme home page won't display desired page.) - Click on "Save" button to save changes.
Customize Slider Revolution
You will get Slider Revolution FREE with AttorneyPress. Please read below points to know how you can edit Slider Revolution.
- Login to WordPress admin panel (URL should be www.yourdomain.com/wp-admin ).
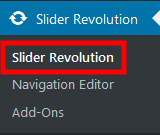
- Go to "Slider Revolution > Slider Revolution".
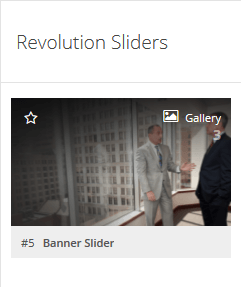
- Click on "Banner Slider".
- Click on any slide (the theme comes with 3 pre-built header sliders).

- Scroll below, you will find "Main Background" tab and click on the "Media Library" button and select or upload your image to put that on slider.
- Now it's time to change text. Scroll down a bit, you will find full slider editor. Now, double click on the text and edit that.
- Lastly, click on "Save Slide" button
Edit Home Page Structure Content
Go through below mentioned steps to understand the process of editing home page structure & content.
- Login to WordPress admin panel (URL should be www.yourdomain.com/wp-admin ).
- Go to "Pages > All Pages".
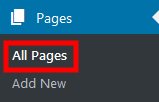
- Click on "Home Page" (version one or two).
- You will find that home page along with entire site was coded with popular “drag and drop” page builder plugin "Visual Composer". You can drag each elements to change their position.
- Click on any element to edit text. Suppose, you want to change the text of ‘welcome’ heading or just want to make it H3, all you have to do is, click on the heading.
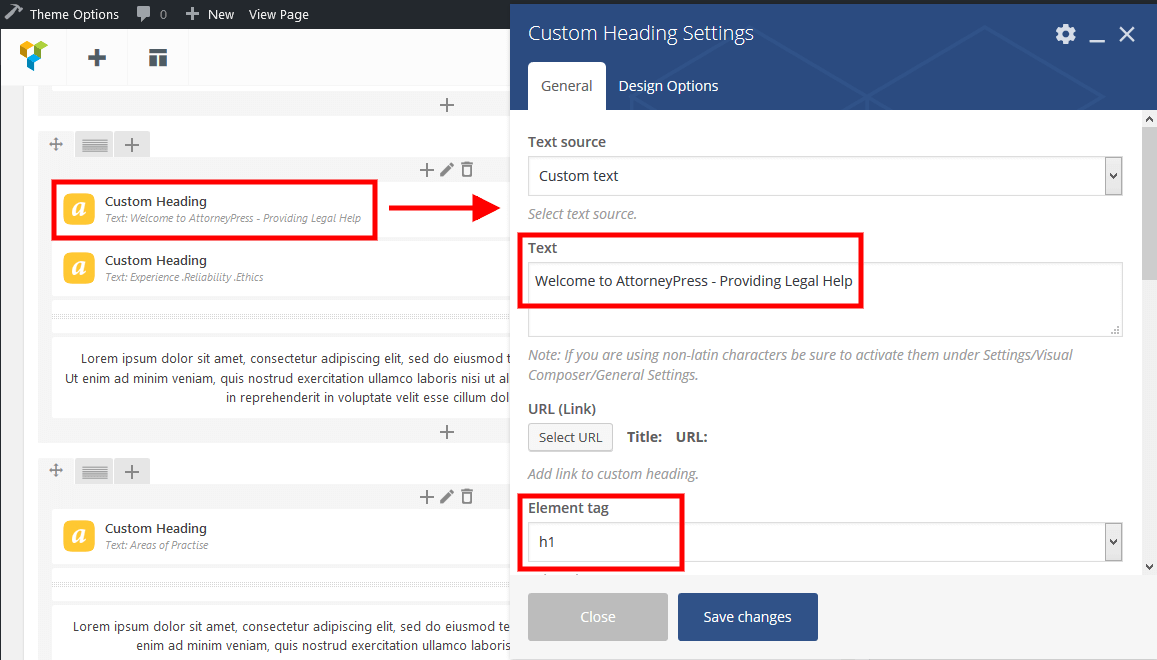
- Then change text or element tag and click on "Save Changes".
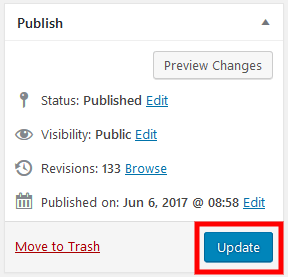
- Finally, click on "Update" button on the top right to save page.
Disable Home Page
You are getting 2 Home Page concepts with AttorneyPress. So, you need to turn off one concept while making a website with this theme. Please follow the below mentioned steps:
- Login to WordPress admin panel (URL should be www.yourdomain.com/wp-admin ).
- Navigate to "Pages > All Pages".
- Check for the home page version you want to disable.
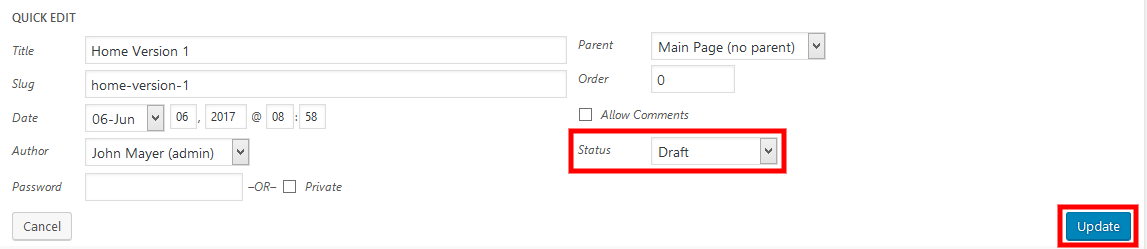
- Now, hover and click on "Quick Edit".
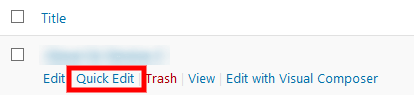
- Change status "Published" to "Draft" from drop-down.
Customizing Inner Pages
Please go through below points to understand how can you change Inner Pages element.
Banner Option
All inner pages have customized banner option. For each page it's possible to add different banner image and custom banner title. Go to Admin Panel > All Pages and select any page to change banner(s).


- You can select whether you want inner banner / breadcrumb to display or not.
- You can change title of banner here from 'Banner Custom Title'.
- You can upload new banner image here from 'Banner Image'.
Once you make change and update the page, the banner will be changed for the corresponding page.

Blog Post
On AttorneyPress, you can write your own Blog. Please go through points given below to understand how you can create new Blog Posts.
- Login to WordPress admin panel.
- Navigate to "Posts > Add New"
- Provide a suitable title for your Blog.
- On below area, you have to write content for your blog. You can add images/videos as per your requirement.
- Scroll a bit, you will find "WordPressTheme SEO Options". From here you can change page title and meta description for your page.
- On the right hand side, you will find "Featured Image" section. Here, you can provide an image for your Blog that will represent your blog everywhere on the website.
- From "Categories" box, you can put your blog post under a suitable category or create a new category for that.
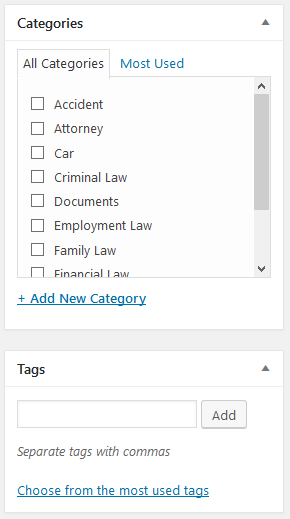
- Finally, click on "Publish" button to publish your blog post.
Creating a WordPress Page
Creating a WordPress page is very similar to creating a post. Just remember that pages are intended for static content.
Please follow the following steps to create a WordPress page.
- To get started by adding a new page to your WordPress site, find the Pages menu in the WordPress Dashboard Navigation menu. Click Add new.
The WordPress page editor looks nearly identical to the post editor, except for a few different boxes located on the right side of the screen. - Add the title of the page, like “About”. Note: If you have pretty permalinks set up, the title of your page will also be the URL slug.
- Next, add some content.
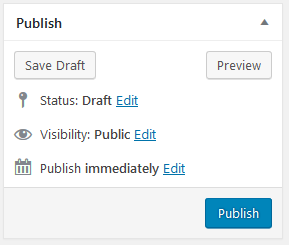
- The Publish section of the page editor is exactly the same as for writing posts. When you’re ready to publish, you can either publish immediately, save this as a draft, or schedule the page to be published later.
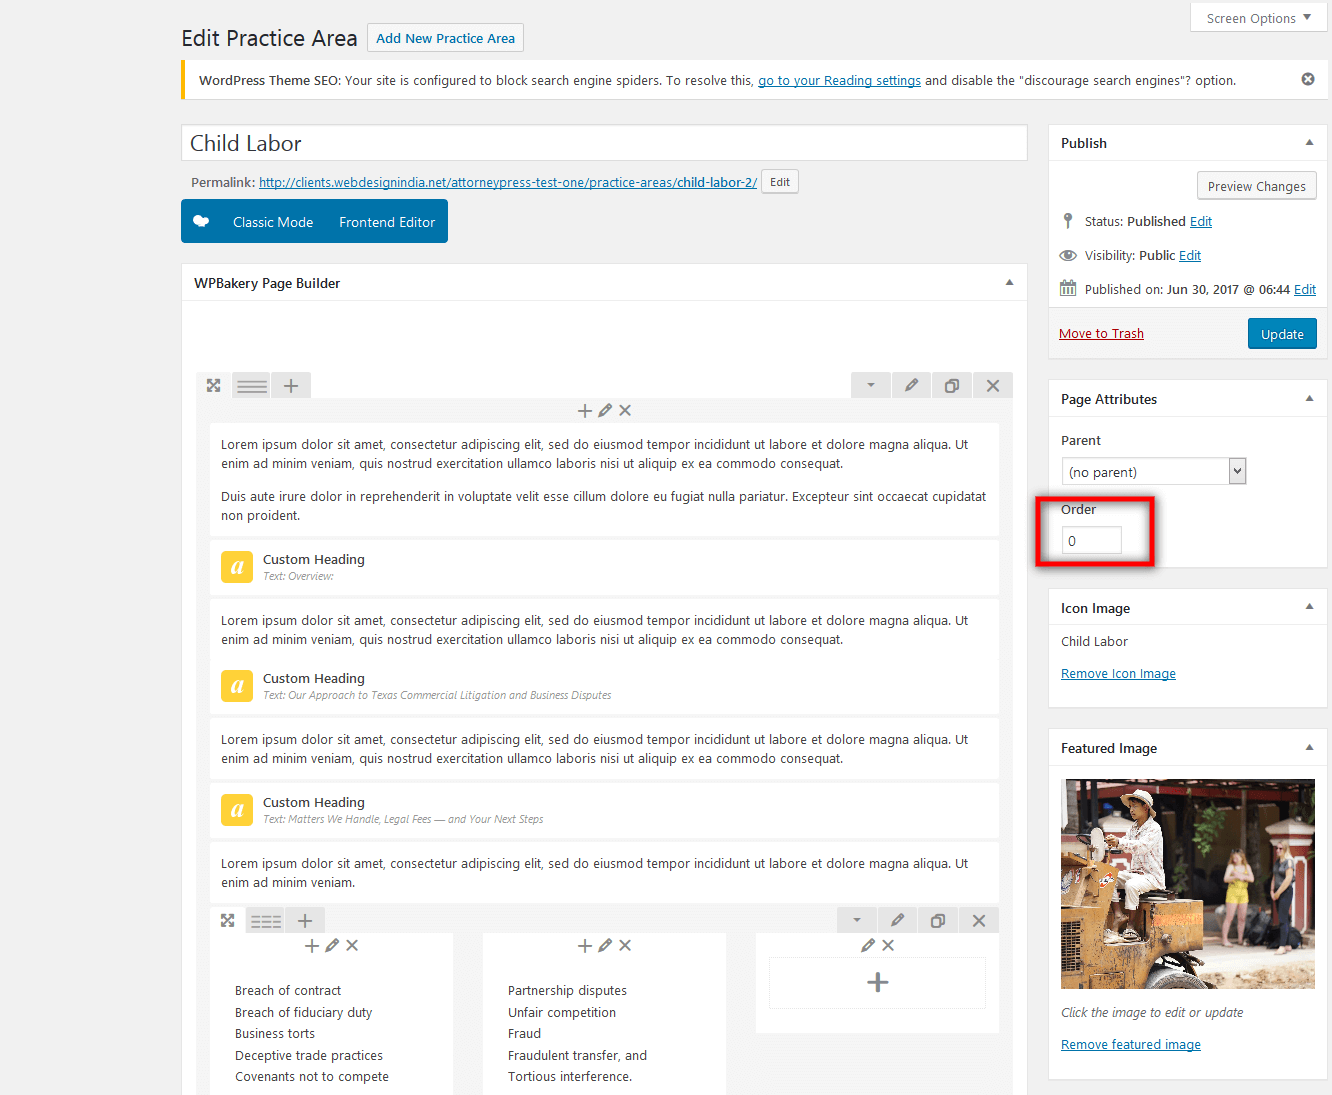
- The Page Attributes section applies a parent page to your new page. For the Parent section, you can arrange your pages into hierarchies. For example, you could create this new page with additional pages under it. There are no limits as to how many levels you can nest pages.
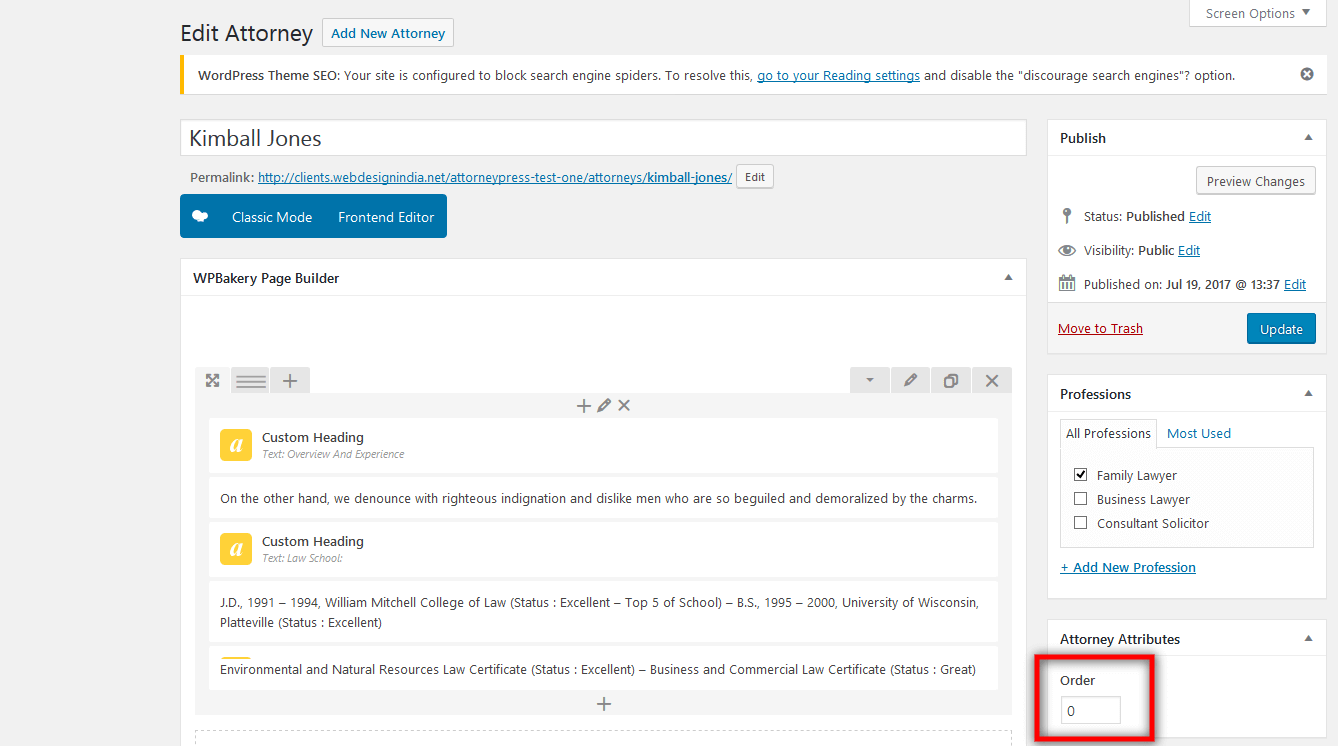
- The Order box allows you to order your page numerically. Pages are usually ordered alphabetically, but you can choose your own order by entering a number in this field.
- Preview the page one last time, then click Publish. You’ve added a new page to your WordPress site.
Practice Areas Page
Practice Areas can be added from Admin Panel > All Practice Areas > Add New.
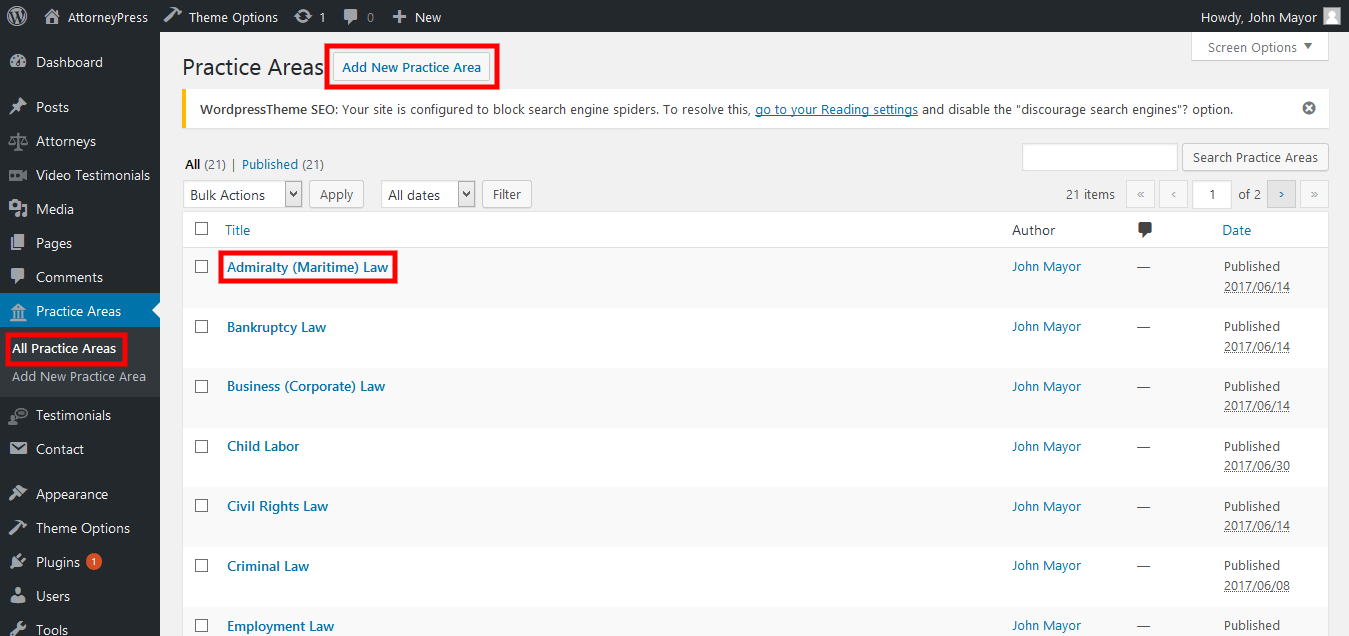
Add new practice area
After clicking on Add New option, a form will appear as provided below, where practice area details can be added.
You can add and edit attorney from Admin Panel > Attorneys > All Attorneys
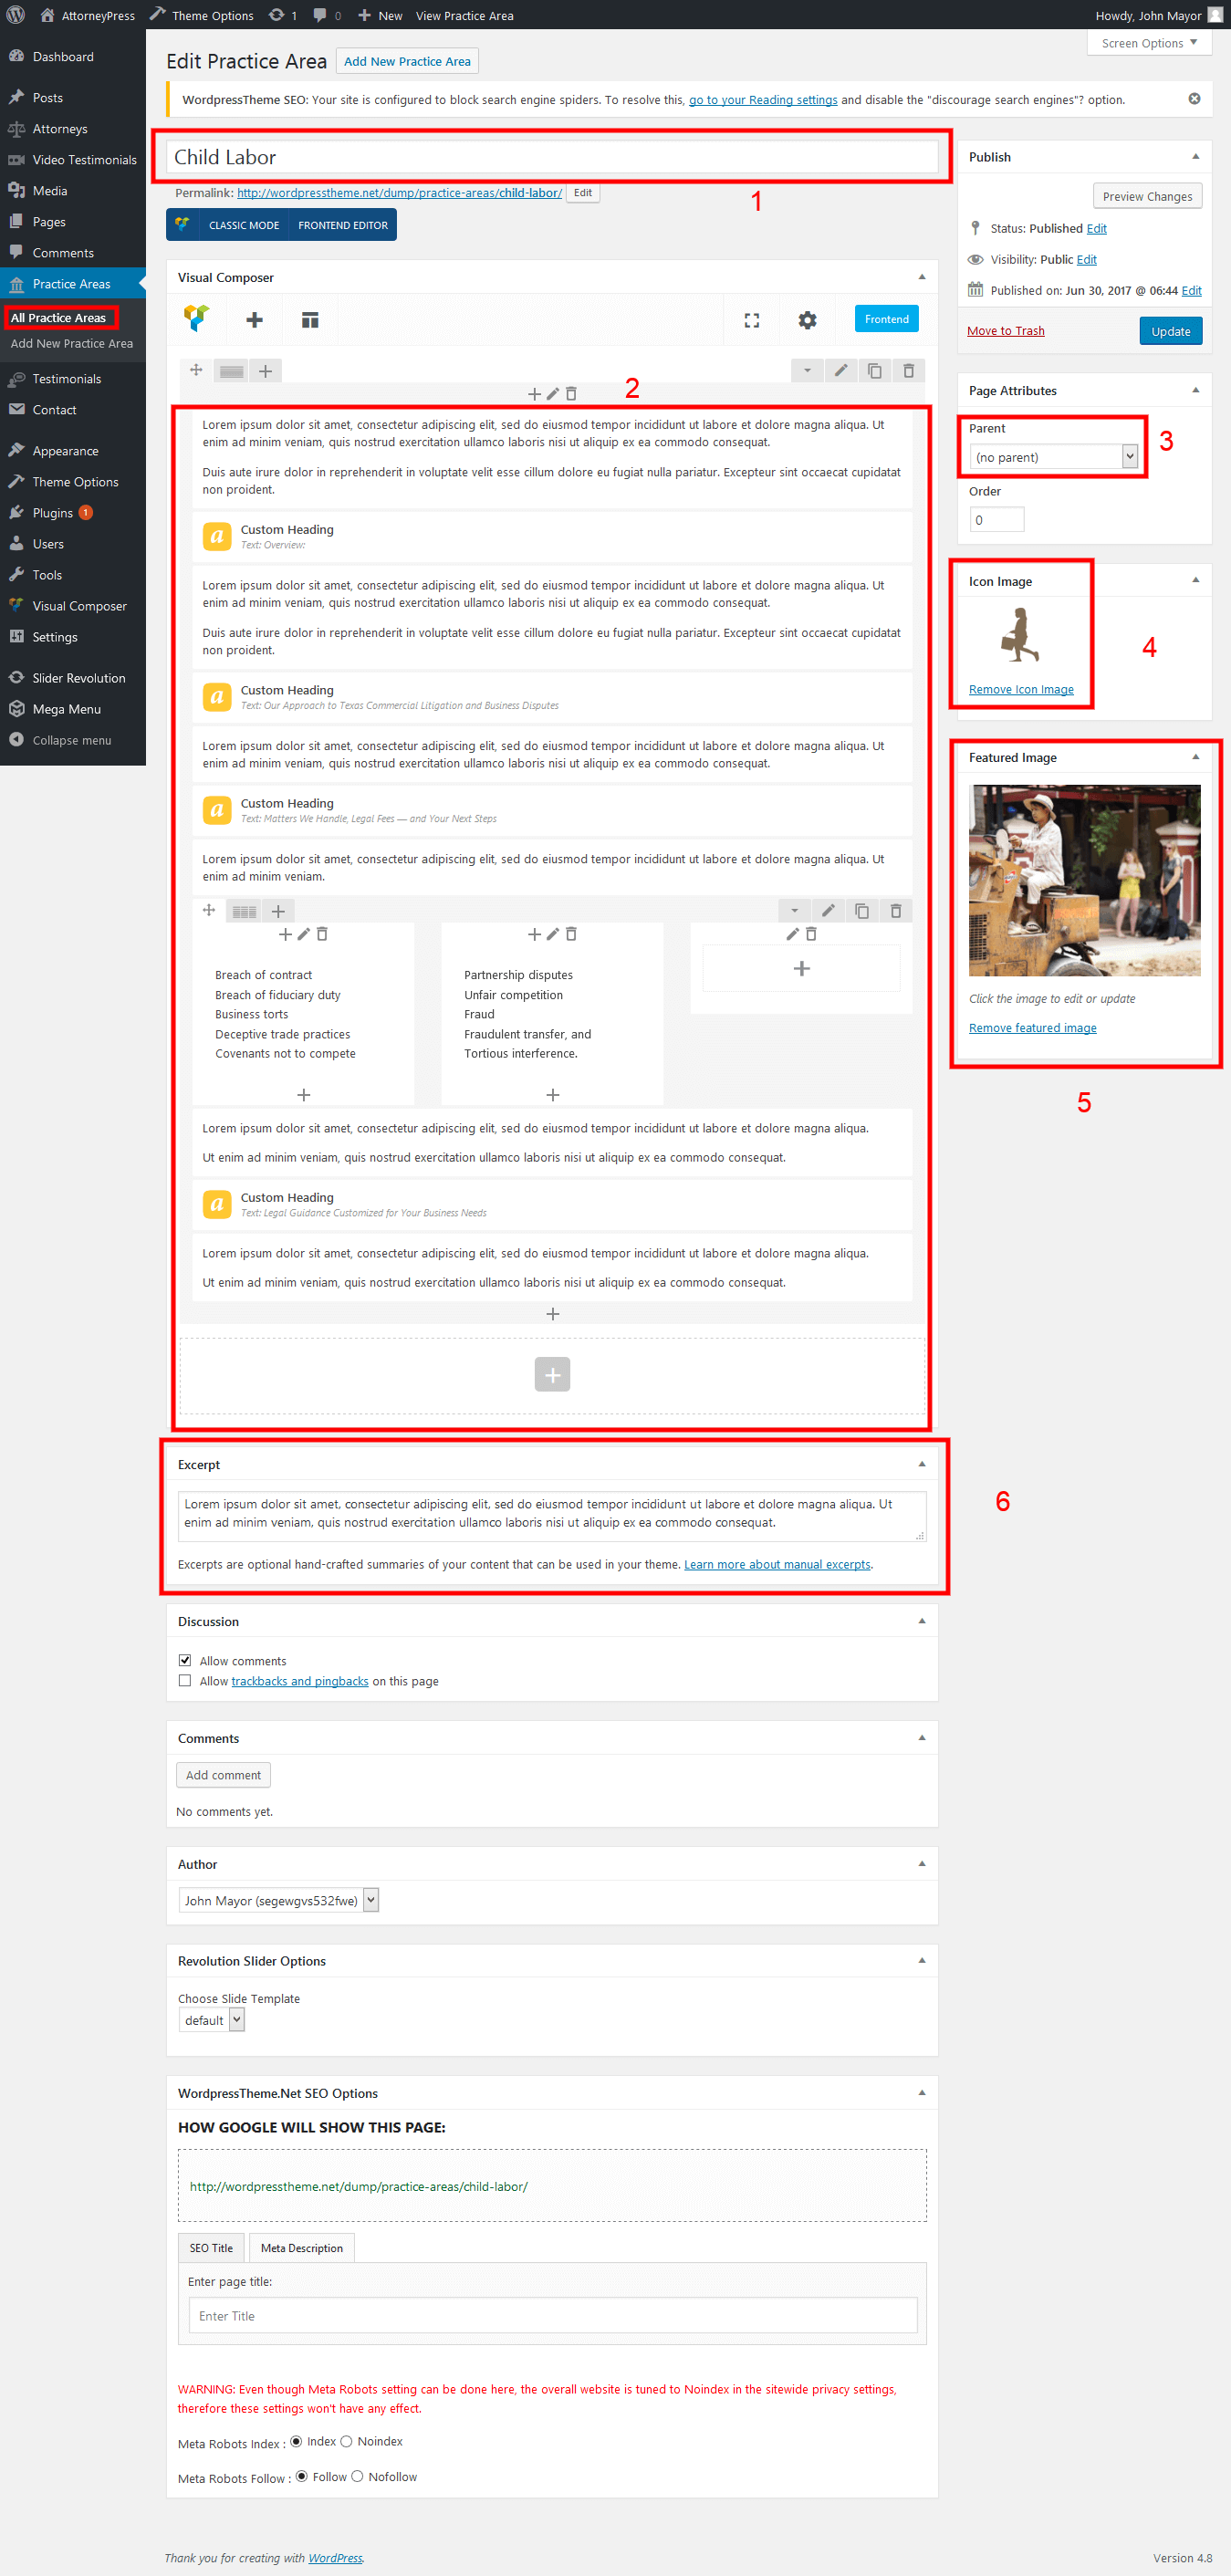
Details are given below by box number.
- Write the name of practice area you want to add
- Edit content from back end visual editor.
- Select parent practice area from the dropdown.
- Select icon for that practice area. A popup will appear to select and upload images.
- You can display picture of practice area by clicking on Featured image. Once clicked a popup will open up where you can select uploaded images or can upload new images.
- Here you can provide short description (excerpt) about the Practice Area you're writing.
Arrange listing orders of Practice Areas
You can display Practice Area(s) as per the serial number provided in the 'Order' box. Serial number is in Assending order i.e: it starts from numeric 0 and will increase as per the number/count of Practice Areas. Therefore, if you have 10 Practice Areas, then you can display any of them in the first or second position by assigning the number '0' or '1' in the 'Order' box and so on you can assign other Practice Area(s) as per your wish, up till number 9.
Practice Area edit / add page
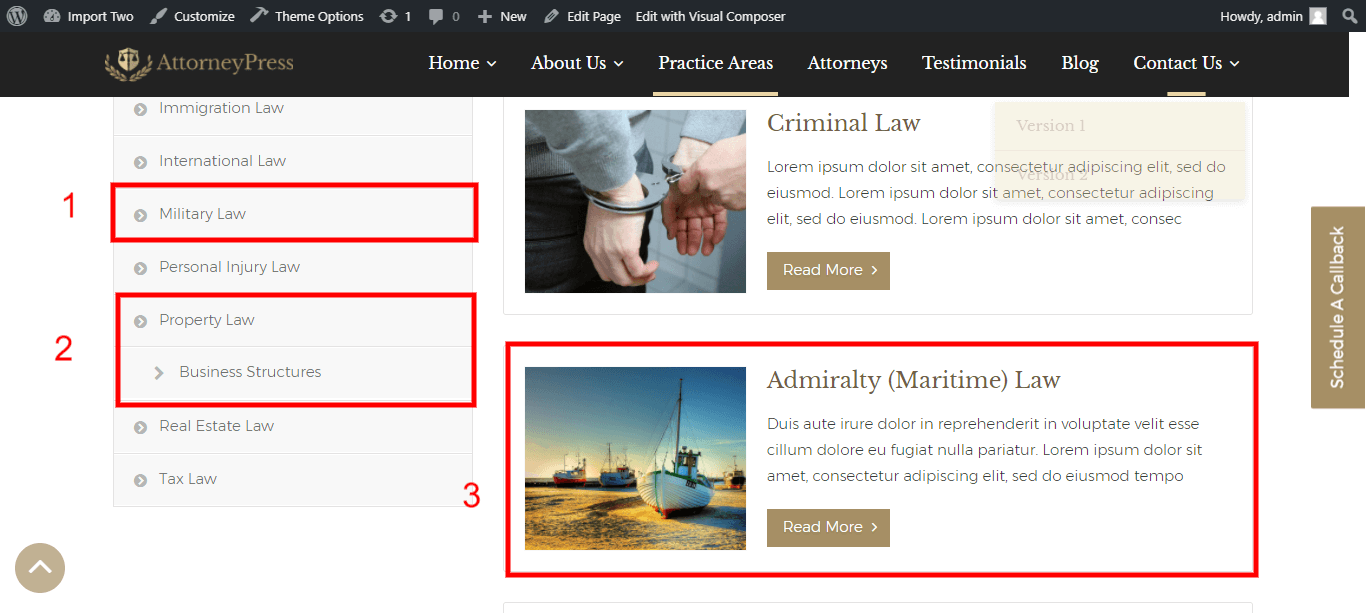
Once added, new Practice area can be seen in Practice Area page.
- This is a parent practice area
- This is a child practice area under a parent practice area.
- List view of practice area with featured image, title and brief description
Practice Area list page.
It's possible to change practice area featured image with icons from Theme Options. Check Theme Option Tutorial for more details
Theme option for practice area
After updating the attorney theme option it would look like below screenshot.
Attorney Pages
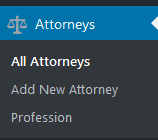
Follow below points to understand how to add new Attorney
- Login to WordPress admin panel.
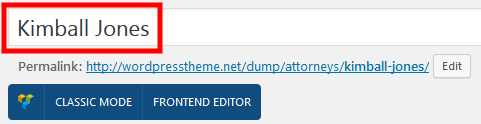
- Navigate to “Attorneys > Add New Attorney”.
- Write the name of your attorney.
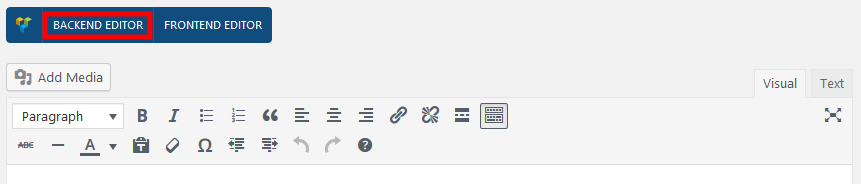
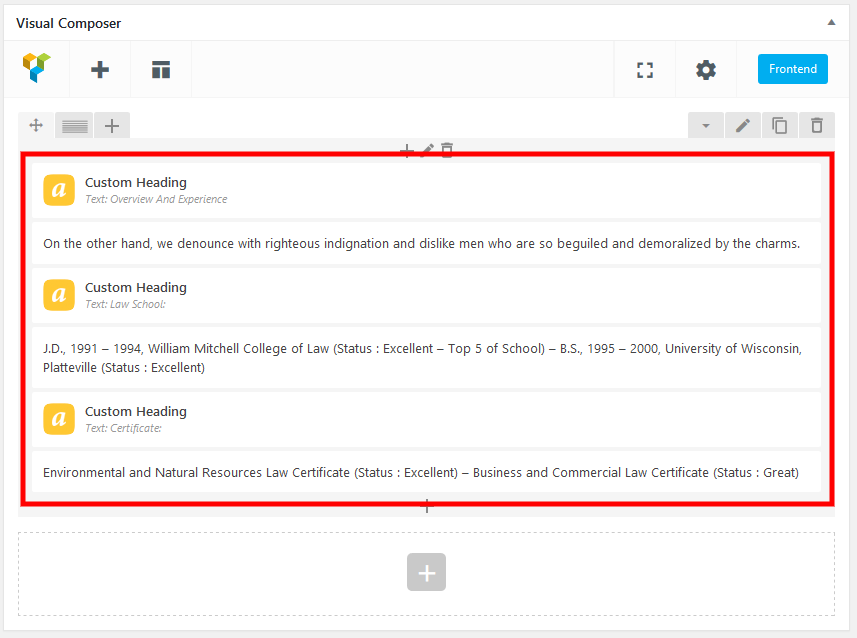
- Click on “Backend Editor”
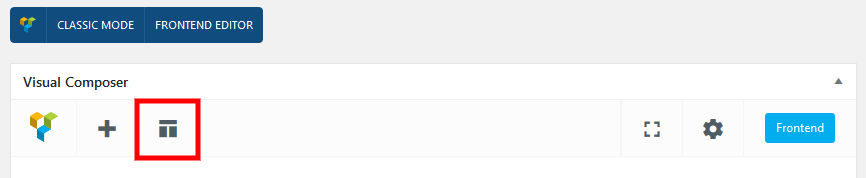
- Click on “Templates”.
- Click on “Attorney Single Layout” to import the preset attorney single layout by AttorneyPress.
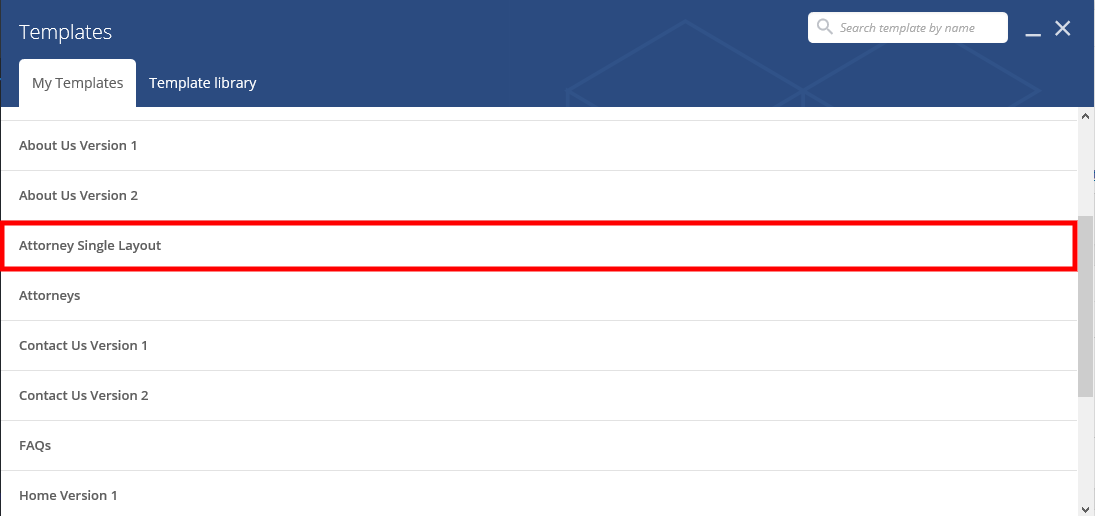
- Now you will see a dummy content structure will imported. You can change the details and content as per your wish.
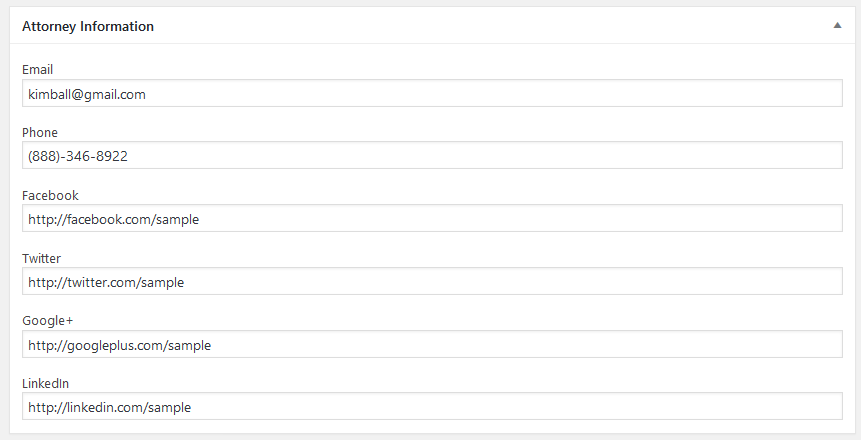
- Scroll a bit, you will find “Attorney Information”. From here you can provide social links, phone number and email for your attorney.
- Now you have to write a short description for your attorney (Excerpt).

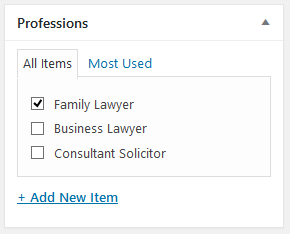
- On the right hand side, you have to set profession for your attorney.
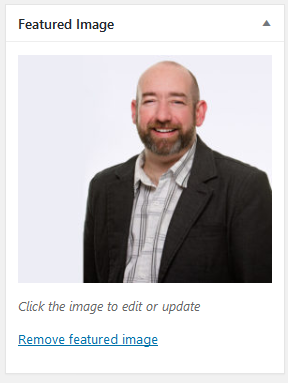
- On “Featured Image” section, you have to set image of the attorney. This image will display throughout the website.
- Click on ”Publish” button to publish new attorney.

Arrange listing orders of Attroneys
You can display Attorney(s) as per the serial number provided in the 'Order' box. Serial number is in Assending order i.e: it starts from numeric 0 and will increase as per the number/count of Attorneys. Therefore, if you have 10 Attorneys, then you can display any of them in the first or second position by assigning the number '0' or '1' in the 'Order' box and so on you can assign other Attorney(s) as per your wish, up till number 9.
About Us Page
You’ll receive 2 variations of “About Us” page concept with AttorneyPress. Please follow the below mentioned steps to understand how you can change them:
- Login to WordPress admin panel.
- Navigate to “Pages > All Pages”.
- Click on “About Us Version 1” or “About Us Version 2”.
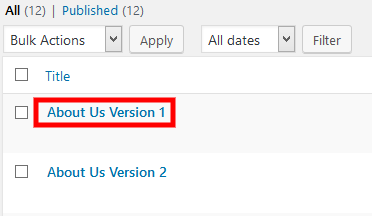
- Now, you’ll see a page structure with drag and drop page builder.
- You can easily change position of each section by drag and drop. Hover on “Arrow” symbol on the top left corner of the section and then drag & drop that, to where you want that section to go.
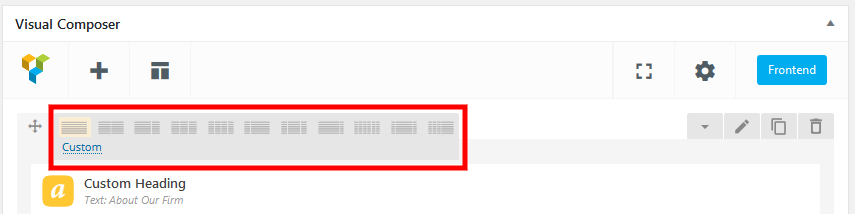
- If you want to change columns of any section, click on the columns button beside moving arrows and select you desired column structure.
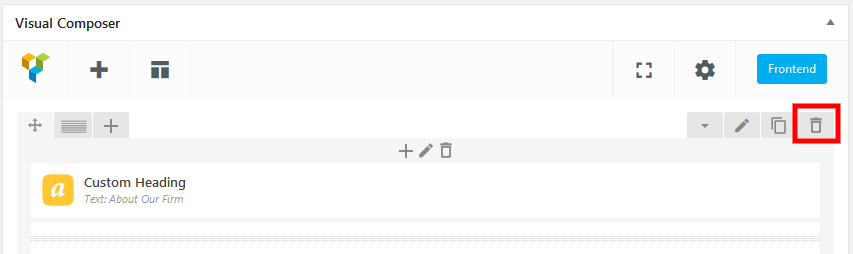
- To delete section, click on the “Bin” icon on the top right hand corner of the section. (N.B.: Exercise extra caution while deleting the section).
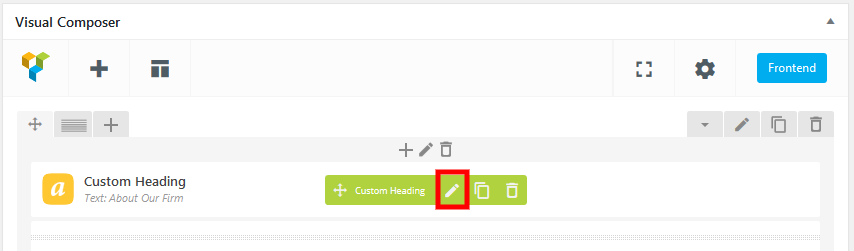
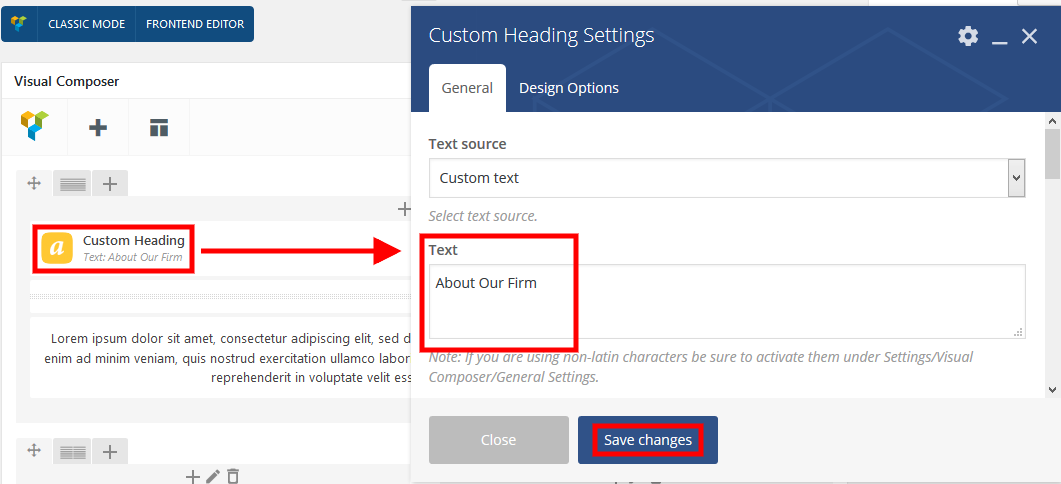
- To edit text of an element, hover on that element and click on “Pen” icon (green color). This will open a popup to change text. Please change text and click on “Save Changes”.
- Please follow same process for changing image too.
- Finally, click on “Update” button so save your changes.

Please visit https://vc.wpbakery.com/video-tutorials/ to learn more about Visual Composer.
Testimonial Page
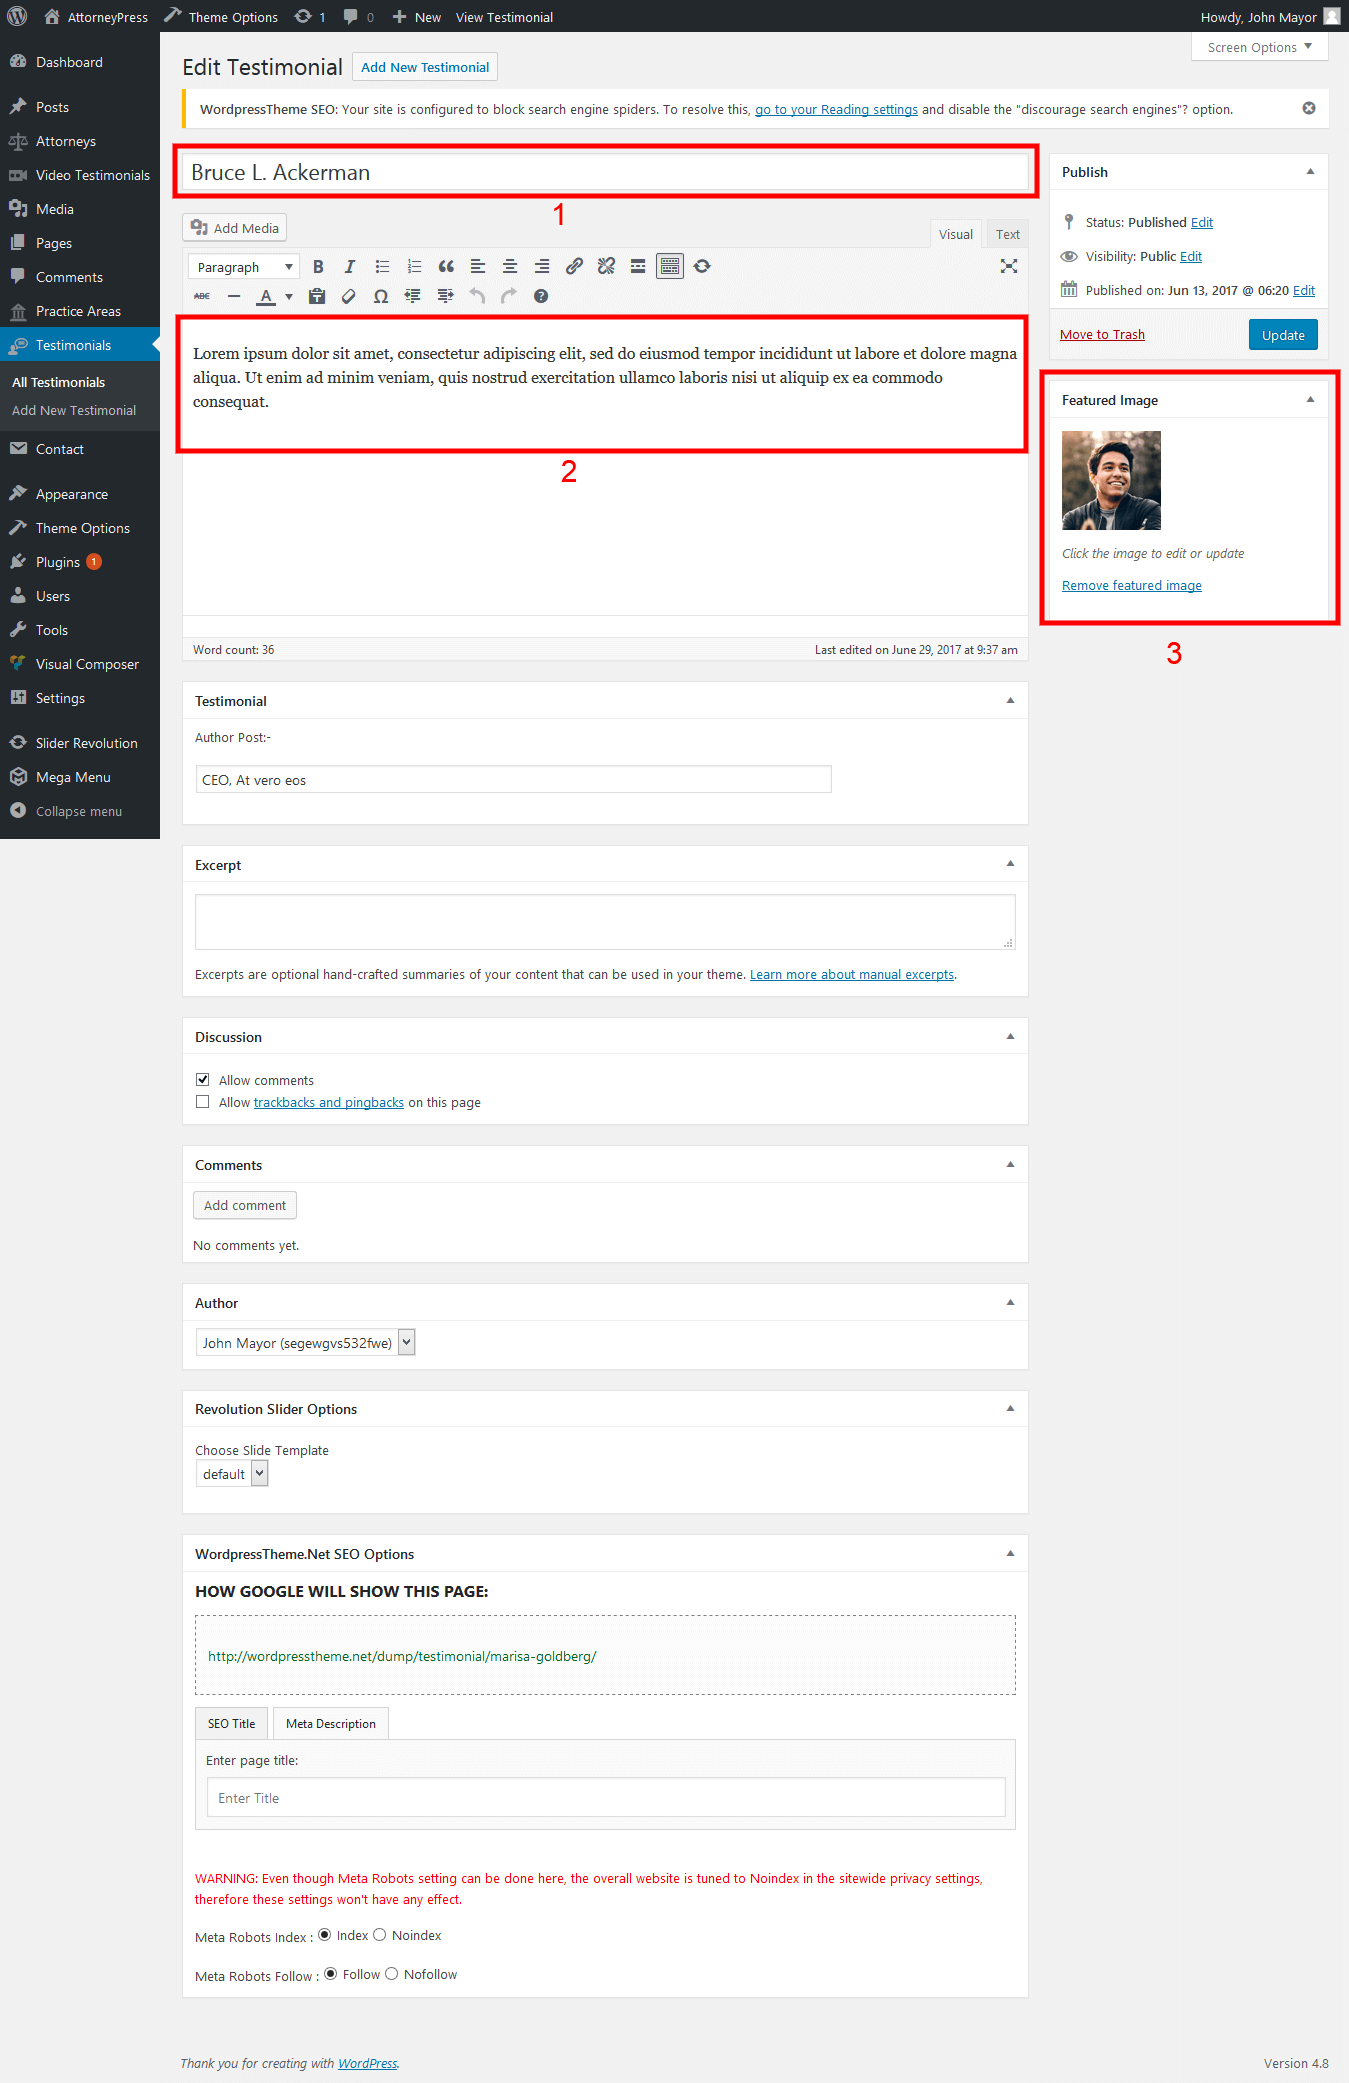
It's possible to add testimonial from Admin Panel > Testimonials> All Testimonials
Details are given below by box number.
- Here you should write the author of the testimonial.
- Add testimonial comment here.
- You can display picture of testimonial author by clicking on Featured image. Once clicked a popup will open up where you can select uploaded images or can upload new images.
Once you click on update, the changes will be shown on Testimonial page.
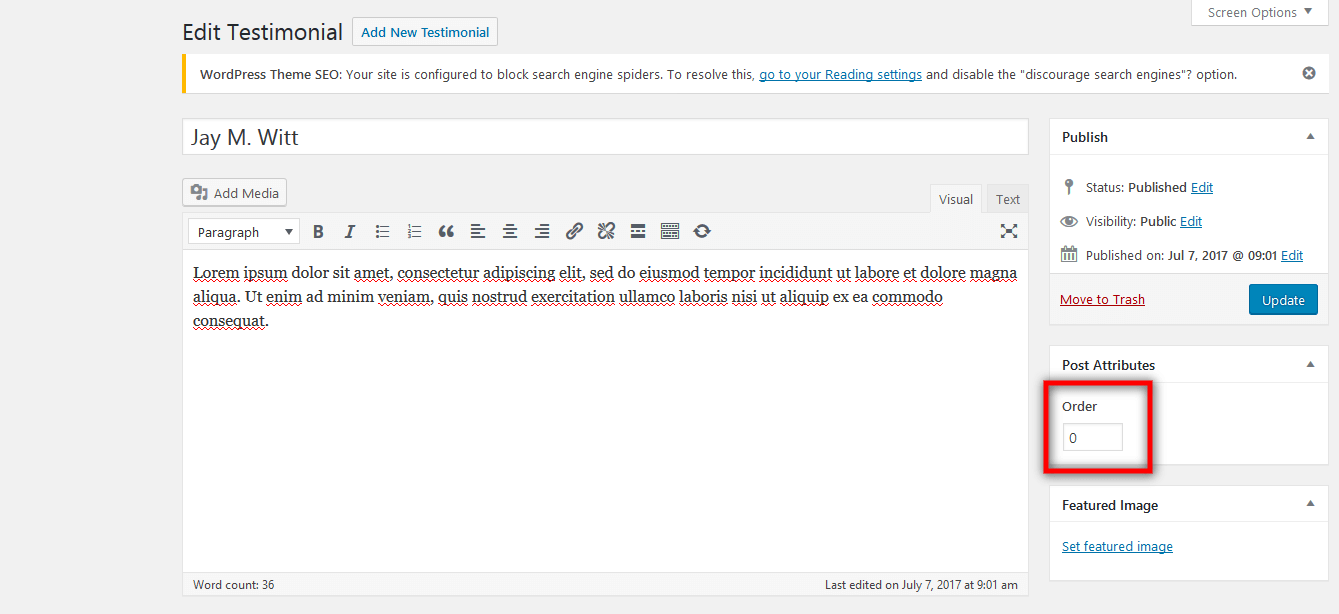
Display Testimonials as per the Serial Number in Order Box
You can display Testimonial(s) as per the serial number provided in the 'Order' box. Serial number is in Assending order i.e: it starts from numeric 0 and will increase as per the number/count of Testimonials. Therefore, if you have 10 Testimonials, then you can display any of them in the first or second position by assigning the number '0' or '1' in the 'Order' box and so on you can assign other Testimonial(s) as per your wish, up till number 9.
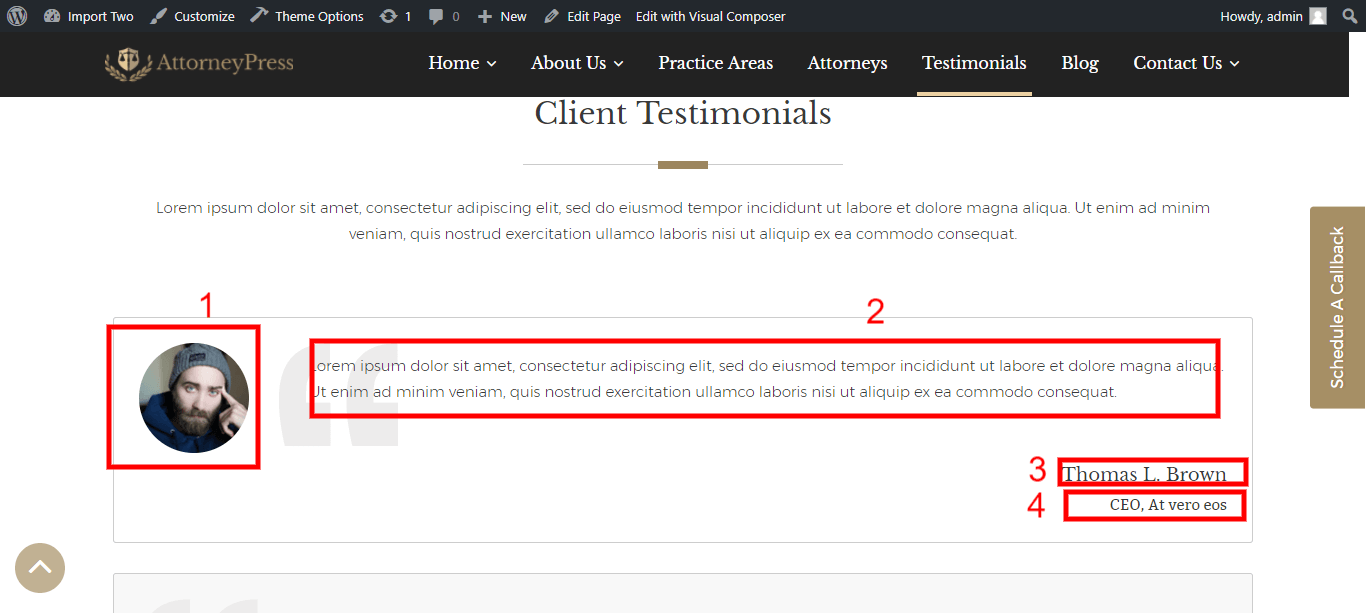
On frontend a testimonial would appear like shown below.
- Image of author of the testimonial.
- Testimonial content.
- Testimonial author name.
- Testimonial author designation.
Video Testimonial
It's possible to add video testimonials on Home Page Version 1 and About us page. To add video testimonial go to Admin Panel > Video Testimonial.
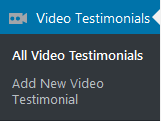
"Video Testimonials > Add New Video Testimonial"
Below red marked boxes are used for specified case.
- Here you need to put name of your client who has given you a testimonial.
- Here you need to put the YouTube video id. See below to understand how to get video id from YouTube.
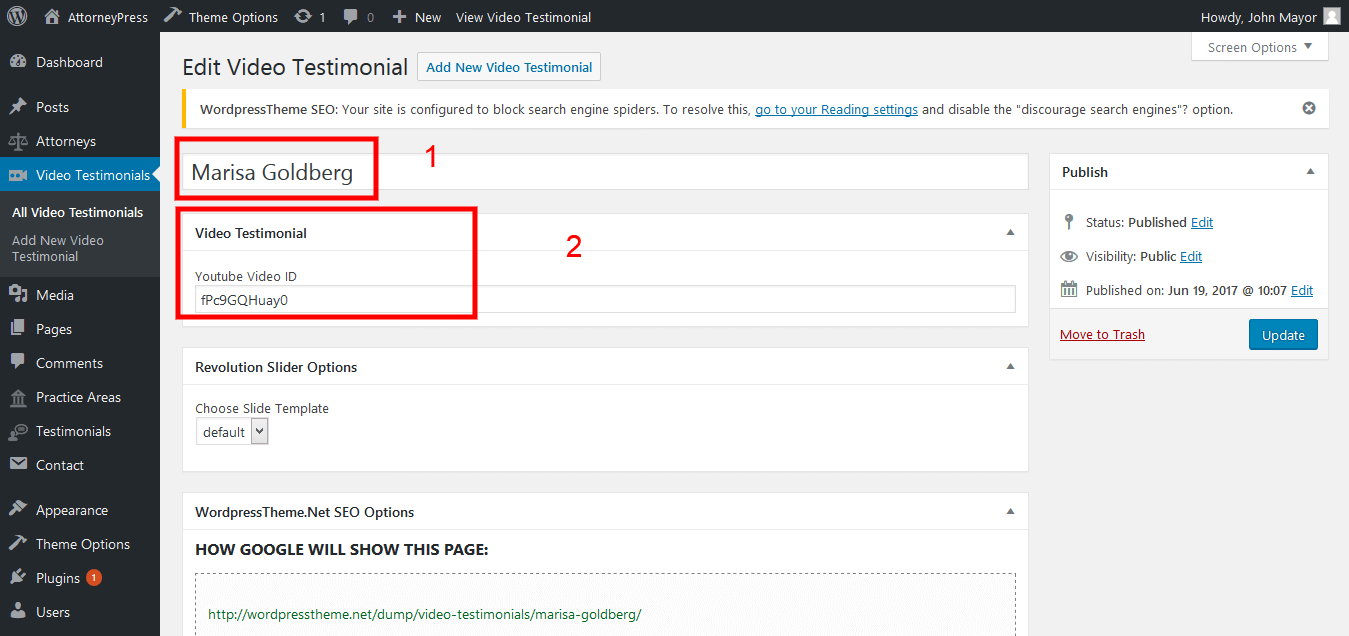
Add/Edit video testimonial
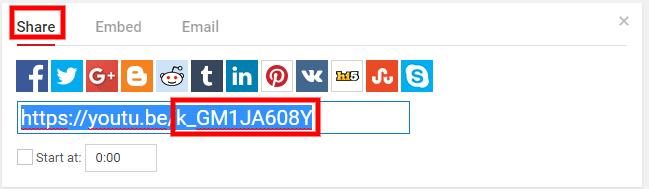
Once you get into video page of YouTube, find share button, click on it. An input box will appear. Copy the red marked part of the link. That is the id of the video. Now paste it in Video testimonial Youtube Video ID box
Please read the points mentioned below to understand how to add the "Video Testimonial" anywhere on the website:
- Login to WordPress admin panel.
- Navigate to any page edit.
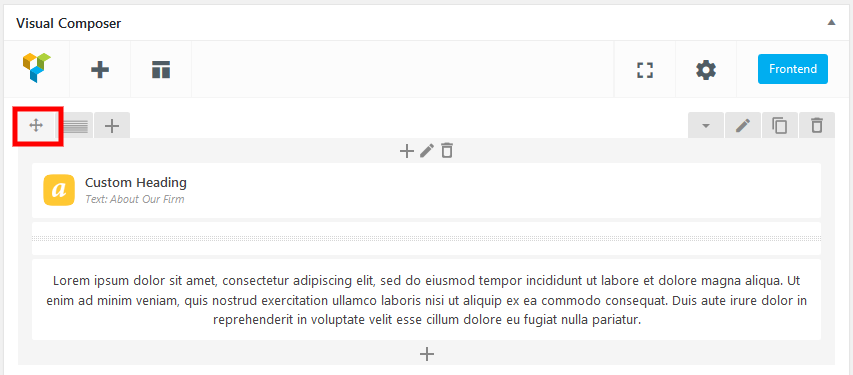
- Click on the "Plus" icon on the Visual Composer section.
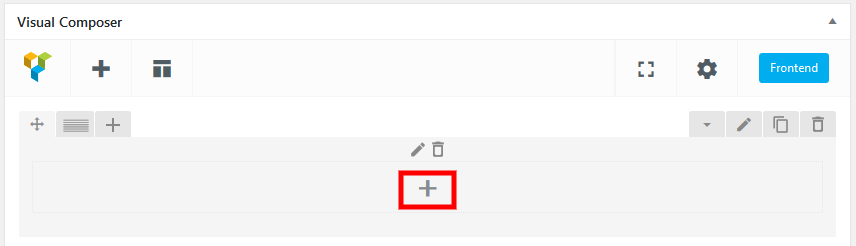
- Click on "AttorneyPress Elements > Video Testimonials Areas Layout".
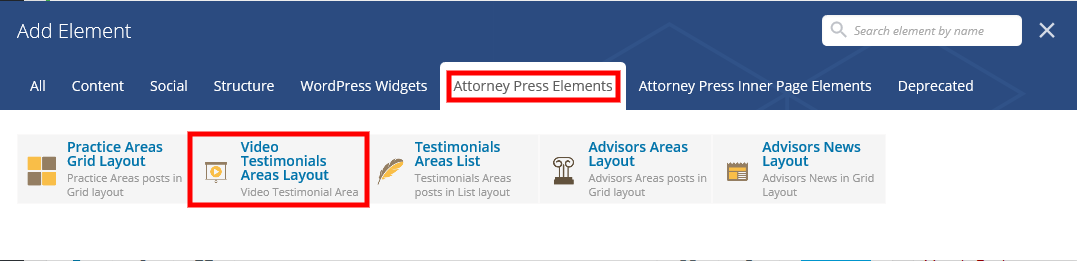
- Click on "Save Changes" and it will create this element on the page.
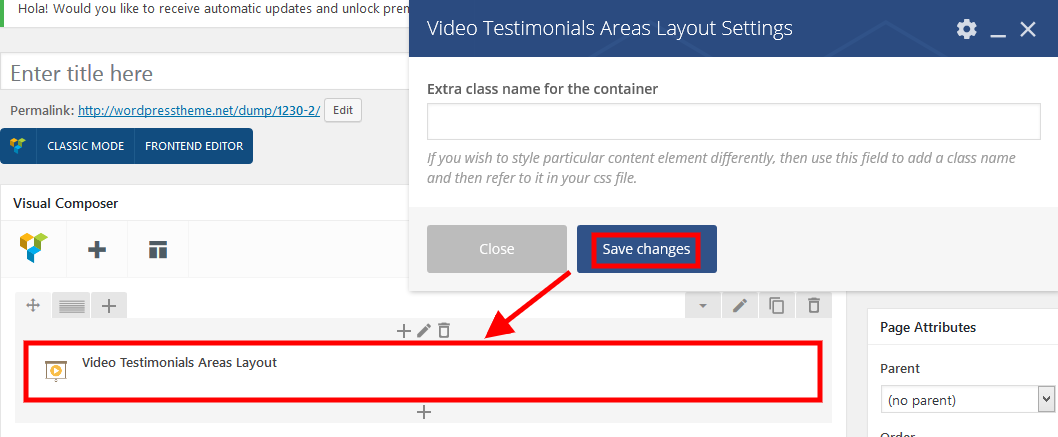
- Now "Update" the page to see Video Testimonial.
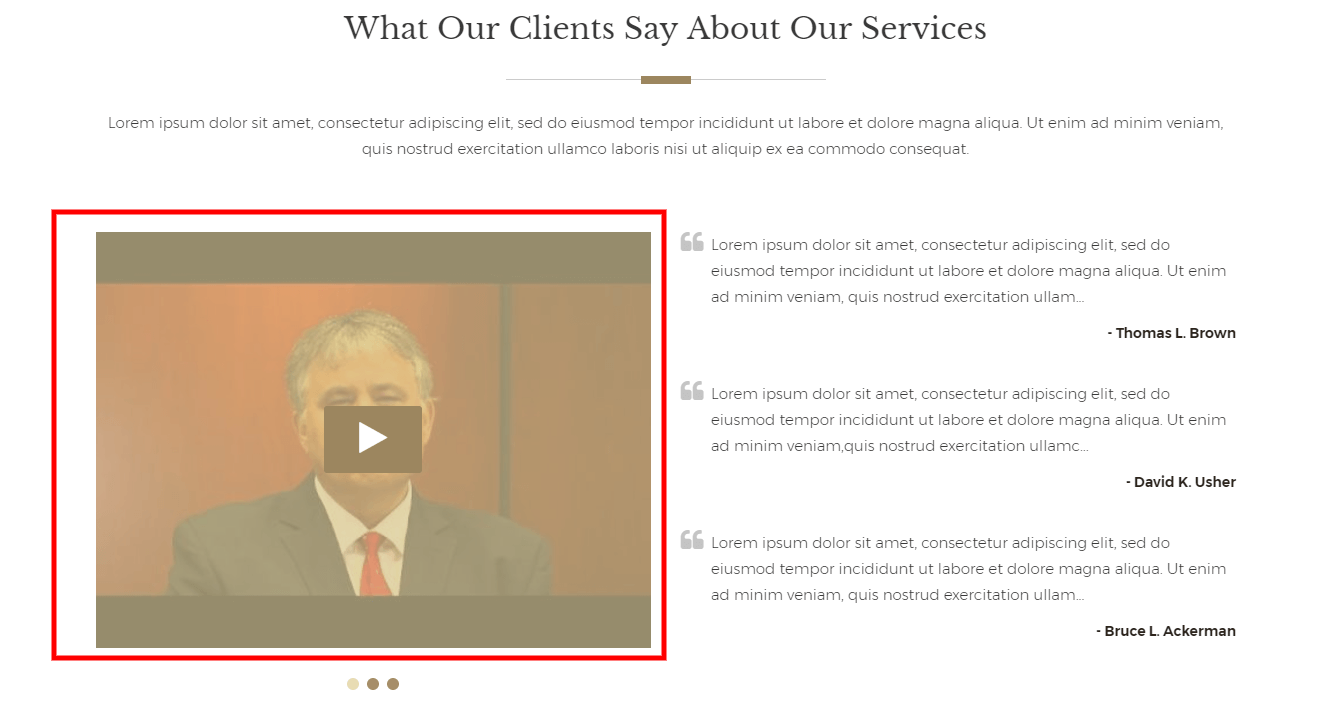
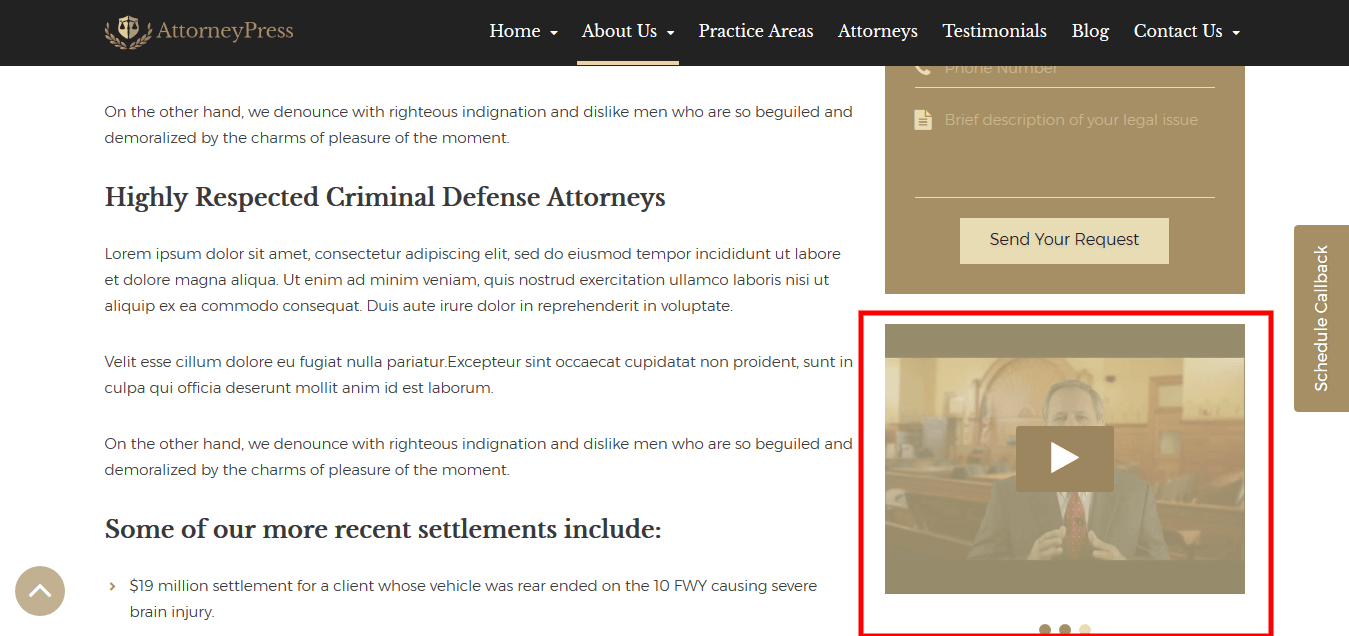
Check below to see how Video Testimonial looks on different pages:
Home Version 1 video testimonial
About Us Version 1 video testimonial
Contact Us
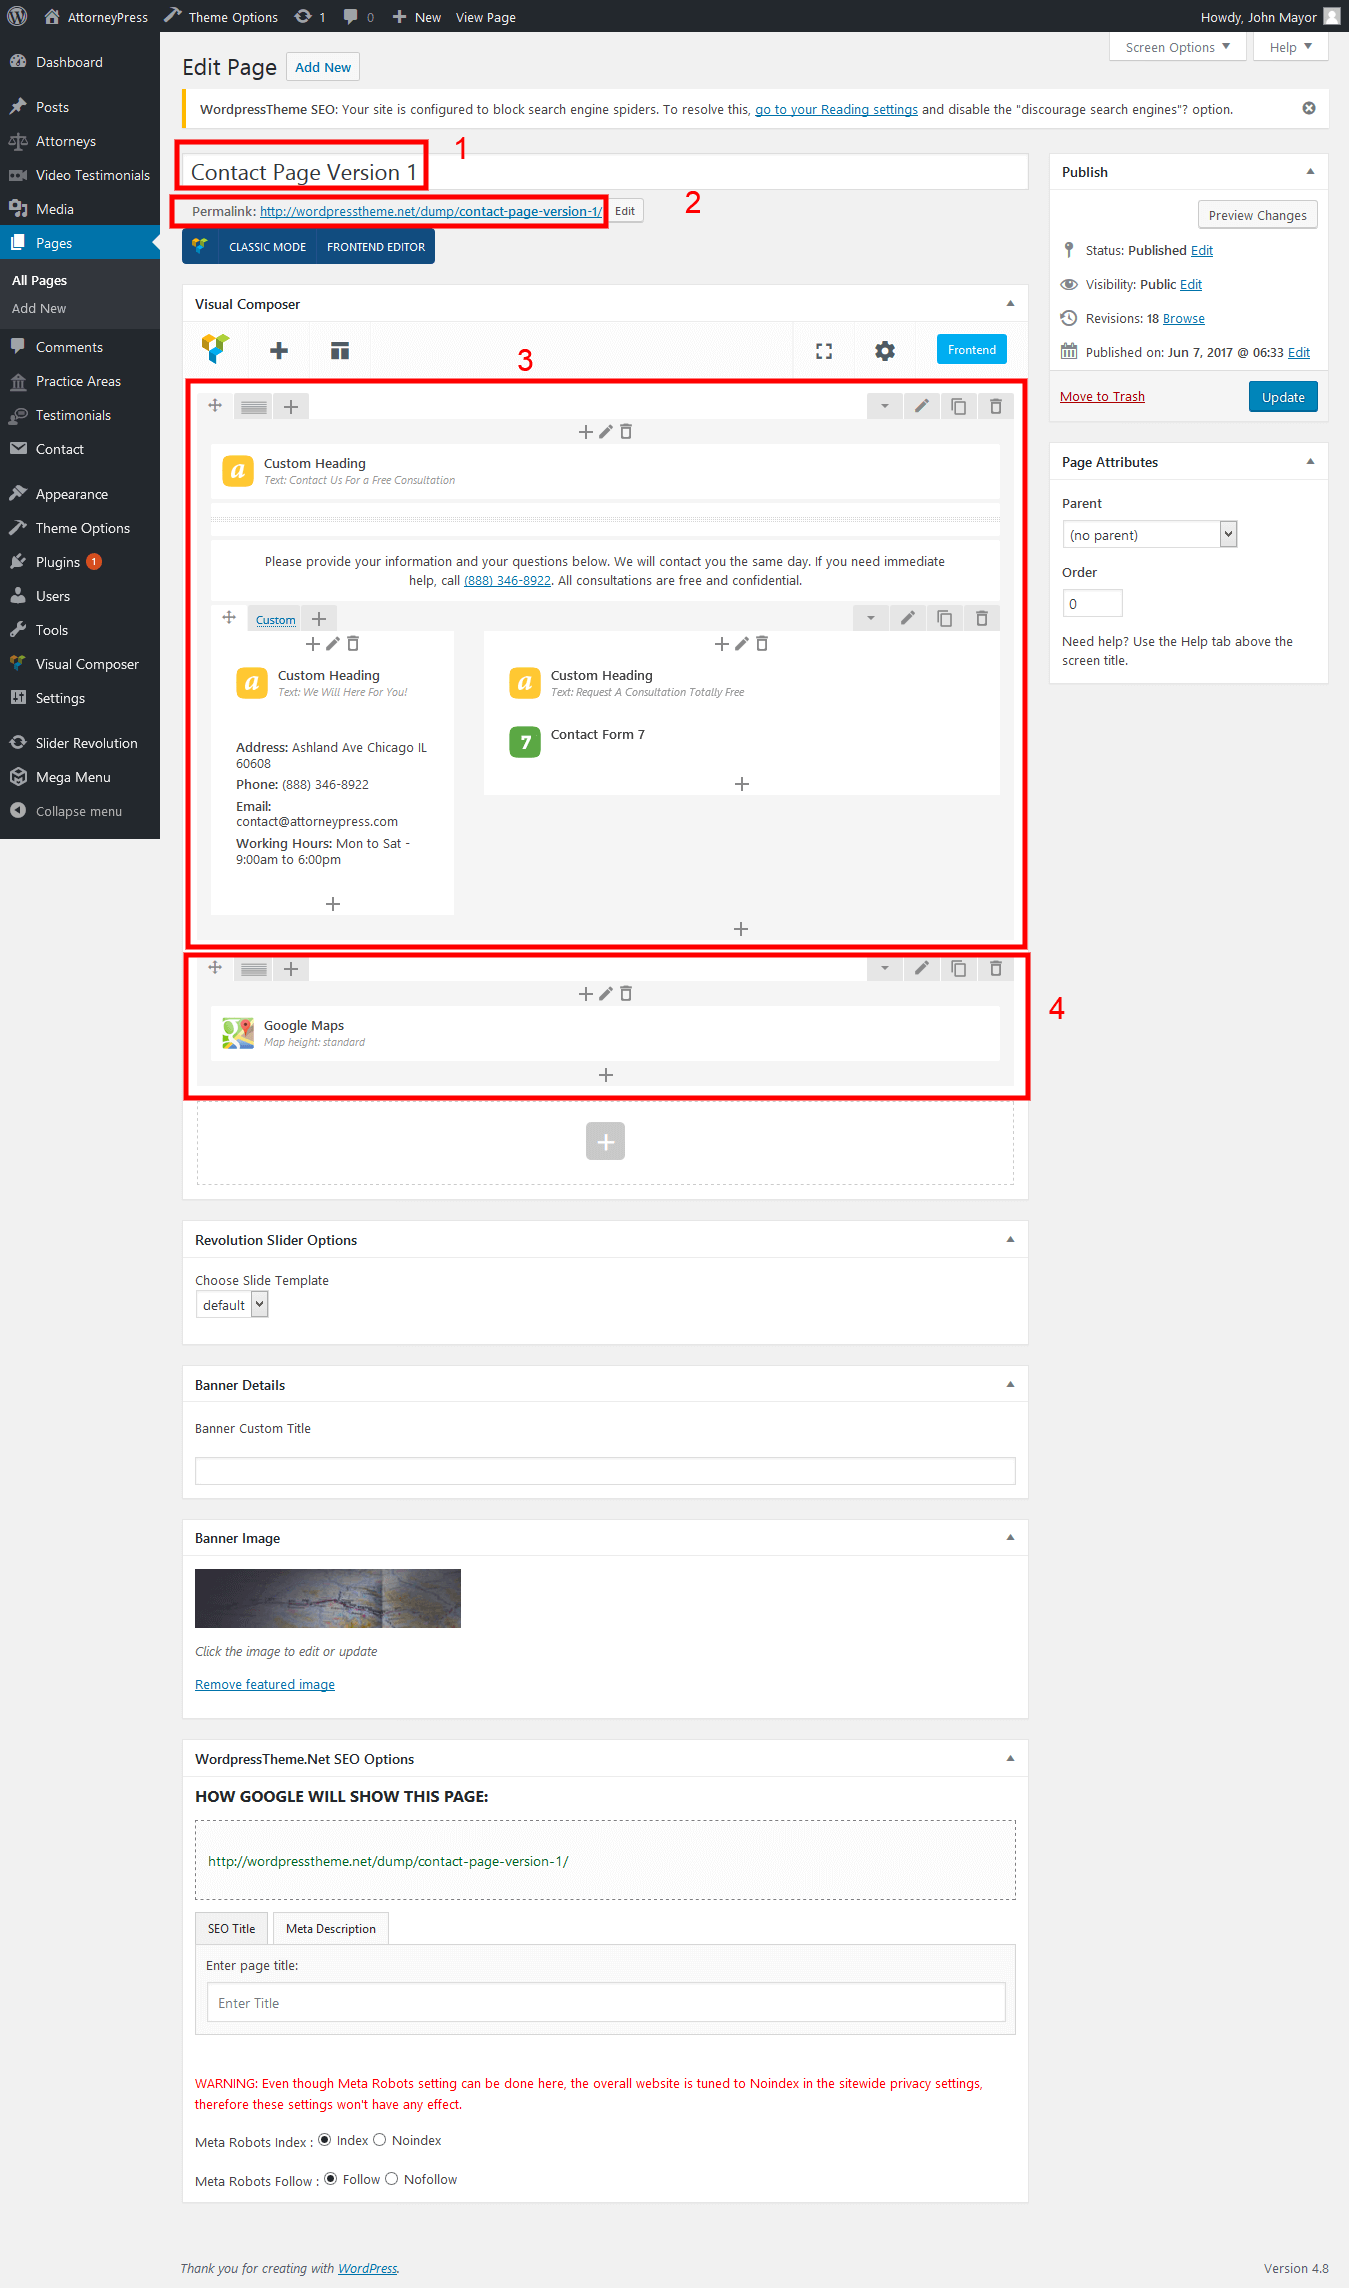
We have provided two versions of contact us page to choose from. You can choose any one of them. You can easily change name of the page and slug of the page easily from admin panel.
- Edit Contact Us page name.
- Change Contact Us permalink to a suitable. Most use "contact-us" permalink.
- Change content using page builder.
- Change google map for location.
If you click on edit in google map as shown in box number 4, a pop up will appear where you can copy and paste the iframe of the Google Map. After updating new map will appear in contact us page.
Clicking on “Update” will save the changes and it will be reflected in the contact us page.
To include the page in menu you should go to Admin Panel > Appearance > Menu.
Edit Contact Us page
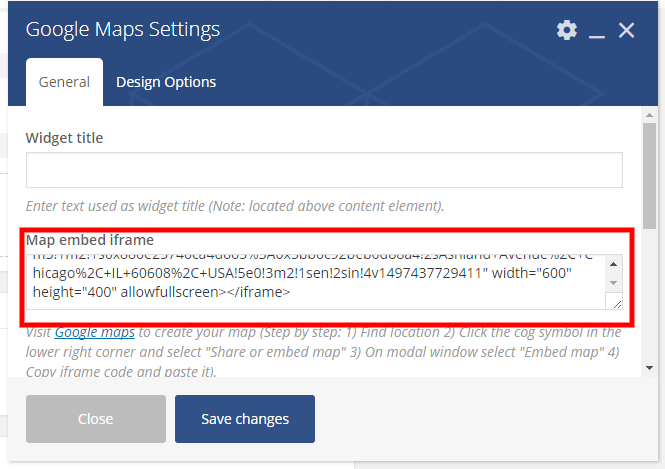
Google map edit in backend
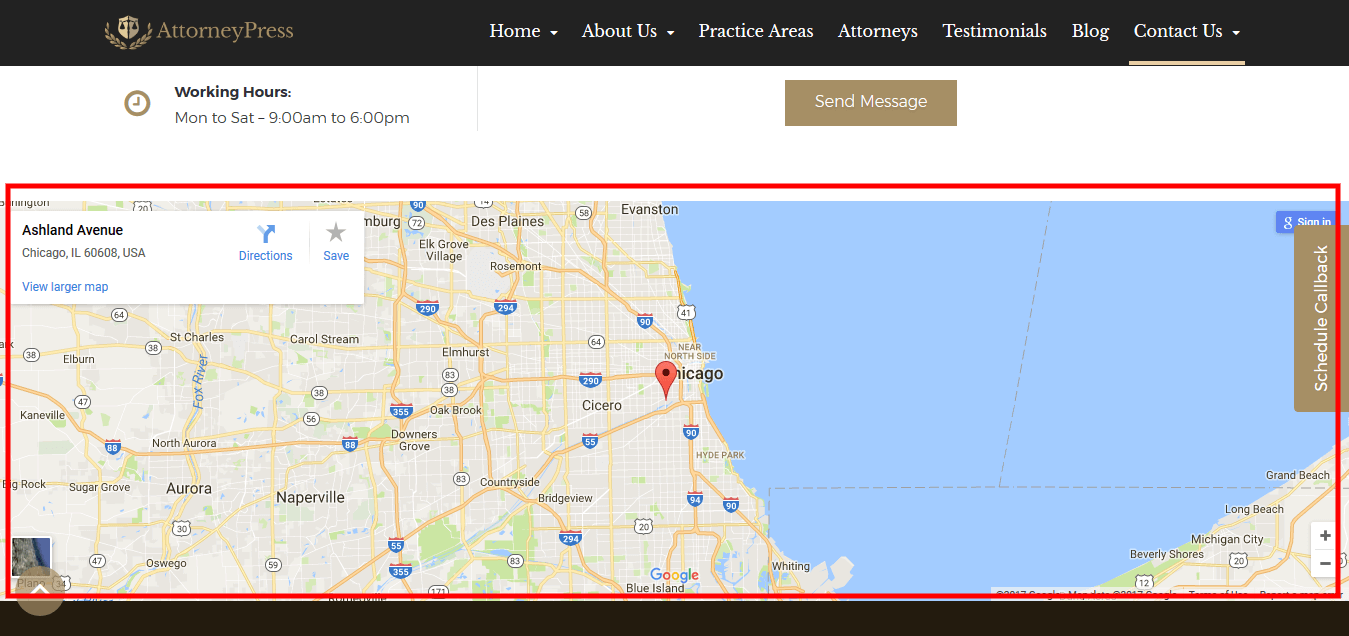
Google map of location in contact us page
Site Maintenance
We offer you our advice and expertise, so that you can enhance your website performance.
Improve Site Speed
Website loading speed is of utmost importance. Visitors don't like a slow website. We have already made the necessary changes in our theme to help your site load faster. Our theme's page speed is 90 in 'Google page speed insight test' (without this plugin). Please read the points mentioned below to know how you can improve your website loading speed.
Image Compress with TinyPNG:
You can compress images from TinyPNG website. Visit https://tinypng.com/ and compress all images before uploading them on your website. By this process, you can decrease your website loading time and provide your visitors, a better experience.
.htaccess Code For Better Website Speed:
Please copy and paste the below mentioned code to your .htaccess file (you will find this file on the root folder of your hosting directory) for improved performance of your website.
(N.B.: Please don't replace any code that already exists on the .htaccess file. It may cause serious issues with your website.)
AddOutputFilterByType DEFLATE text/plain
AddOutputFilterByType DEFLATE text/html
AddOutputFilterByType DEFLATE text/xml
AddOutputFilterByType DEFLATE text/css
AddOutputFilterByType DEFLATE application/xml
AddOutputFilterByType DEFLATE application/xhtml+xml
AddOutputFilterByType DEFLATE application/rss+xml
AddOutputFilterByType DEFLATE application/javascript
AddOutputFilterByType DEFLATE application/x-javascript

## EXPIRES CACHING ##
<IfModule mod_expires.c>
ExpiresActive On
ExpiresByType image/jpg "access 1 year"
ExpiresByType image/jpeg "access 1 year"
ExpiresByType image/gif "access 1 year"
ExpiresByType image/png "access 1 year"
ExpiresByType text/css "access 1 month"
ExpiresByType text/html "access 1 month"
ExpiresByType application/pdf "access 1 month"
ExpiresByType text/x-javascript "access 1 month"
ExpiresByType application/x-shockwave-flash "access 1 month"
ExpiresByType image/x-icon "access 1 year"
ExpiresDefault "access 1 month"
</IfModule>
## EXPIRES CACHING ##
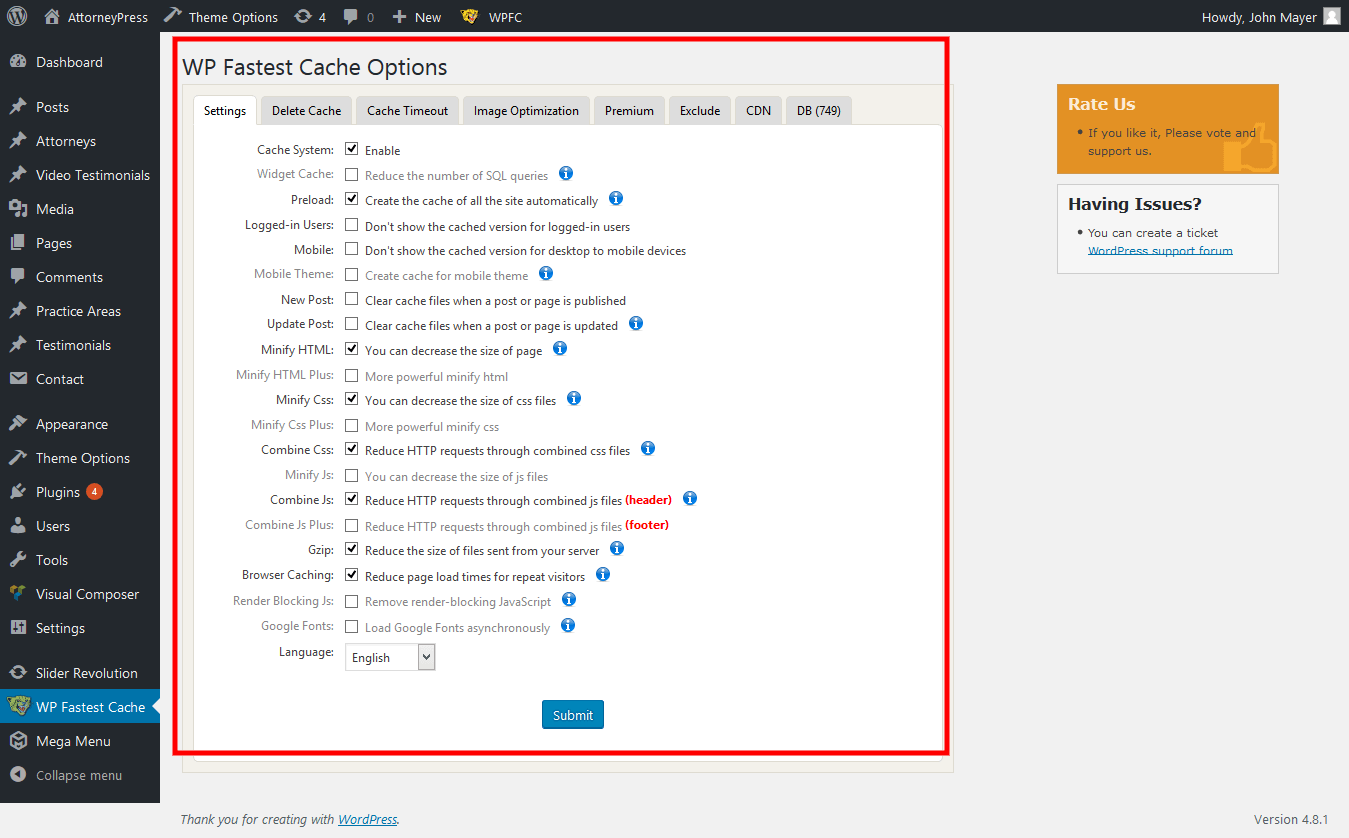
WP Fastest Cache:
WP Fastest Cache is our preferred plugin for website cache. You can install this plugin by following the below mentioned steps:
- Login to WordPress admin panel (URL should be www.yourdomain.com/wp-admin ).
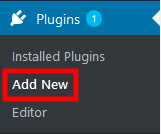
- Navigate to "Plugins > Add New" (see screenshot below).
- Search for "WP Fastest Cache".
- Install and activate the plugin.
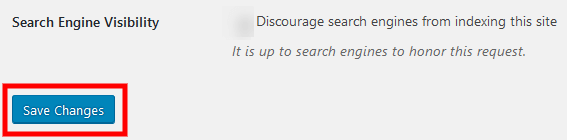
- Check on “Enable”, to enable cache.
Check Website On Google Page Insights and GT Metrix:
Please follow the below mentioned steps to check your website on Google Page Speed:
- Visit https://developers.google.com/speed/pagespeed/insights/
- Type your website URL and click on "Analyze" button to get to know your website speed.
Please follow the below mentioned steps to check your website on GTMetrix:
- Visit https://gtmetrix.com/
- Type your website URL and click on "Analyze" button to get to know your website speed.
External Resources
Here, we have used different links from external sources to develop the theme. All images used in this theme are free. We thought of listing them to give them due credit.
We Used These High Quality Free Images
We have used some of the freely available high quality images for the theme. Below is a list of all images used in our theme AttorneyPress. These images are royalty free. On Pixabay you may find and share images free of copyrights. All pictures are released under Creative Commons CC0 into the public domain. You may want to read license statement of few others from https://unsplash.com/license & https://www.pexels.com/photo-license/.
- https://unsplash.com/photos/Uqi8TeQezEc
- https://www.pexels.com/photo/black-calculator-near-ballpoint-pen-on-white-printed-paper-53621/
- https://pixabay.com/en/handcuffs-trouble-police-arrest-2102488/
- https://www.pexels.com/photo/adult-business-commerce-computer-346301/
- https://unsplash.com/photos/9bpwQIKnJYY
- https://unsplash.com/photos/0Ol8Sa2n21c
- https://unsplash.com/photos/VY06xImrmWM
- https://unsplash.com/photos/sfL_QOnmy00
- https://unsplash.com/photos/5fNmWej4tAA
- https://unsplash.com/photos/OQMZwNd3ThU
- https://www.pexels.com/photo/adult-black-background-businessman-casual-262391/
- https://www.pexels.com/photo/press-conference-interview-man-person-32976/
- https://unsplash.com/photos/yg8Cz-i5U30
- https://unsplash.com/photos/npxXWgQ33ZQ
- https://pixabay.com/p-1125324/?no_redirect
- https://pixabay.com/en/justice-law-case-hearing-old-skin-1509437/
- https://pixabay.com/en/women-bussines-office-style-smole-1389255/
- https://pixabay.com/en/man-case-person-business-man-1443866/
- https://pixabay.com/en/coin-money-business-currency-cash-2308140/
- https://pixabay.com/en/cutter-north-sea-port-shrimp-2366326/
- https://pixabay.com/en/parthenon-athens-greece-117571/
- https://pixabay.com/en/audience-band-club-concert-crowd-1850665/
- https://pixabay.com/en/forest-sun-shadow-green-yellow-2209221/
- https://pixabay.com/en/medic-hospital-laboratory-medical-563425/
- https://pixabay.com/en/statue-statue-of-liberty-freedom-470190/
- https://pixabay.com/en/globe-africa-europe-continents-map-599486/
- https://pixabay.com/en/soldiers-military-usa-weapons-war-1002/
- https://pixabay.com/en/wheelchair-disability-paraplegic-1595802/
- https://pixabay.com/en/buildings-highrises-building-184269/
- https://pixabay.com/en/calculator-calculation-insurance-1044173/
- https://pixabay.com/en/computer-summary-chart-business-767776/
- https://pixabay.com/en/fire-automobile-burned-accident-783746/
- https://pixabay.com/en/child-labour-cambodia-site-child-2436946/
- https://pixabay.com/en/people-portrait-man-male-smile-1690965/
- https://unsplash.com/photos/YvgG9mdPepk
- https://unsplash.com/photos/VVEwJJRRHgk
- https://unsplash.com/photos/5TLA2Blx-MU
- https://unsplash.com/photos/HT4WVcoEWKs
- https://unsplash.com/photos/Ek628qcbzzM
- https://unsplash.com/photos/Brl7bqld05E
- https://pixabay.com/en/manager-head-shot-business-person-1808728/
- https://pixabay.com/en/coach-mentor-manager-woman-1563998/
- https://pixabay.com/en/business-man-businessman-corporate-1042706/
- https://pixabay.com/en/woman-black-businesswoman-young-868523/
- https://pixabay.com/en/businessman-man-portrait-male-1247947/
- https://pixabay.com/en/businessman-man-portrait-male-805769/
- https://pixabay.com/en/woman-glasses-business-woman-1254453/
- https://pixabay.com/en/road-night-light-traffic-city-1589126/
- https://pixabay.com/en/child-abuse-fear-stop-coercion-1152327/
- https://pixabay.com/en/adult-business-composition-cup-1868015/
- https://pixabay.com/en/hammer-books-law-court-lawyer-620011/
- https://pixabay.com/en/court-entry-stairs-entrance-door-144090/
- https://pixabay.com/en/the-bund-shanghai-paternity-2362812/
- https://pixabay.com/en/defense-attorney-defense-lawyer-840062/
- https://pixabay.com/en/supreme-court-building-supreme-court-1209701/
- https://pixabay.com/en/confused-muddled-illogical-880735/
- https://pixabay.com/en/road-night-light-traffic-city-1589126/
- https://unsplash.com/photos/8nDH5ebliVA
- https://unsplash.com/photos/BFVXuSPI2vU
- https://unsplash.com/photos/9bpwQIKnJYY
- https://www.pexels.com/photo/adult-business-commerce-computer-346301/